Installation with side connections
-
lt is also possible to install the indoor units using the existing side
pre-shearing.
-
Please note that the wiring, the drainage, and the refrigerant
connections are fully suited for connection on either side of the unit.
-
Even when installing with feedthrough connections, wrap up all the
connections to prevent condensation problems.
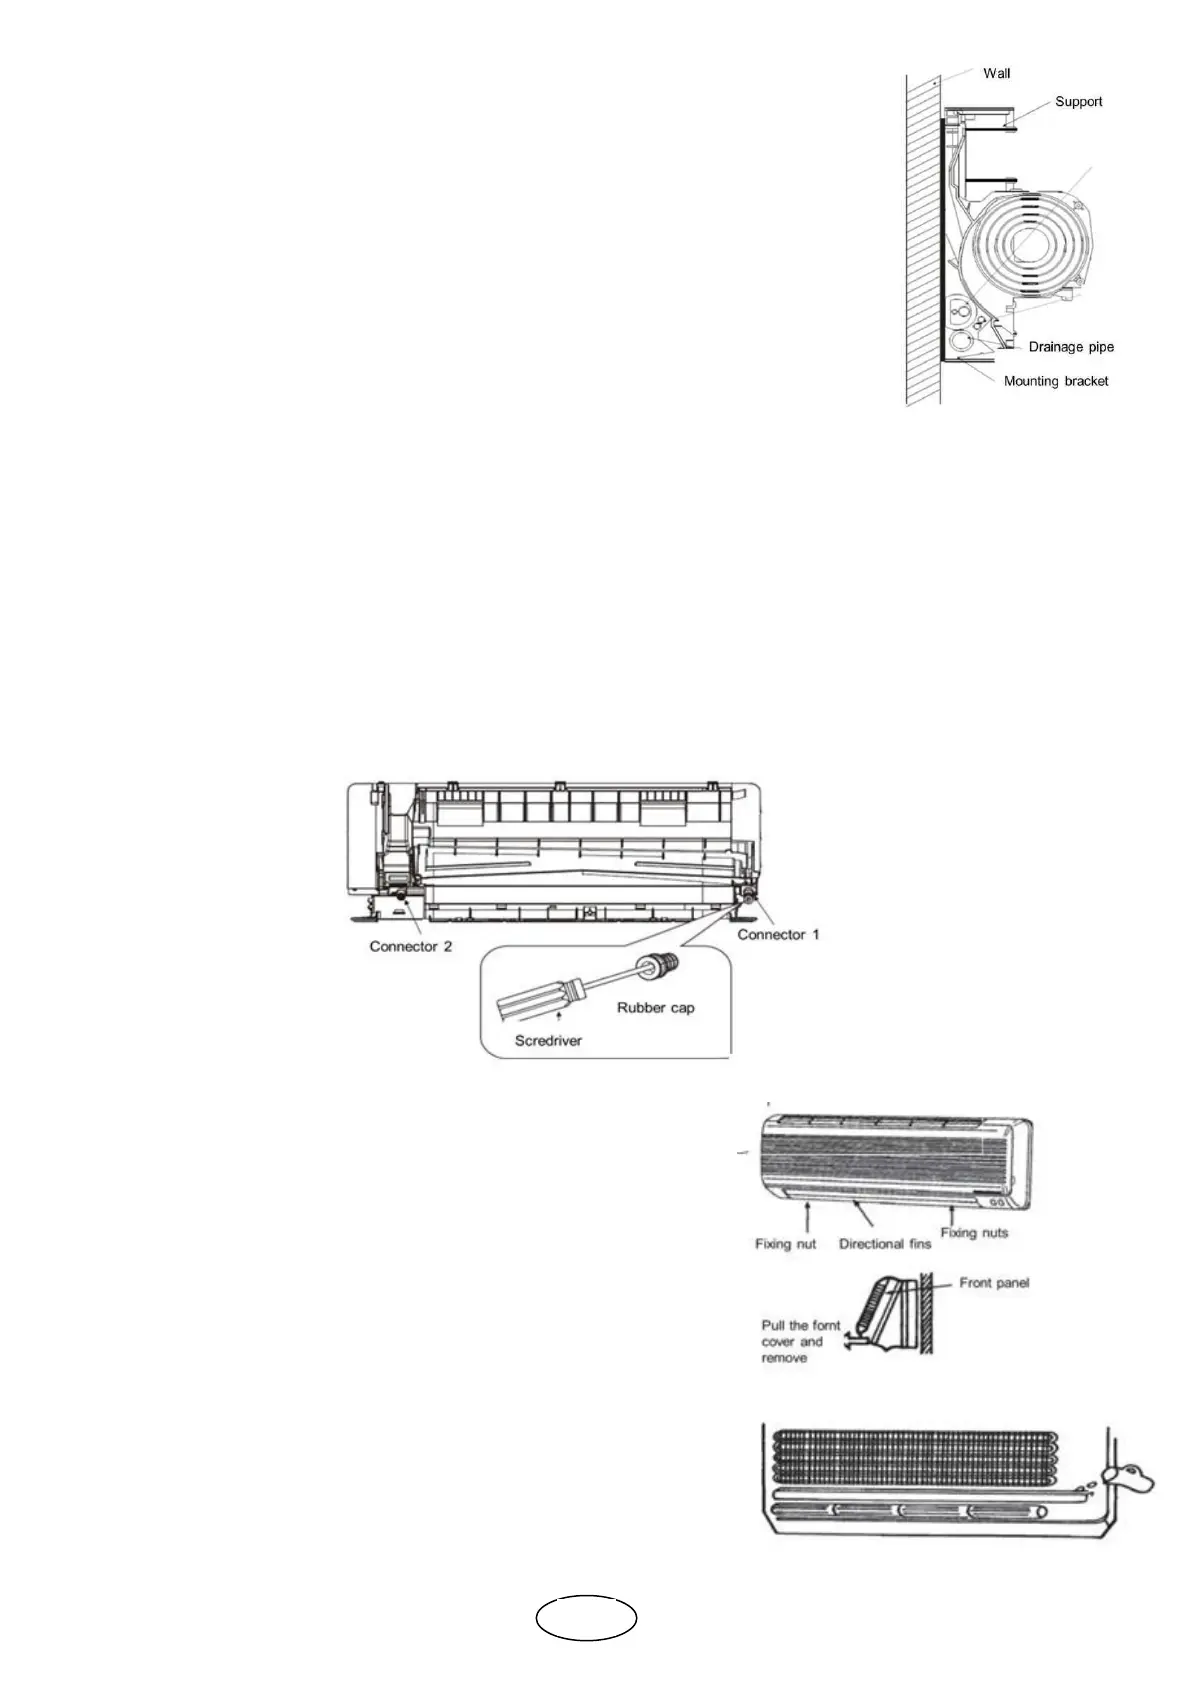
Drainage pipe
-
Bear in mind that water drainage takes place due to gravity.
-
Connect the drainage pipe to the thermally-isolated plastic pipe from the right
side of the indoor unit (rear view).
-
Make sure the drainage pipe comes out from the indoor unit with a negative
slope (downwards). The highest point of the outlet connections must not
exceed the position of the tank.
N.B.
-
The drainage pipe can be connected to either connector 1 or 2.
-
lf it is necessary to change the side of the drainage pipe, remove the rubber
cap on the connector and secure it on the unused side using a screwdriver.
Checking water drainage
Remove the front panel from the unit according to
the following instructions:
a) Open the front fin on the indoor unit (rotate
it downwards)
b) As shown in the figures below, remove the two
protections from the front panel, then remove the two
fixing screws.
c) Pull the panel towards you to remove it.
Checking water drainage
a) Place a container beneath the drainage channel.
b) Check that drainage passes through the appropriate
hale.