EN | UltraQ | Operating instructions EN | UltraQ | Operating instructions
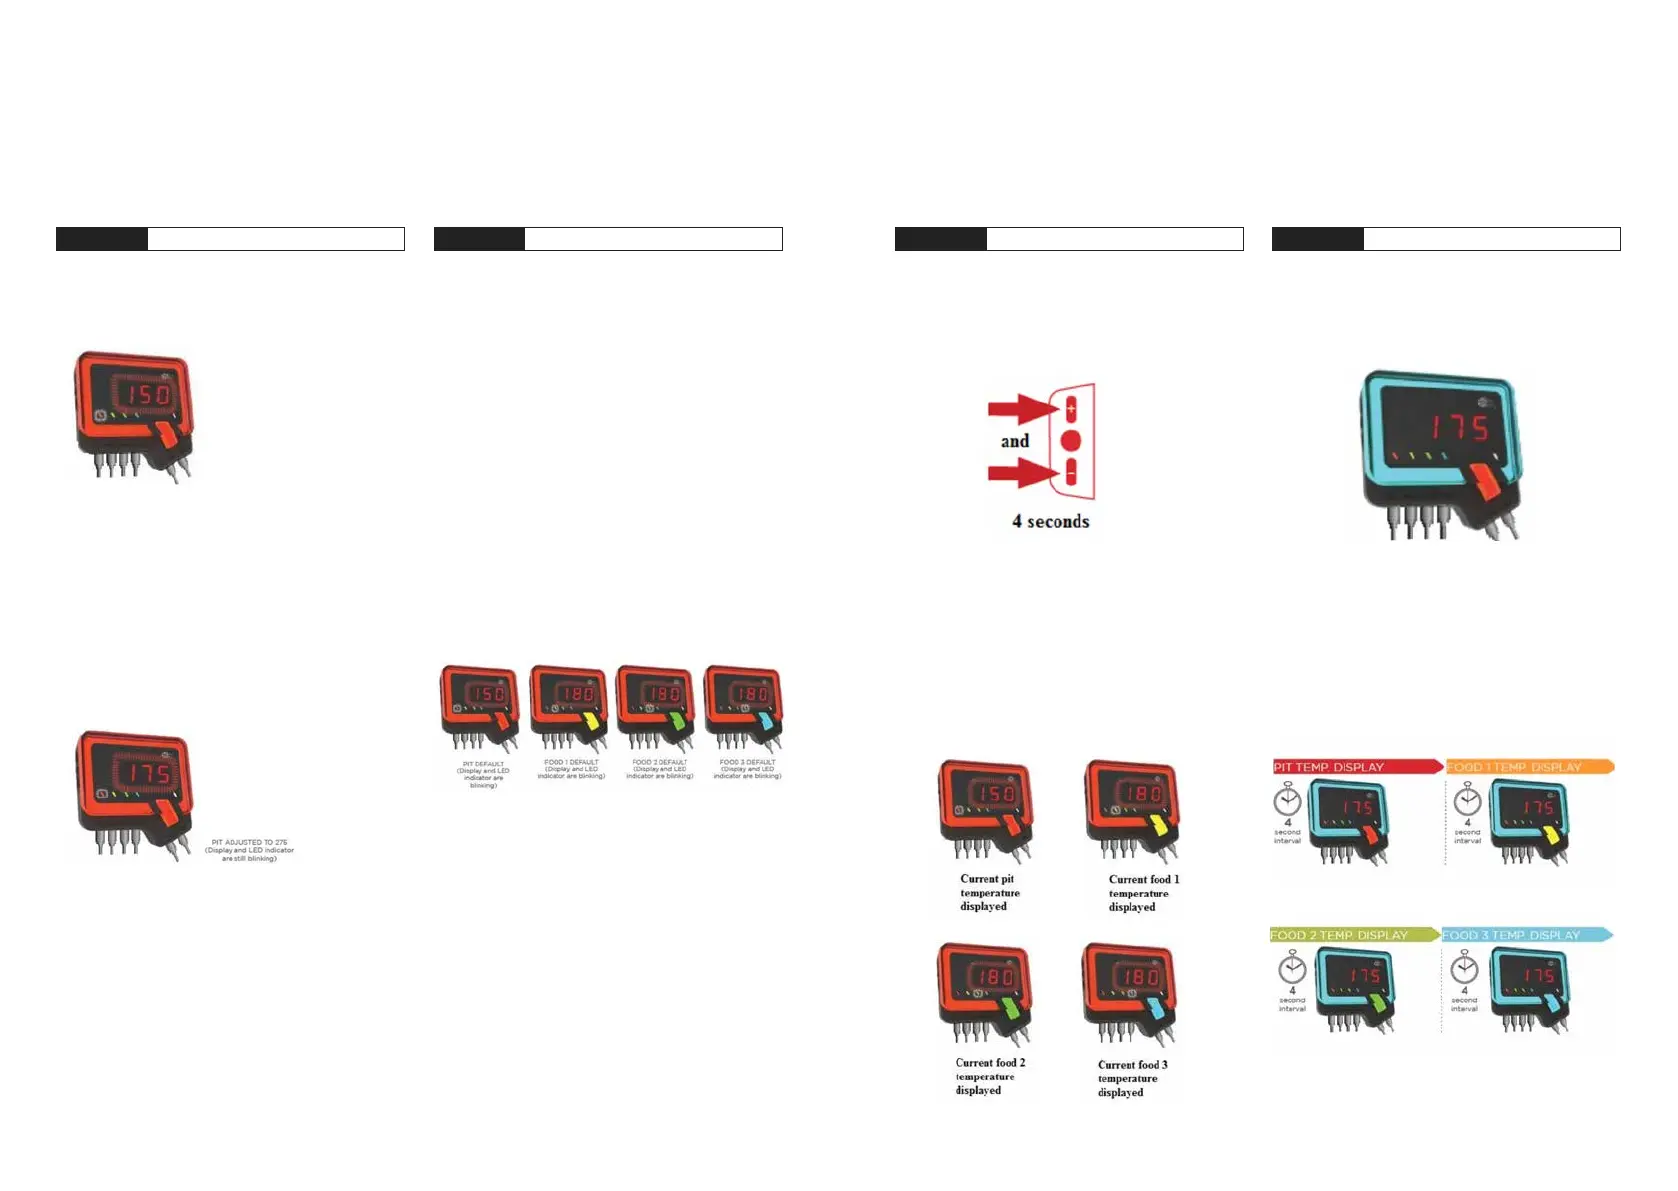
1. The control displays one temperature at a time. To
toggle scanning of all temperatures, press and hold
the DOWN button for 2 seconds.
2. The control cycles through all four temperatures
at 2- second intervals. The respective colour for
each probe lights up on the bulge just as it does
at the set temperature. The outer ring of the Q
always indicates the current cooking status. The
bulge changes accordingly to indicate which food
temperature is reached.
1. The outer ring of the control unit lights up in vari-
ous ways to indicate the current cooking chamber
status at a glance.
2. When the cooking chamber temperature is below
the target range, the outer ring lights up solid blue.
The bulge of the Q remains solid red.
STEP 3 Enter scan mode STEP 4 Visual real-time cooking status
07 MANUAL OPERATION
The UltraQ can also be used without connecting to another device via Bluetooth or Wi-Fi.
STEP 1 Setting the cooking chamber temp. STEP 2 Setting the core temperature
1. As soon as the control is started, the cooking
chamber temperature is displayed. The default
value is 120°C (250°F).
2. There are three buttons on the left side of the
control. To set the target temperature, press and
hold the SELECT button for 2 seconds. The digital
display ashes.
3. If you press the UP or DOWN buttons while the
display is ashing, the target temperature is adjusted
by 1 degree. Pressing and holding the UP or DOWN
buttons changes the target temperature by 1° for
4 seconds and then increases or decreases in 5°
steps.
4. When the temperature is at the desired set point,
press the SELECT button to save the temperature.
The food probe temperatures are set to a standard
value of 85°C (185°F). Each probe slot has a corre-
sponding indicator light.
Food 1 – Yellow
Food 2 – Green
Food 3 – Blue
1. Press the SELECT button to jump from the preset
cooking chamber temperature to the “Food probe
1“ temperature. Press and hold the SELECT button
for 2 seconds. Use the UP or DOWN buttons to
set the desired food temperature by following the
same instructions for setting the cooking chamber
temperature.
Repeat the above steps to set additional food
probe sensor temperatures.
NOTE: The control element is made in the shape of a
Q. The bulge of the Q lights up in the same colour as
the probe display so that it is easy to determine which
temperature is currently being displayed.
NOTE: If no probe is connected to a particular
probe socket, the display will show „---“.