EN | UltraQ | Operating instructions EN | UltraQ | Operating instructions
When the cooking chamber temperature is within its
strategy range and the fan is on, the top and bottom
of the outer Q-ring remain solid red, while the left and
right sides pulse red.
TIP: If the grill has been running for several hours
and the sides start to pulse more frequently or
constantly, additional charcoal may be needed. If
the temperature uctuates and the sides do not
pulse or pulse infrequently, close the ,”damper“
(sliding ap) slightly.
If the cooking chamber temperature is above the set
temperature, the outer light ring pulses continuously
in red. The temperature deviation range is approx.3
degrees Celsius. For more information or to change
the deviation range, see section 09 USING THE
MOBILE APP under step 4 „Alarm“.
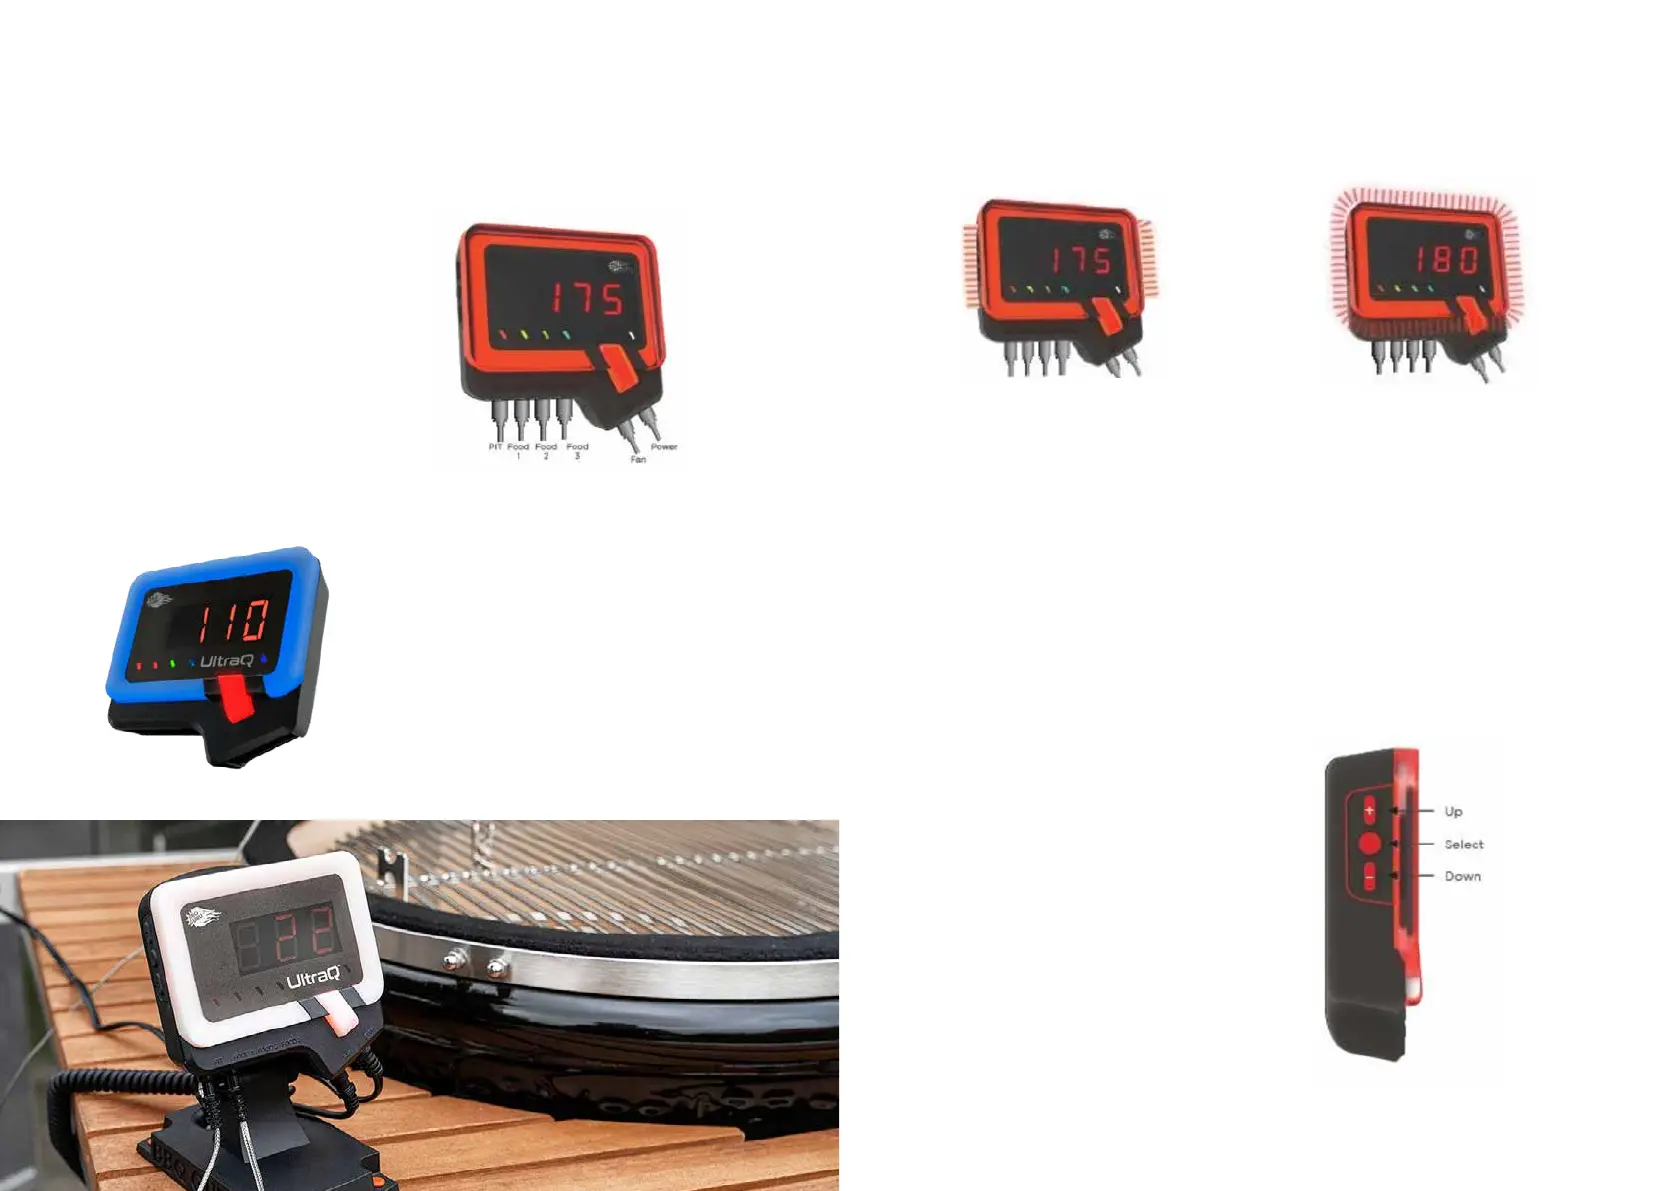
06 REAL TIME VISUAL COOKING STATUS
The outer ring of the control lights up in different ways
to indicate the current grill status at a glance.
When you bring your grill up to temperature for the rst
time, the Q-shaped light ring glows solid blue. When
the grill temperature rises into the Smart Cook strategy
range, the outer ring changes from blue to red.
The temperature range is 0 degrees Celsius and your
set temperature. For more information, see the section:
09 USING THE MOBILE APP under step 5 „Adaptive
control strategy for Smart Cook“.
When using the UltraQ for the rst time, connect
the cooking chamber sensor rst. Then connect the
food probe and the fan before supplying power to the
controller. The corresponding LEDs light up above the
probe sockets to indicate that a probe is connected.
If you connect a probe and the corresponding
indicator LED does not light up, push the plug all the
way into the socket so that it locks into place. If the
indicator light still does not light up, this may indicate
that you have a faulty probe sensor.
If the UltraQis connected to the power supply but no
pit probe sensor is connected, the outer ring ashes
quickly. This is a safety feature so that the fan only
runs when a cavity sensor is plugged in.
Press the SELECT button shown to clear one of these
visual warnings.
NOTE: If there is a short or prolonged power interrup-
tion at any time, the UltraQ will automatically restart
and continue to control the temperature under the
same settings that were set before the interruption.
NOTE: To reset the controller to the factory
settings, press and hold the button on the left
side of the controller for 2 seconds.