61
IT
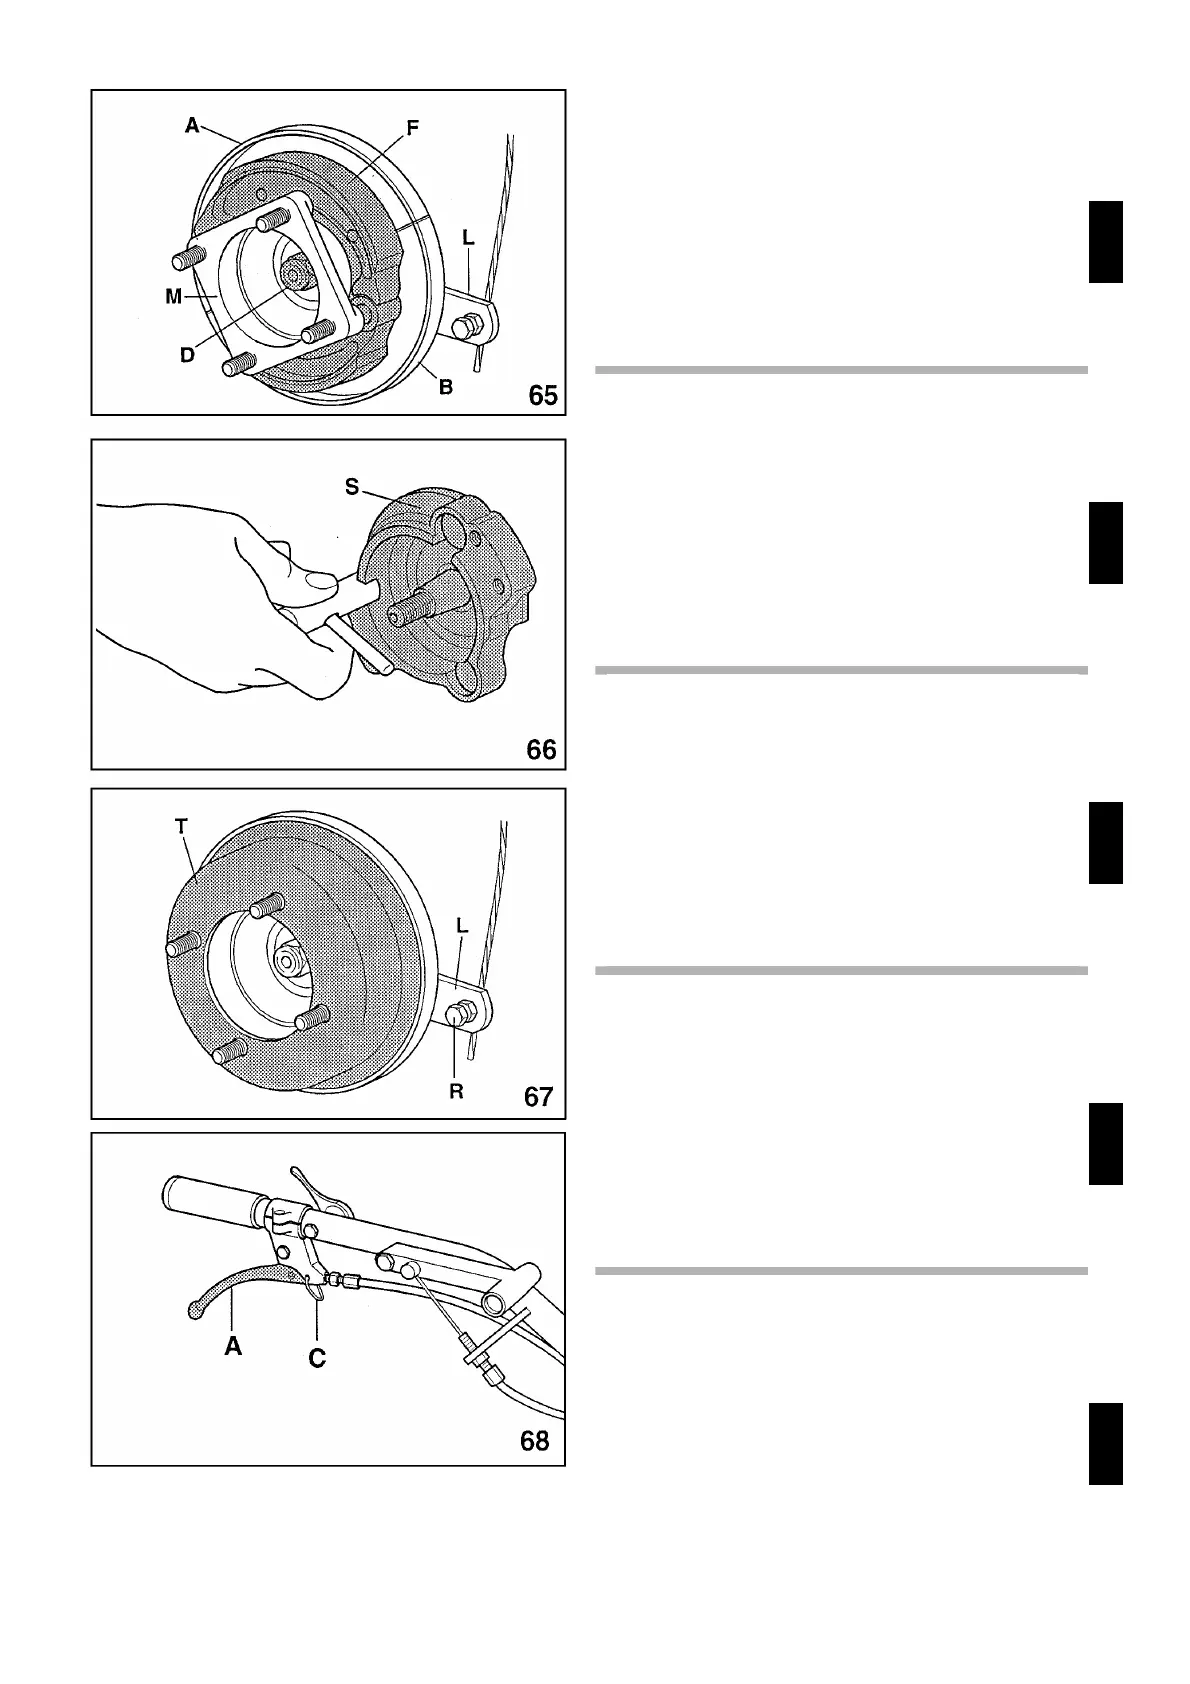
8) montare il filo e la guaina del freno bloccando il filo nel
morsetto R (fig.67) inserito nella leva L che comanda
l’apertura dei ceppi.
9) registrare il comando agendo sull’apposita vite ferma
guaina situata sulla leva A (fig.68).
Per utilizzare il freno come freno di stazionamento bloc-
care la leva sul manubrio in posizione aperta con l’apposito
gancio C (fig.68).
Per il modello 730 è disponibile il kit freni a tamburo
con comando indipendente sulle due ruote.
Per il montaggio seguire le fasi dal punto 4 al punto 9.
EN
8) mount the brake wire and sheath locking the wire in
clamp R (fig.67) which is inserted in the brake-shoe open
control lever L.
9) adjust the control by acting on the sheath-stop screw on
control lever A (fig.68).
To use the brake as parking brake, lock the handlebar
lever in open position using hook C (fig.68).
For mod. 730 also the drum brakes with independent
control on both wheels are available.
For the assembly please refer to steps from 4 to 9.
FR
8) monter le fil et la gaine du frein en bloqueant le fil dans
l’étau R (fig.67) inséré dans le levier L qui commande
l’ouverture des sabots.
9) régler la commande à l’aide de la vis bloque gaine
située sur le levier A (fig.68).
Pour utiliser le frein comme frein de stationnement, bloquer
le levier sur le mancheron en position ouverte avec le cro-
chet C (fig.68).
Pour le mod. 730 les freins à tambour avec commande
indépendante sur les deux roues sont aussi disponi-
bles. Pour le montage veuillez vous référer aux indica-
tions du point 4 au point 9.
ES
8) montar el hilo y la vaina del freno bloqueando el hilo de
la grapa R (fig.67) inserido en la palanca L que comanda
la apertura de las cepas.
9) registrar el mando actuando sobre el tornillo especial
que cierra la vaina situada sobre la palanca A (fig.68).
Para utilizar el freno como freno de estacionamiento blo-
quear la palanca del manillar en posición abierta con el
gancho especial C (fig.68).
Para el modelo 730 están disponibles también los fre-
nos de tambor con mando independiente en las dos
ruedas. Para el montaje seguir las introducciones del
punto 4 al punto 9.
DE
8) Den Draht und den Überzug der Bremse einbauen, in-
dem man den Draht in den in Hebel L inserierten Bugel R
(Bild 67), lockert, der die Öffnung der Schube reguliert.
9) Die Regulierung erfolgt mittels den Hebel A (Bild 68) an-
geordneten Überzugschraube.
Um die Bremse als Feststellbremse zu gebrauchen, den
Hebel am Lenkholm in offener Position mit den angeordne-
ten Haken C (Bild 68) sichern.
Auf Mod. 730 sind die Trommelbremsen mit unabhän-
giger Betätigung auf beiden Rädern auch verfügbar.
Für den Anbau siehe Anweisungen von Punkt 4 bis
Punkt 9.