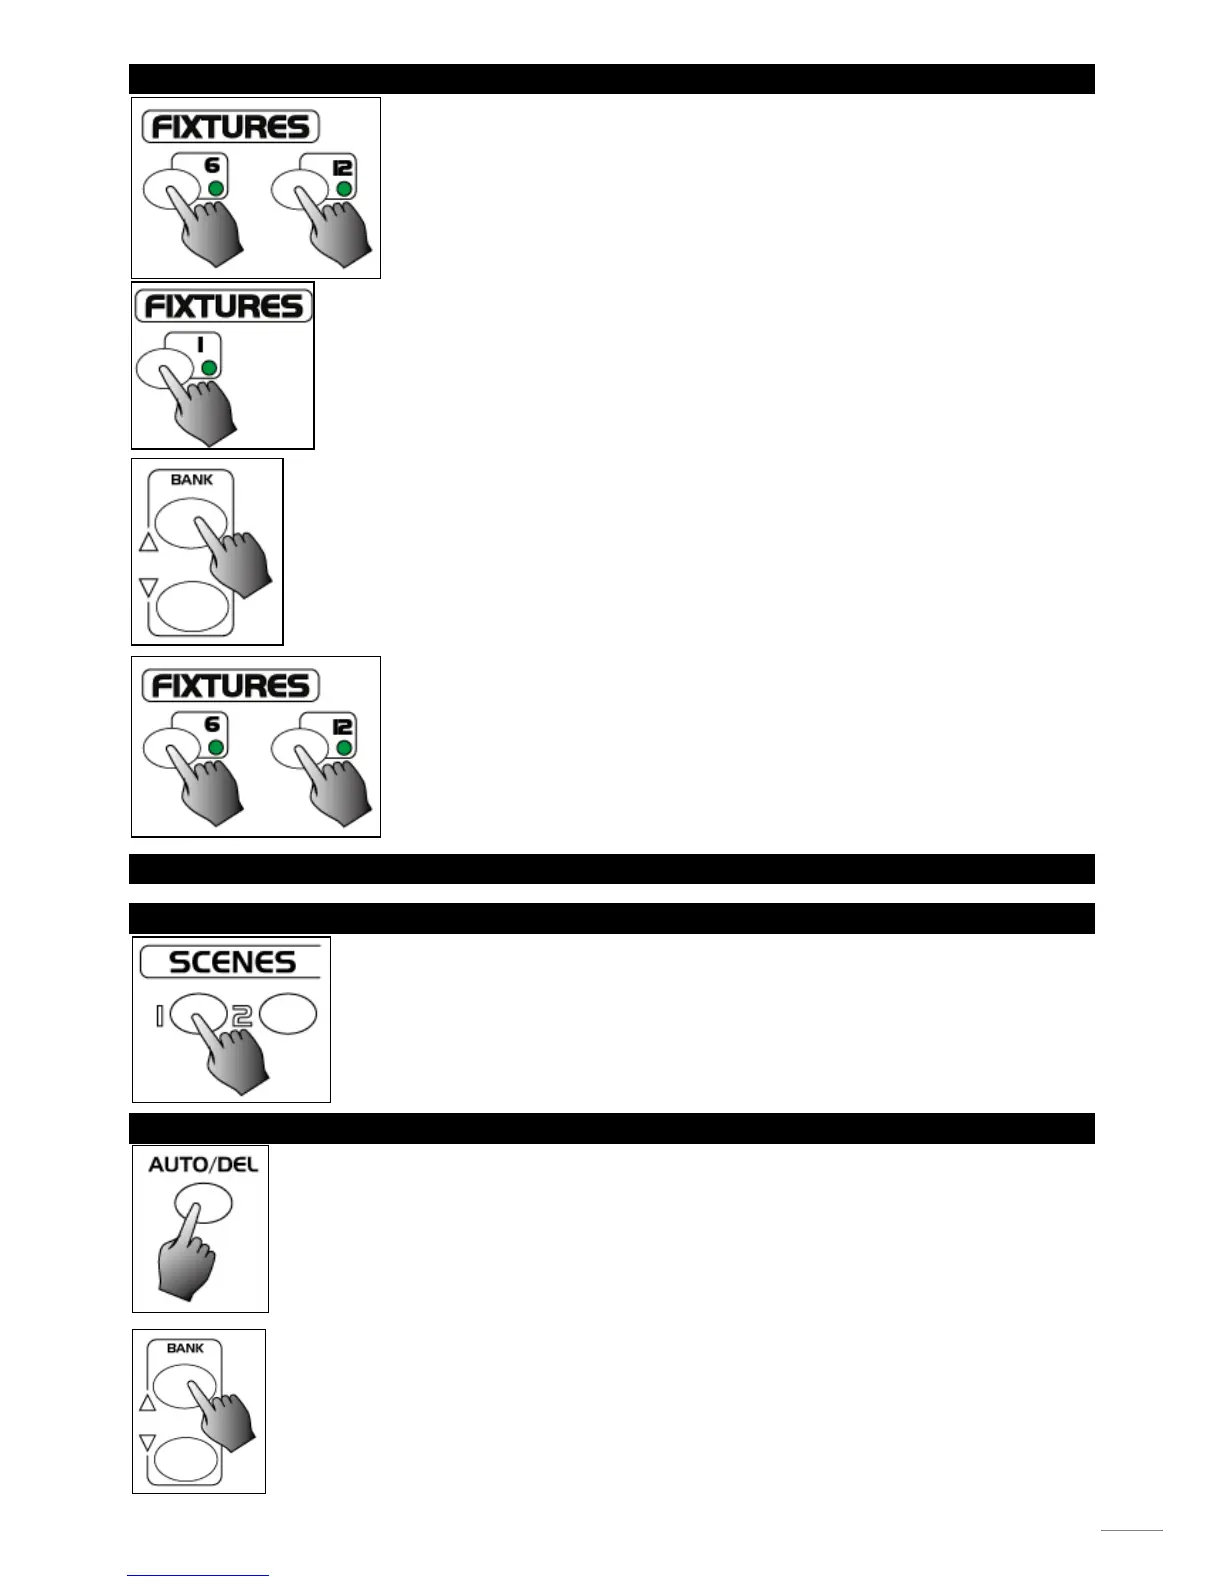
3.7 SET UP NEW LOGO
1. Turn the power off.
2. Press and hold down the fixture 6 and fixture 12 buttons at a time. Apply the power again
while pressing the two buttons, then release the two buttons.
3. Tap the Fixture 6(or 12) button to move the cursor to the left (or right).
4. Tap the Bank Up/Down button to scroll to the characters you want.
5. Continue steps 3-4. You may enter a maximum of 16 characters in two rows.
6. Press the fixture 6 and 12 buttons at a time to store the new characters into memory, all
LEDs should flash briefly indicating this operation. If you are not going to save these new
characters, just tap the Blackout button to leave this operation.
4.0 RUNNING SCENES
4.1 MANUAL MODE
1. When the power is turned on, this unit enters Manual mode automatically.
2. Make sure Auto trigger and Music trigger indicators in the Segment Display are both off.
3. Use the Bank Up/Down button to select the bank that contains the scenes you wish to
run.
4. Tap the Scene button to select the scene to run.
4.2 AUTO MODE
This function allows you to run a bank of programmed scenes in a sequential loop.
1. Tap the Auto/Del button to activate Auto mode. The auto LED lights indicating auto mode
is active.
2. Use the Bank Up/Down button to select a bank of scenes to run.
 Loading...