UK UK
60 61
DK DK
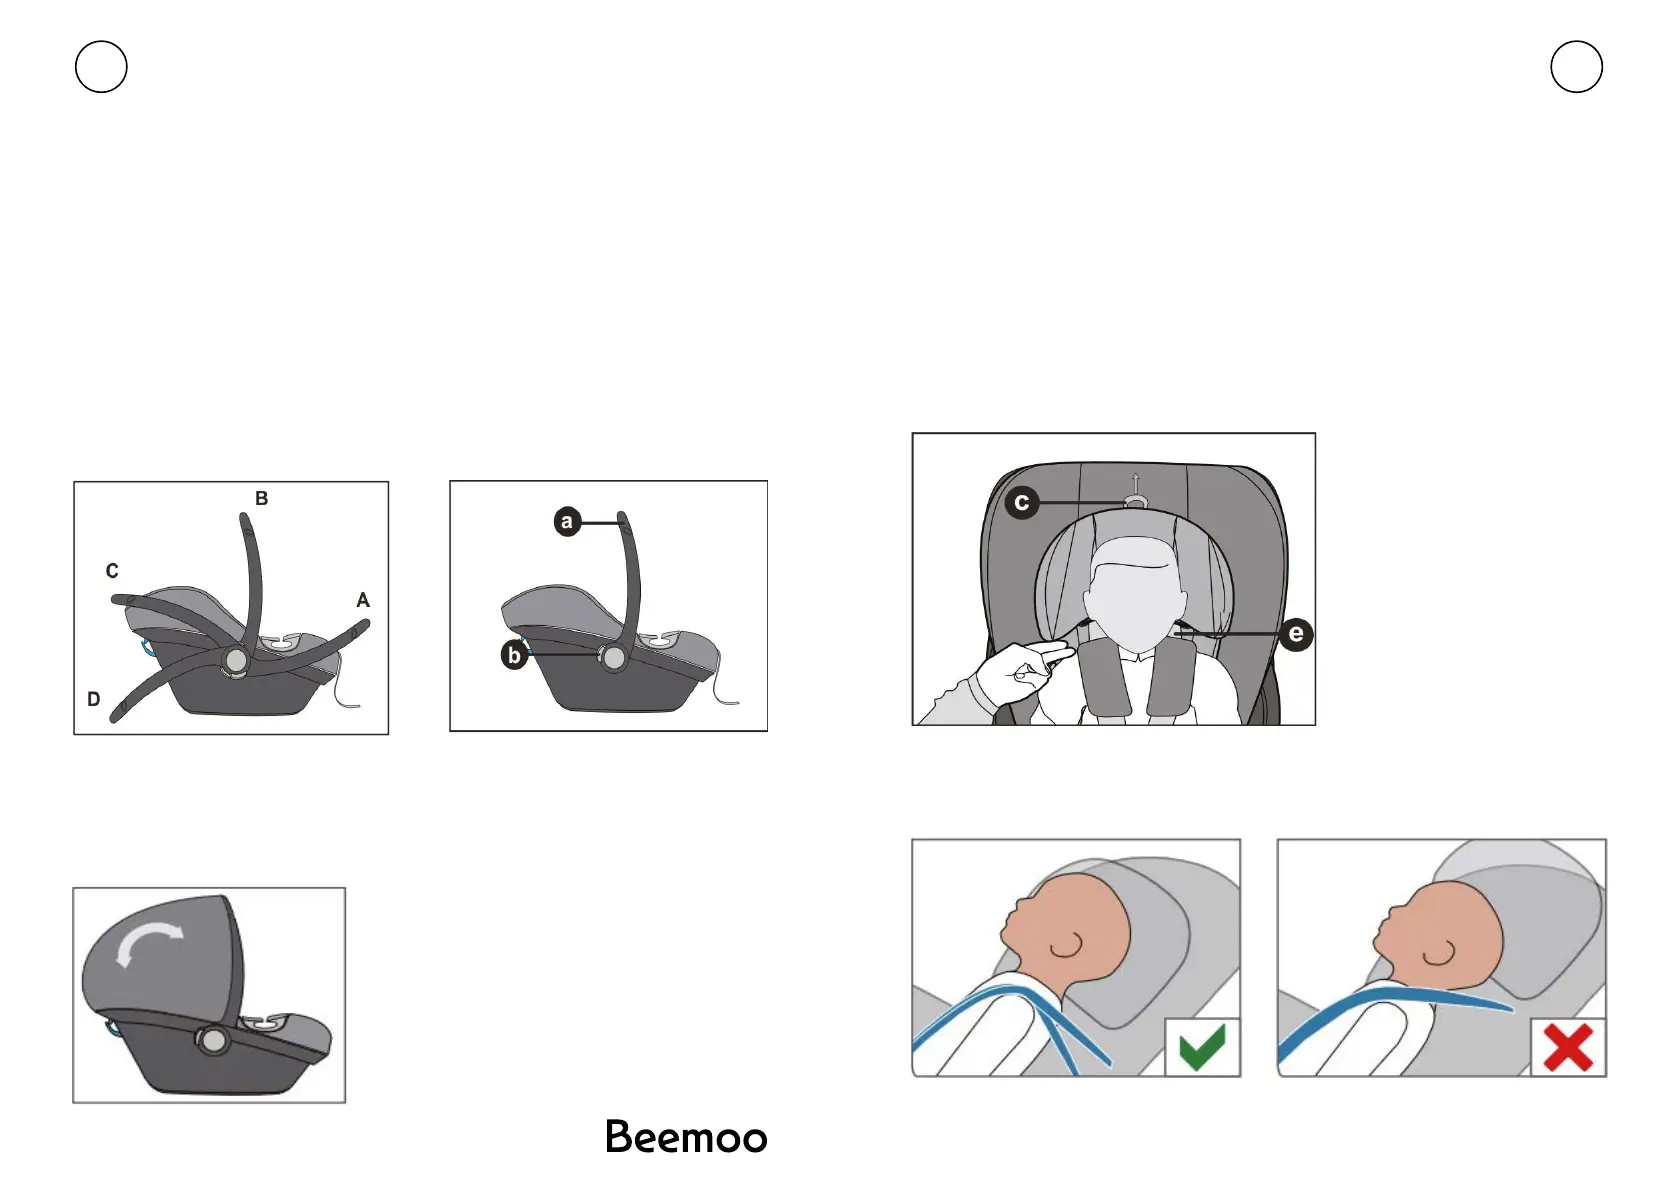
JUSTERING AF BÆREHÅNDTAGET
Du kan låse bærehåndtaget i re positioner:
A) Kørestilling
B) Bærestilling
C) Placering af barnet i autostolen
D) Sikker placering på plan overade uden for køretøjet
ADVARSEL!
For at forhindre, at autostolen vælter under transport, skal du kontrollere, at
bærehåndtaget (a) er fastlåst i bærepositionen (B).
• For at justere bærehåndtaget, skal du trykke på højre og venstre knap samtidigt (b).
• Drej derefter bærehåndtaget frem eller tilbage, mens du trykker på knappen (b),
indtil det automatisk låses fast i den ønskede position.
JUSTERING AF KALECHE
• Fold kalechen ud ved at trække gradvist i plastikdækslet.
• For at folde kalechen op, skubbes den tilbage til udgangspositionen.
JUSTERING AF NAKKESTØTTE
BEMÆRK! Spædbarnsindlægget beskytter dit barn. Det skal bruges til, at barnet har
en længde på 60 cm.
Nakkestøtten sikrer den bedst mulige beskyttelse af dit barn, når den er justeret efter
barnets længde. Den kan indstilles i 6 positioner. Nakkestøtten skal justeres således,
at afstanden mellem barnets skuldre og nakkestøtte ikke overstiger 2 cm (ca. 2 ngres
bredde).
• Kontrollér højden af skulderselerne: Placér skulderselerne ved eller lige under
barnets skuldre til bagudvendt brug.
• Træk justeringshåndtaget (c) opad for at låse nakkestøtten op. Nu kan du justere
nakkestøtten.
Bemærk! Skulderselerne (e) er fast forbundet til nakkestøtten og må ikke justeres
separat.
You can lock the carrying handle in place in four positions:
A: Driving position.
B: Carrying Position.
C: For placing the baby in the seat.
D: For a safe stand on a level surface outside the vehicle..
WARNING! In order to prevent the seat from tipping over during carrying,
check whether the carrying handle a is locked in place in carrying
position B.
• To adjust the carrying handle, simultaneously press the left and right
buttons (b).
• Then pivot carrying handle a forwards or backwards while pressing
button (b), until it automatically locks in place in the desired position.
.
07
08
Adjusting the Headrest
The headrest only ensures the best possible protection for your child if it is
adjusted to the optimum height. There are six positions that can be set.
The headrest has to be adjusted in a way that the distance between
the child‘s shoulders and the headrest doesn‘t exceed 2 cm
(approx. 2 fingers width).
• Check the height of the Harness Straps: Position the Harness
Straps at or just below the child‘s shoulders for rear-facing use.
• Pull the adjustment handle © upwards to unlock the headrest .
Now you can adjust the headrest.
NOTE !
The newborn inlay protects your child. It must be used up to size of 60 cm
ADJUSTING THE CARRYING HANDLE
ADJUSTING THE SUN CANOPY
Unfold the sun canopy by pulling
gradually on the plastic cover.
To fold up, push the sun canopy
back to its starting position.
ADJUSTING TO BODY SIZE
Note! The shoulder belts (e)
are firmly connected to the
headrest and must not be
adjusted separately.
 Loading...