UK UK
78 79
FI FI
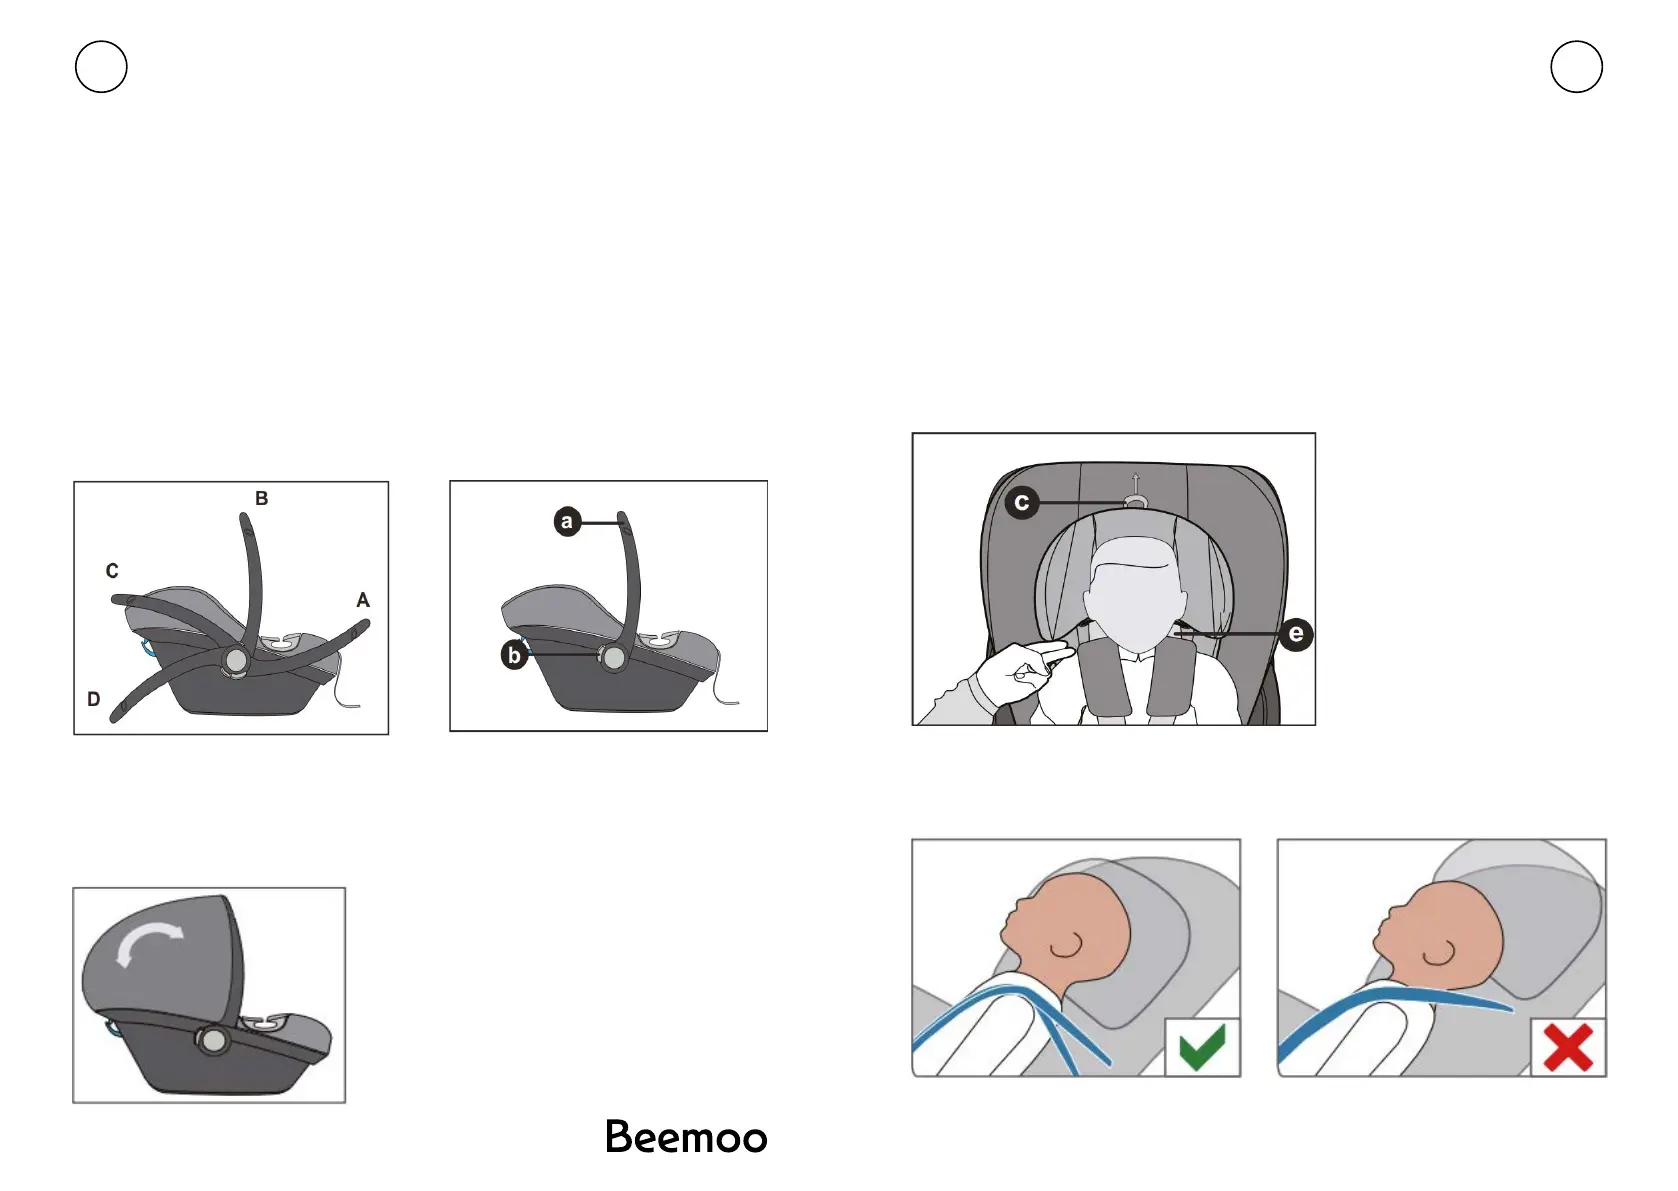
KANTOKAHVAN SÄÄTÖ
Voit lukita kantokahvan neljään asentoon:
A) Ajoasento
B) Kantoasento
C) Asento, kun vauva asetetaan turvakaukaloon
D) Asento, kun turvakaukalo asetetaan tasaiselle alustalle ajoneuvon ulkopuolella
VAROITUS! Jotta istuin ei kellahtaisi kuljetuksen aikana, tarkista, että kantokahva
on lukittu paikalleen kantoasentoon B.
• Säädä kantokahvaa painamalla samanaikaisesti oikeaa ja vasenta painiketta (b).
• Käännä sitten kantokahvaa eteen- tai taaksepäin samalla kun painat painiketta (b),
kunnes kantokahva lukittuu haluttuun asentoon.
KUOMUN SÄÄTÖ
• Avaa kuomu vetämällä vähitellen muovisuojasta.
• Kuomun taittamiseksi työnnä kuomu takaisin alkuasentoonsa.
PÄÄTUEN SÄÄTÖ
HUOMIO! Vastasyntyneen lisäosa suojaa lastasi. Sitä tulee käyttää 60 cm pituuteen
asti. Päätuki takaa parhaan mahdollisen suojan lapsellesi silloin, kun se on säädetty
optimaaliselle korkeudelle. Päätuen voi säätää kuuteen eri korkeuteen.
Päätuki on säädettävä siten, ettei lapsen hartioiden ja niskatuen välinen etäisyys ylitä
kahta senttimetriä (n. kahden sormen leveys).
• Tarkista turvavaljaiden hihnojen korkeus: Aseta valjaiden hihnat lapsen hartioiden
kohdalle tai hieman hartioiden alapuolelle selkä menosuuntaan päin käytettäessä.
• Vedä säätökahvaa (c) ylöspäin päätuen lukituksen avaamiseksi. Nyt voit säätää
päätukea.
Huomioitavaa: Olkavyöt (e) on kiinnitetty tiukasti päätukeen, eikä niitä saa säätää
erikseen.
You can lock the carrying handle in place in four positions:
A: Driving position.
B: Carrying Position.
C: For placing the baby in the seat.
D: For a safe stand on a level surface outside the vehicle..
WARNING! In order to prevent the seat from tipping over during carrying,
check whether the carrying handle a is locked in place in carrying
position B.
• To adjust the carrying handle, simultaneously press the left and right
buttons (b).
• Then pivot carrying handle a forwards or backwards while pressing
button (b), until it automatically locks in place in the desired position.
.
07
08
Adjusting the Headrest
The headrest only ensures the best possible protection for your child if it is
adjusted to the optimum height. There are six positions that can be set.
The headrest has to be adjusted in a way that the distance between
the child‘s shoulders and the headrest doesn‘t exceed 2 cm
(approx. 2 fingers width).
• Check the height of the Harness Straps: Position the Harness
Straps at or just below the child‘s shoulders for rear-facing use.
• Pull the adjustment handle © upwards to unlock the headrest .
Now you can adjust the headrest.
NOTE !
The newborn inlay protects your child. It must be used up to size of 60 cm
ADJUSTING THE CARRYING HANDLE
ADJUSTING THE SUN CANOPY
Unfold the sun canopy by pulling
gradually on the plastic cover.
To fold up, push the sun canopy
back to its starting position.
ADJUSTING TO BODY SIZE
Note! The shoulder belts (e)
are firmly connected to the
headrest and must not be
adjusted separately.
 Loading...