16
4. CAMERA INSTALLATION
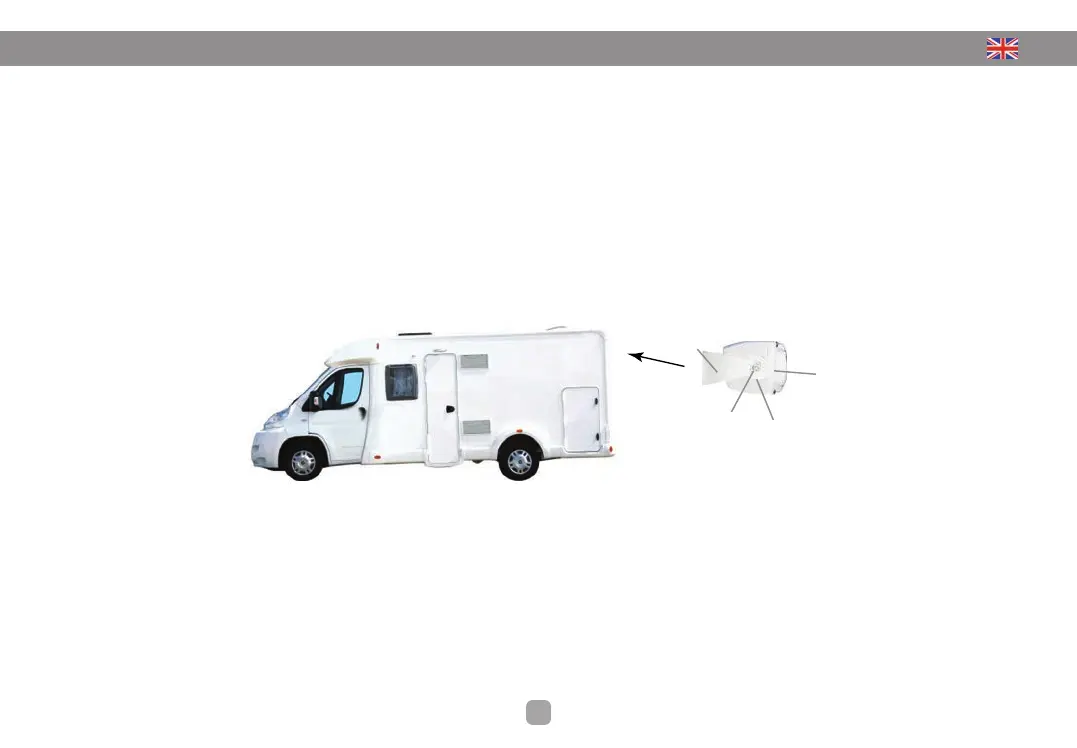
CAMERA POSITION
We recommend that you set the position of the camera with the user of the vehicle depending on the desired monitor. Conveniently the camera is positioned at the rear of
the vehicle in the center and as high as possible while avoiding to exceed the actual height of the vehicle. The orientation of the camera must be connected after the system
to control the optimal viewing angle through the display.
CAMERA FIXATION
• Loosen the screws to remove the power block bracket camera
• Attach the bracket to the location defined
• Drill a hole to pass the cable. The cable gland must be sufficiently compressed to ensure a good seal. The cable must not be stretched and if possible, it should be a gutter
to prevent the ingress of water by capillarity.
• Screw the camera to the bracket using the center screw.
• Set the desired optimal viewing angle and firmly screw the 4 screws provided in the kit rotation.
NOTES
To avoid oxidation & corrosion of the body, we recommend that you apply a rust paint for metal body at the drill holes.
To ensure a perfect seal, we recommend that you fill the holes with a silicone gasket.
Braket
Camera box
Central screw
Rotation screw