will light.
9. To turn the GLIDE on for a step, turn up the GLIDE To turn off, turn it all the way down. When GLIDE is on for a step, the
LOCATION LED 5 will light.
10. To increase the brightness or accent, press the RESET/ACCENT When an accent is applied, the LOCATION LED 7 will light.
11. Press REC when you have finished creating the pattern. It is not saved yet, but it can be played back. Caution: Do not turn off the
unit, or create a new pattern, or the current unsaved pattern will be lost.
PLAYING A PATTERN
1. Press PLAY/STOP to listen to the current
2. If you decide not to save it, you can repeat the recording steps above to record a new Alternatively, press PATTERN and RESET to
recall the currently saved pattern, and discard any changes.
3. If you decide to save the pattern, you must follow the “SAVING A PATTERN” procedure shown below, or it will not remain in
memory if a new pattern is begun, or the power is turned
4. To create a SWING for this pattern, hold SHIFT and adjust the TEMPO/GATE LENGTH In the center position, no swing is applied, if
turned down, only the off-beats will play, and if all the way up, only the on-beats will play. The SWING setting for the pattern is
saved when the pattern is saved as shown below.
5. Press SHIFT and PAGE to return to automatic page turning. While playing a pattern: Press HOLD/REST to hold the current step.
Press RESET/ACCENT to return to step 1. Press SHIFT and any STEP, and you can edit the gate length, rest, accent, ratchet,
glide but not note. Press SHIFT and the same STEP again to exit step edit. (If playback is paused, the same operation can edit the
note as well. Press PAGE to view the pattern page from 1 to Press SHIFT and ARP/SETEND and a STEP to change the sequence
end step. PLAY/STOP to pause playback.
6. Press PLAY/STOP.
SAVING A PATTERN
1. Press and hold SHIFT + PLAY/STOP for 2 seconds until the LOCATOR LED of the current pattern number begins to flash green
2. Press a STEP switch 1 to 8 to select the new desired pattern
3. Press PATTERN + STEP switch 1 to 8 to select the desired bank
4. Press SHIFT + REC to save the pattern and exit the save mode.
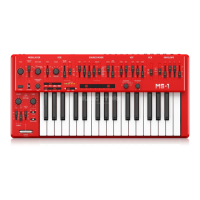
MS-1 Parameters Select
CHANGING THE PARAMETERS
The parameters may be changed using the following procedure:
1. Press SHIFT+ HOLD/REST + 8 to enter the setting mode. The LOCATION LED 1 will blink yellow.
2. Press <KYBD or STEP> to select pages 1 to 5. The yellow LOCATION LED, shows the current page:
3. Page 1 allows you to select the MIDI input channel, 1 to 16.
4. Page 2 allows you to select the MIDI output channel, 1 to 16.
5. Page 3 allows you to select the clock source mode from 1 to 5: (INTERNAL / MIDI DIN / MIDI USB / TRIG / AUTO). When using
AUTO, the clock priority is: TRIG > MIDI USB > MIDI DIN > INTERNAL
6. Page 4 allows you to select the clock type mode, 1 to 4: (1PPS / 2PPQ / 24PPQN / 48PPQN)
7. Page 5 allows you to select the clock edge mode, 1 to 2: (Fall / Rise)
8. Press STEP switches 1 to 8 to select numeric values from 1 to 8. The current value is indicated by a green LOCATION LED.
9. To access values 9 to 16, press SHIFT + STEP switch 1 to 8. The current value is shown by a red LOCATION LED.
Note: If a setting is on the same LED number as the current page LED, then the LED will flash alternately between the yellow page
color and the green or red parameter color.
10. Press SHIFT + HOLD/REST + 8 to exit the setting mode, and save any parameter changes.
11. More parameters can be changed using the Synthtool App.
ADSR Envelope
The stages of the ADSR envelope are shown in this simplified diagram below. The envelope can control the VCA level, the VCF cut-off
frequency, and Pulse Width modulation of the VCO.
 Loading...