steady red LED, and the current step flashes red.
14. GLIDE – during step editing, this knob can be used to add a Ratchet by splitting the current step into 1, 2, 3, or 4 parts. Hold down
SHIFT and turn the knob to split the current step into the number of parts shown by the LOCATOR LEDs (yellow) 1 to 4. The GLIDE
switch (33) does not have to be on for the Ratchet to work.
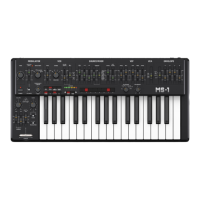
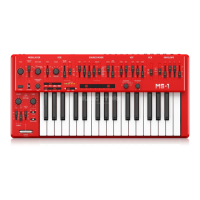
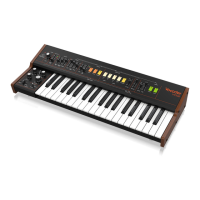
MS-1 Getting started
Step 3: Getting started
OVERVIEW
This “getting started” guide will help you set up the MS-1 analog synthesizer and briefly introduce its capabilities.
CONNECTION
To connect the MS-1 to your system, please consult the connection guide earlier in this document.
Caution: Do not overload the 3.5 mm inputs. They can only accept the correct level of voltages as shown in the specification tables.
The 3.5 mm outputs should only be connected to inputs capable of receiving the output voltages. Failure to follow these instructions may
damage the MS-1 or external units.
SOFTWARE SETUP
The MS-1 is a USB Class Compliant MIDI device, and so no driver installation is required. The MS-1 does not require any additional
drivers to work with Windows and MacOS.
HARDWARE SETUP
Make all the connections in your system. Apply power to the MS-1 using the supplied power adapter only. Ensure your sound system is
turned down. Turn on the MS-1 power switch.
WARM UP TIME
We recommend leaving 15 minutes or more time for the MS-1 to warm up before recording or live performance. (Longer if it has been
brought in from the cold.) This will allow the precision analog circuits time to reach their normal operating temperature and tuned
performance.
INITIAL SETUP
The following steps will help you get started making sound with the MS-1.
1. With the power off, connect a pair of headphones, and turn down the volume knob.
2. In the Source Mixer section, turn up the sawtooth fader and turn down all the others. (If all these faders are down, then there will be
no sources to listen to.)
3. In the VCF section, turn up the FREQ fader. (If the fader is down, then the cutoff frequency of the low pass filter may be too low.)
4. In the VCA section, set the switch to Gate. (If it is set to Envelope, then make sure to turn up the D (decay) fader or the S (sustain)
fader.)
5. Turn on the MS-1 and play notes on the keyboard as you adjust the volume level to a comfortable listening level.
6. If you hear no sound, hold SHIFT + <KYBD to make sure you are in Keyboard mode and not Step mode. Check the REC switch
LED is Off.
SOURCE MIXER SECTION
The MS-1 has three waveforms, a sub oscillator, an internal noise generator, and an external source input. Each of these, and any
combination, are used by the MS-1 to generate sound. The Source Mixer faders allow you to adjust the volume of each to create an
overall mix.
VCO SECTION
Adjust the Range knob and you will hear the sound of the various octaves. The MOD fader allows the VCO to be modulated by the
LFO. Turn up the MOD fader, and then adjust the modulator controls such as the Rate fader, and the Waveform selector. The pulse
width fader will adjust the pulse width if the switch is set to MANUAL. Turn up the Pulse fader in the Source Mixer section to hear the
oscillator. If the switch is set to LFO (or envelope) then the pulse width is modulated by the LFO and its controls, (or the envelope
controls) and the pulse width fader varies the amount of effect.
VCF SECTION
Play with the Frequency fader, and Resonance, and listen to their effect on the sound. The ENV fader will adjust the amount of
effect the ADSR envelope controls have on the VCF. The MOD fader adjusts the amount of modulation on the VCF. Vary the fader,
and adjust the Modulator LFO rate fader and the waveform. The KYBD fader adjusts how much the VCF is affected by the pitch of
notes played. Select an FM Source and then turn up the FM Amount knob to suit. Listen to the various FM sources and their effect.
VCA SECTION
The VCA switch allows you to select if the VCA is affected by the envelope controls, or the keyboard gate signal.
ENVELOPE SECTION
These faders adjust the VCA if the VCA switch is set to ENV. In this case, their effect is on the volume level, and its variation with time.
These faders also adjust the VCF if the VCF’s ENV fader is above minimum. In this case, their effect is on the cutoff frequency and its
variation with time. The VCO pulse width can also be affected by the envelope controls, if the switch in the VCO section is set to ENV.
CONTROLLERS SECTION
The GLIDE knob and on/off switch allow you to adjust the glide time between different played notes. In order for the Bender and handle
Bender to work, the nearby VCO and/or VCF bender faders have to be above minimum. The main Bender will change the VCO pitch and
VCF in both directions, while the handle Bender wheel will only increase. Both Benders can be used at the same time. Press the MOD
switch on the end of the handle, or move the main unit BENDER up, to add LF modulation. The modulation effect depends upon the
setting of the LFO MOD fader and other LFO controls.
ARPEGGIATOR
To use the arpeggiator, press the ARP switch in the sequencer section: