Step 2: Controls
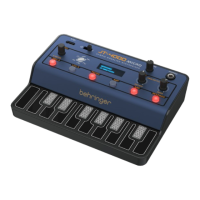
Sequencer Section
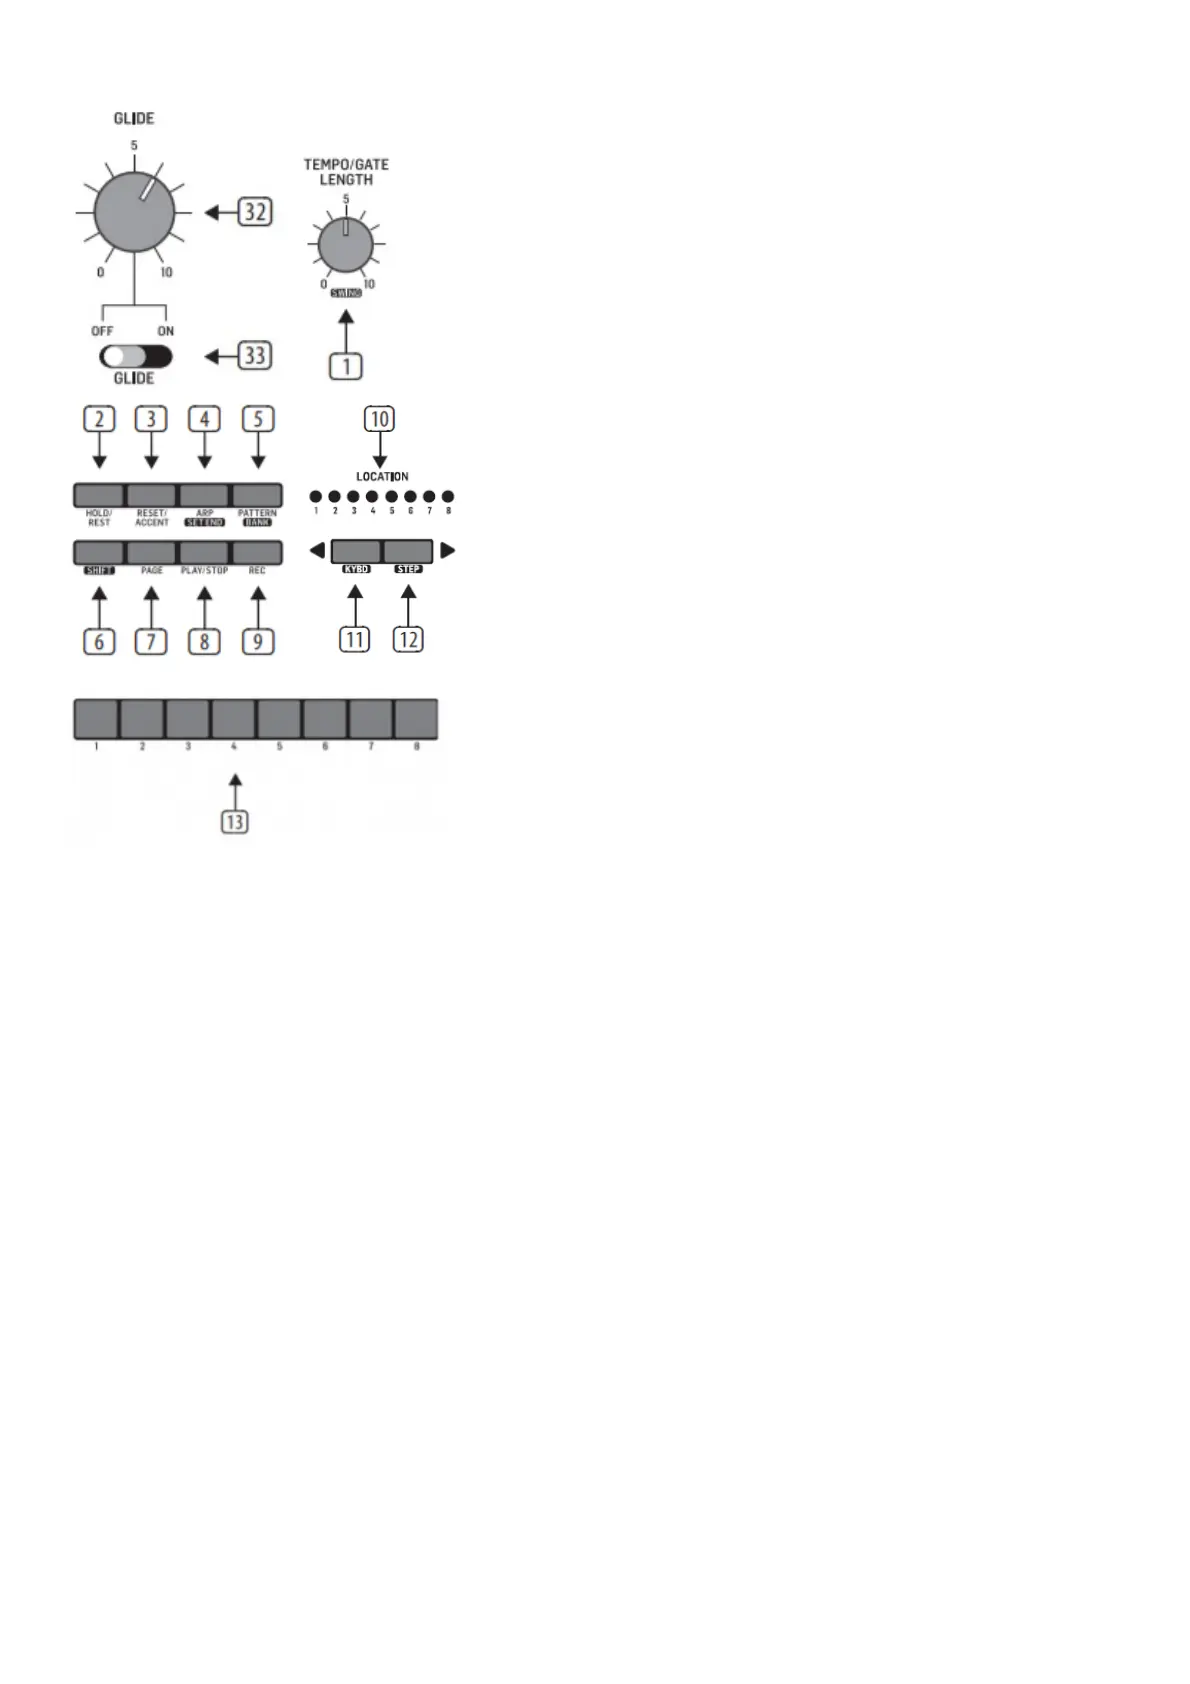
1. TEMPO/GATE LENGTH – this knob controls the sequencer and ARP tempo when using the internal clock source. During USB or
MIDI clock use, it also controls the value of clock division. During step editing, it controls the gate length. If SHIFT is held and the
sequencer played, then it also adjusts the swing. If SHIFT is held and ARP played, then it also adjusts the ARP gate length.
2. HOLD/REST – during keyboard play, this allows you to hold the last note played. In sequencer playback, this allows you to hold the
current step. During step editing, it allows you to enter a rest. Press HOLD and ARP to hold an arpeggio.
3. RESET/ACCENT – during playback, this allows you to reset the pattern back to step 1. During step editing, you can add an accent
to a step.
4. ARP (SET END) – in ARP mode, an arpeggio will play, based on the held notes on the keyboard. Press it twice, or press HOLD
and ARP, to hold the arpeggio. In Sequencer mode, pressing SHIFT and SET END together, followed by a STEP switch, will allow
that step to become the end of the current pattern.
5. PATTERN (BANK) – This switch is used to access either the current pattern, or bank number, as follows: PATTERN: Press
PATTERN, and one of the 8 LOCATION LEDs will show the current pattern number (from 1 to 8). To change to a different pattern
number, keep the PATTERN switch held down and press any of the STEP switches (1 to 8), or press <KYBD to decrease, or
STEP> to increase the pattern number. BANK: Press SHIFT and PATTERN, and one of the 8 LOCATION LEDs will show the
current bank number (from 1 to 8). To change to a different bank number, keep both SHIFT and BANK held down, and press any of
the STEP switches (1 to 8), or press <KYBD to decrease, or STEP> to increase the bank number.
6. SHIFT – This is used to access the secondary features of some of the other sequencer controls, such as SET END, BANK,
SWING, KYDB, and STEP. Hold down SHIFT and the other switch at the same time. For example SHIFT + PATTERN (BANK) will
show the current BANK number in the LOCATOR LEDs.
7. PAGE – each pattern can be up to 32 steps in length. This switch allows you to show each of the 4 pages of 8 steps each. The
LOCATION LEDs 1 to 4, show which page you are on. If a pattern is playing, the STEP LEDs will show the steps in use on the
current page.
8. PLAY/STOP – starts or stops the playback of the pattern. If SHIFT is held at the same time, then this is the start of the pattern
saving procedure, described below.
9. REC – press this to begin the recording of a new pattern. This is also used with SHIFT during the pattern saving procedure.
10. LOCATION – these multi-colored LEDS show various details, such as the current PATTERN number, current BANK number,
current PAGE, and GATE LENGTH.
11. KYBD – press SHIFT + KYBD to change the sequencer to keyboard mode.
12. STEP – press SHIFT + STEP to change the sequencer to STEP mode.
13. STEP SWITCHES – these multi-function switches allow you to view and select individual pattern steps, select a pattern number,
select a pattern bank. They are used during recording of a pattern to show the current step. Active steps are illuminated with a
 Loading...