5
XENYX
1002FX/1202FX
2. CONTROL ELEMENTS AND CONNECTORS
1.3 Before you get started
1.3.1 Shipment
Your mixing console was carefully packed in the factory to
guarantee safe transport. Nevertheless, we recommend that
you carefully examine the packaging and its contents for any
signs of physical damage that may have occurred during transit.
+ If the unit is damaged, please do NOT return it to us,
but notify your dealer and the shipping company
immediately, otherwise claims for damage or
replacement may not be granted.
+ To assure optimal protection of your XENYX during
use or transport, we recommend utilizing a carrying
case.
+ Please always use the original packaging to avoid
damage due to storage or shipping.
+ Never let unsupervised children play with the
XENYX or with its packaging.
+ Please dispose of all packaging materials in an
environmentally-friendly fashion.
1.3.2 Initial operation
Be sure that there is enough space around the unit for cooling
purposes and to avoid overheating please do not place your
mixing console on high-temperature equipment such as radiators
or power amps.
+ Never connect the XENYX to the power supply unit
when the latter is connected to the mains! First
connect the power supply unit to the console, then
connect the power supply unit to the mains.
+ Please make sure that all units have a proper
ground connection. For your own safety, never
remove or disable the ground conductor from the
unit or on the AC power cord. The unit should always
be connected to a mains socket outlet with a
protective earthing connection.
+ When installing the product, ensure the appliance
coupler or power cord is easily accessible for
disconnecting the unit from mains.
1.3.3 Online registration
Please, do remember to register your new BEHRINGER
equipment right after your purchase by visiting
www.behringer.com (alternatively www.behringer.de) and
kindly read the terms and conditions of our warranty carefully.
Should your BEHRINGER product malfunction, our goal is to
have it repaired as quickly as possible. To arrange for warranty
service, please contact the retailer from whom the equipment
was purchased. Should your BEHRINGER dealer not be located
in your vicinity, you may directly contact one of our subsidiaries.
Corresponding contact information is included in the original
equipment packaging (Global Contact Information/European
Contact Information). Should your country not be listed, please
contact the distributor nearest you. A list of distributors can be
found in the support area of our website (www.behringer.com).
Registering your purchase and equipment with us helps us
process your repair claims quicker and more efficiently.
Thank you for your cooperation!
2. CONTROL ELEMENTS AND
CONNECTORS
This chapter describes the various control elements of your
mixing console. All controls, switches and connectors will be
discussed in detail.
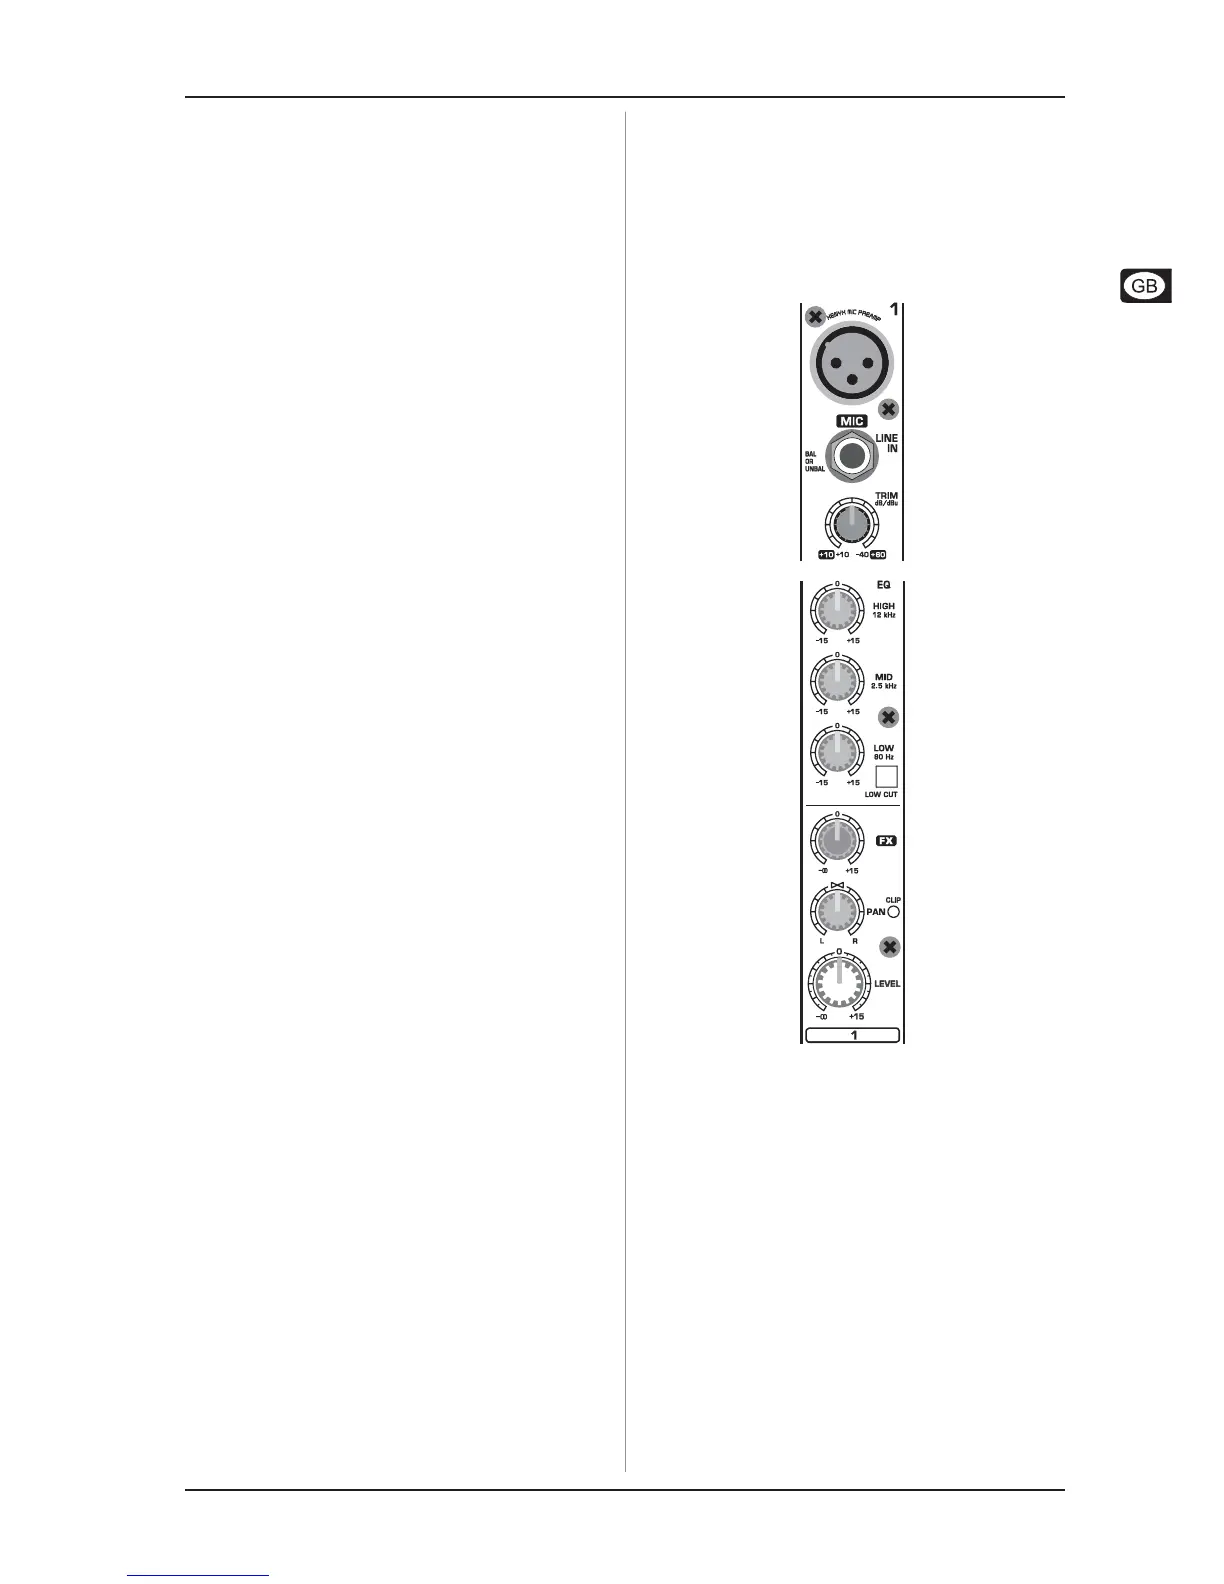
2.1 Mono channels
Fig. 2.1: Connectors and controls on the mono channels
MIC
Each mono input channel offers a balanced microphone input
via the XLR connector and also features switchable +48 V
phantom power supply for condenser microphones. The XENYX
preamps provide undistorted and noise-free gain as is typically
known only from costly outboard preamps.
+ Please mute your playback system before you
activate the phantom power supply to prevent
switch-on thumps being directed to your
loudspeakers. Please also note the instructions
in chapter 2.4 Main section.
LINE IN
Each mono input also features a balanced line input on a ¼"
connector. Unbalanced devices (mono connectors) can also be
connected to these inputs.
+ Please remember that you can only use either the
microphone or the line input of a channel at any
one time. You can never use both simultaneously!
 Loading...