Procedure
Control signal is applied to actuator.
Check power wiring. Correct any
problems. See Note 1.
Turn reversing switch to the correct
position.
Make sure the control signal positive
(+) is connected to Wire No 3 and
control signal negative (-) is connect-
ed to wire No. 1. Most control prob-
lems are caused by reversing these
two wires. Verify that the reversing
switch is all the way CCW or CW.
Check input signal with a digital volt
meter (DVM). Make sure the input is
within the range of the actuator. For
LM24-SR (-T) US this is 0 to 10 VDC
or 0 to 20 mA.
Note: The input signal must be above
the 2 VDC or 4 mA to have the actua-
tor move.
Use the manual override button to
move the damper by hand from fully
closed to fully open.
Check damper torque requirement.
Actuator works properly. Test con-
troller by following controller manu-
facturer's instructions.
Expected Response
Actuator will move to its “Control
Signal” position.
Power supply rating should be
≥
the total power requirement of
the actuator(s). Minimum volt-
age of 19.2 VAC or 21.6 VDC.
Actuator will move to its “Control
Signal” position.
Drives to “Control Signal” posi-
tion
Input voltage or current should
be ±1% of what controller's
adjustment or programming indi-
cate.
Damper will go from fully closed
to fully open.
Torque requirement is ≤ actua-
tor’s minimum torque.
Gives Expected
Response
Go To Step…
Actuator operates
properly
Step 8
Power wiring correct-
ed, actuator begins
to drive
Step 1
Actuator operates
properly.
Step 8
Actuator operates
properly.
Step 8
Controller output
(actuator input) is
correct. Input
Polarity Correct.
Step 6
Damper moves
properly
Step 7
Defective Actuator.
Replace Actuator -
See Note 2
Does Not Give
Expected Response
Go To Step…
No response at all
Step 2
Operation is
reversed
Step 3
Does not drive
toward "Control
Signal Position"
Step 4
Power wiring
corrected, actuator
still does not drive
Step 4
Does not drive
toward “Control
Signal Position”
Step 4
Step 5
Reprogram, adjust
repair or replace
controller as needed.
Step 1
Find cause of
damper jam and
repair.
Step 1
Recalculate actuator
requirement and
correct installation.
Step
1.
2.
3.
4.
5.
6.
7.
8.
Note 1 Check that the transformer(s) are sized properly.
• If a common transformer is used, make sure that polarity is observed on the secondary. This means connect all No. 1
wires to one leg of the transformer and all No. 2 wires to the other leg of the transformer.
• If multiple transformers are used with one control signal, make sure all No. 1 wires are tied together and tied to control
signal negative (-).
• Controllers and actuators must have separate 24 VAC/VDC power sources.
Note 2 If failure occurs within 5 years from original installation date, notify Belimo and give details of the application.
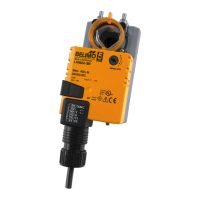
LM24-SR (-T) US and LM24-MFT US + P-100… Electrical check-out procedure
Startup and Checkout
Instructions for LM24-SR (-T) US and LM24-MFT US + P-100…