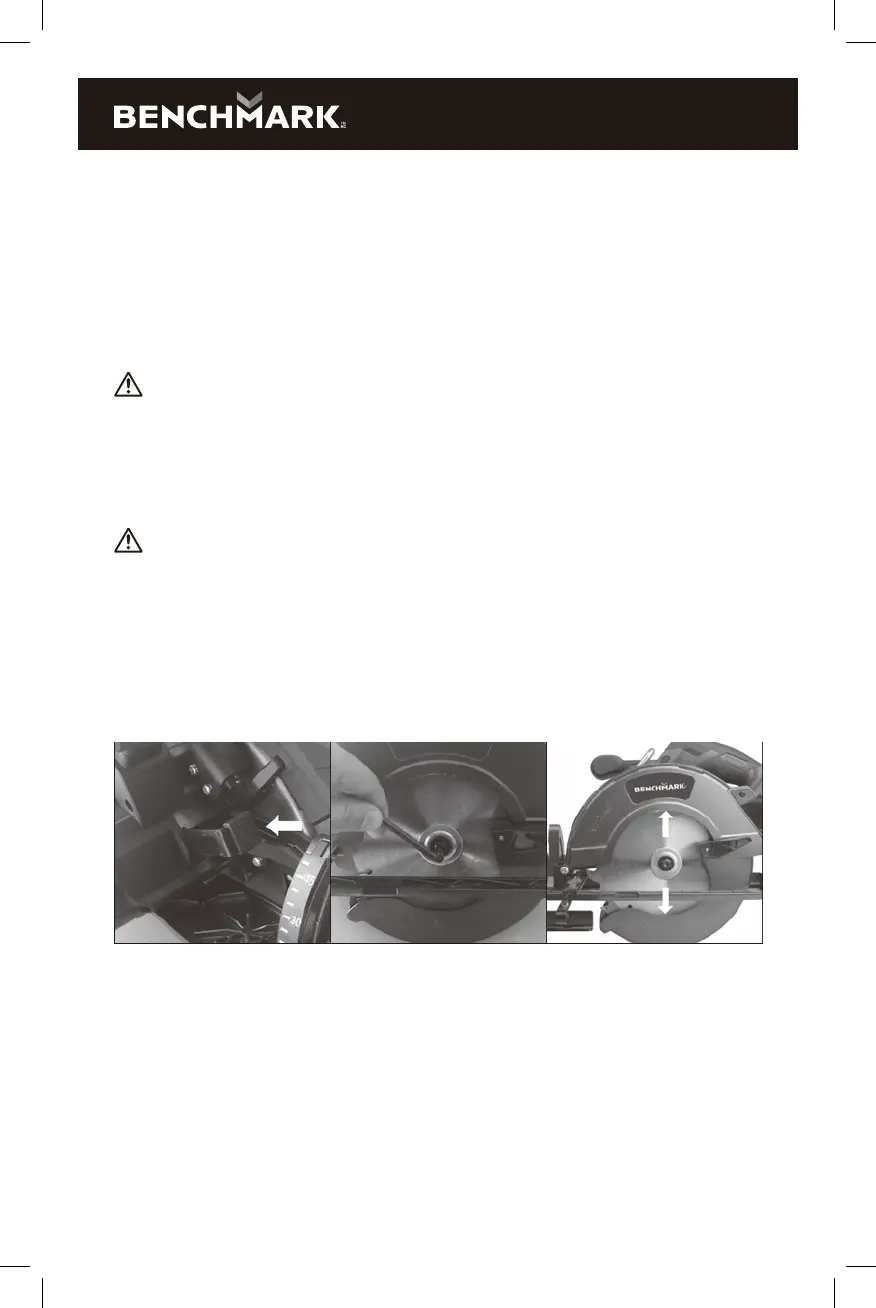
13
ASSEMBLY
INSTALLING BLADES
A 7-1/2 in. blade is the maximum blade capacity of the saw. Never use a blade that
is too thick to allow the outer blade washer to engage with the flats on the spindle.
Larger blades will come in contact with the blade guard, while thicker blades will
prevent blade screw from securing the blade on the spindle. Either of these
situations could result in a serious accident.
WARNING: Always remove the battery before installing blades.
The blade is extremely sharp and care must be observed when handling. Caution
must be observed as the blade guard is spring loaded and if released may cause
an injury. Rotate the blade guard into the fully open position and secure it in this
position using a screwdriver or piece of wood.
1. Depress the spindle lock button Fig.3.
CAUTION: To prevent damage to the spindle or spindle lock, always allow
motor to come to a complete stop before engaging spindle lock.
2. Remove the blade screw by turning it clockwise with the hex key, while keeping
the spindle lock button depressed Fig.4.
3. Remove the blade washer noting which way round it is fitted.
4. Fit the saw blade inside the lower blade guard and onto the spindle ensuring
that the direction of rotation arrow on the blade corresponds with the direction
of rotation arrow on the fixed guard arrow Fig.5.
FIG. 3 FIG. 4 FIG. 5
NOTE: THE SAW TEETH POINT UPWARD AT THE FRONT OF THE SAW.
5. Replace the blade washer. Depress the spindle lock button, then replace the
blade screw. Tighten the blade screw securely by turning it counterclockwise.