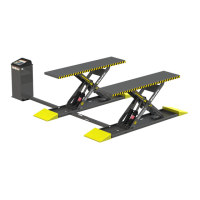
LR-10000 Low-Rise Scissor Lift 14 P/N 5900075 — Rev. B — August 2021
Create Chalk Line Guides
Make sure to plan out, in advance, where the LR-10000 is going to go:
• Clearance. Make sure there is enough clearance on all sides of the Lift site and above.
• Power Unit Stand. The Power Unit Stand can be installed on either side of the Lift (when
looking at it from the Short Ramp end).
• Operator. The operator at the Power Unit Stand
must
have a full, unobstructed view of the Lift.
• Power. The Power Unit Stand must also be positioned near an appropriate power source.
• Set up Chalk Line Guides. Create Chalk Line Guides to make sure the Lift is properly aligned.
Refer to Specifications for the Overall Width and Overall Length measurements.
To create the Chalk Line Guides:
1. Decide where you want to locate the Lift.
2. Create an Alignment Chalk Line where you want one end of the LR-10000; make the Alignment
Chalk Line longer than the Overall Width of the LR-10000.
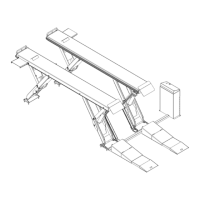
Not all components shown. Neither the Safety Lock Release Handle nor the Power Unit Stand are
taken into consideration when creating Chalk Line Guides.
3. Create two Side Chalk Lines, one on each side of the Lift; make the Side Chalk Lines longer than
the Overall Length of the Lift.
4. Move the Lift into position: one end just inside the Alignment Chalk Line and the two sides just
inside the two Side Chalk Lines.
5. When the Platforms are in the correct location, they can be anchored into place.
Tip Before anchoring the Lift, make sure there is an appropriate location for the Power Unit
Stand: close to a power source and within reach of the provided Hydraulic Hoses.