10
STEP 4
(Anchoring The Lift Column)
IMPORTANT NOTE
A level floor is suggested for proper installation. Small
differences in floor slope may be compensated for by
proper shimming. Any major slope changes will affect the
units level lifting performance. If a floor is of questionable
slope, consider pouring a new concrete slab.
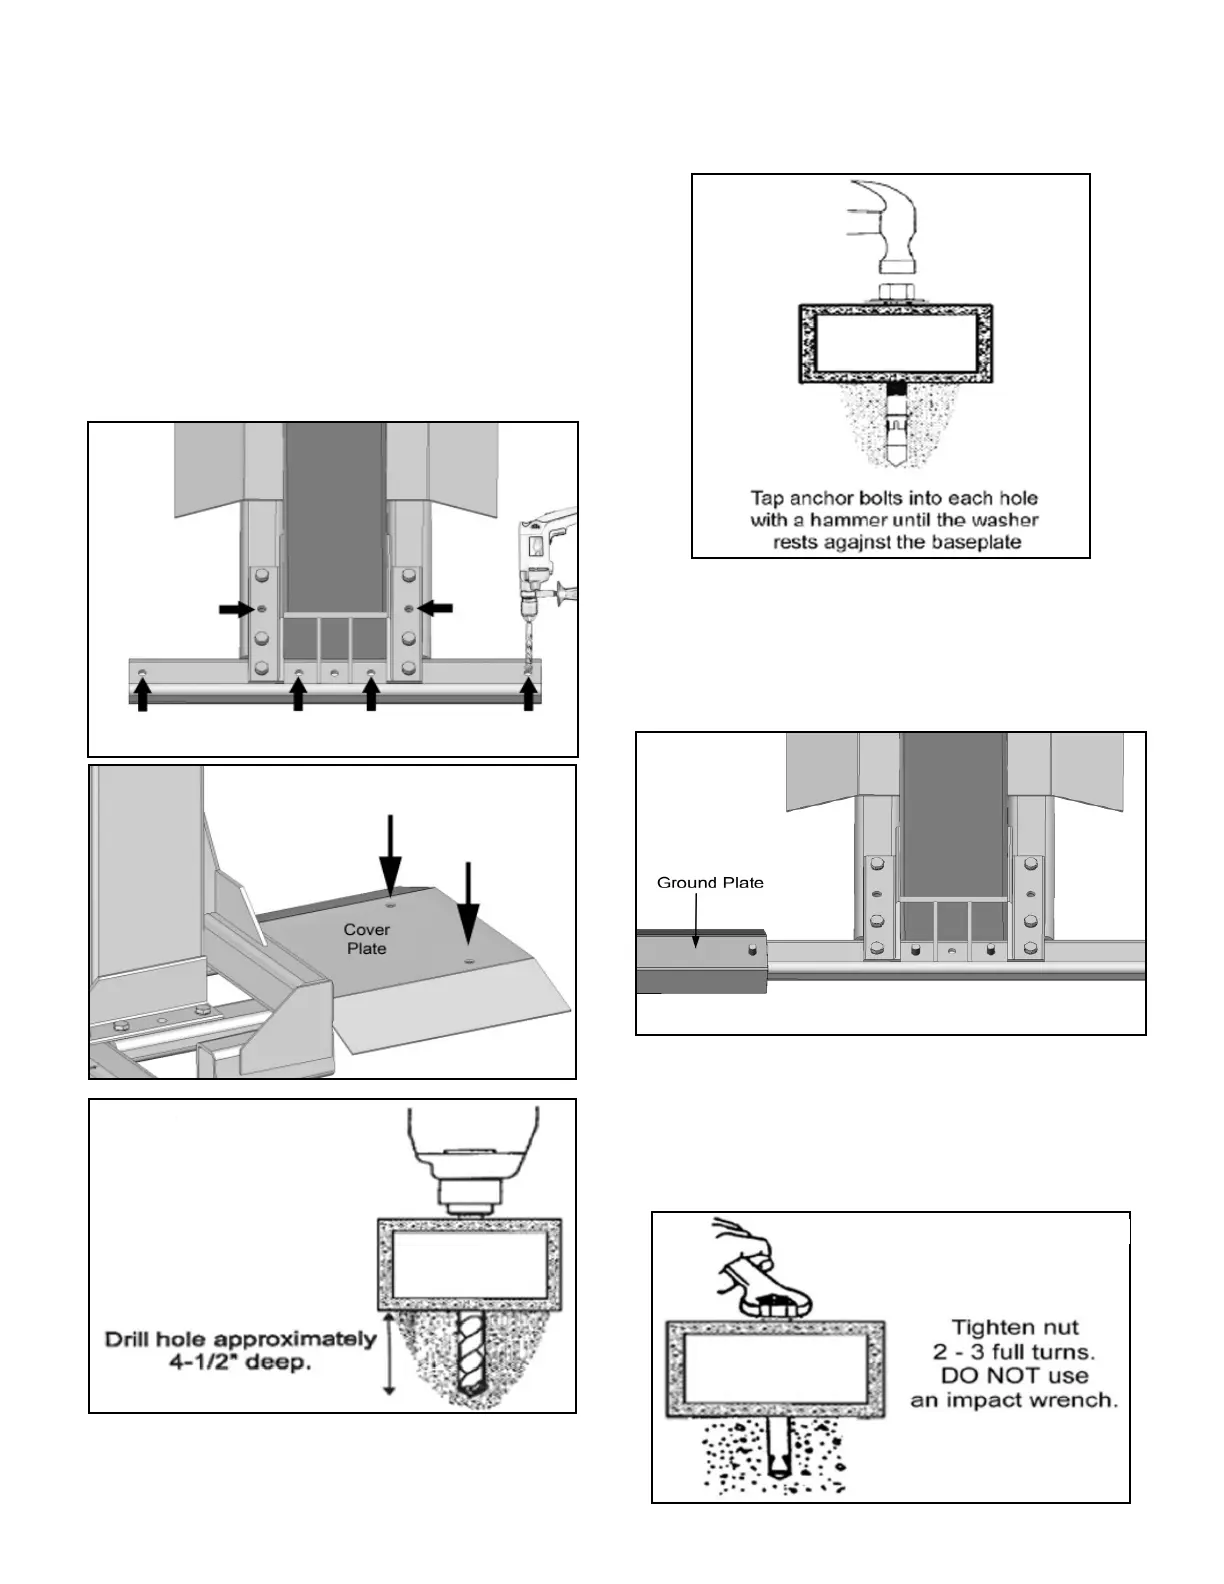
1. Drill through the Legs (eight holes total / see arrows)
in the concrete approximately 4-1/2” deep using a rotary
hammer drill and 3/4” concrete drill-bit. Do not ream the
hole or allow the drill to wobble. (See Fig. 4.1 - 4.3)
2. After drilling the anchor holes, remove the dust
thoroughly from each hole using compressed air, shop vac
and/or wire brush. ALWAYS WEAR SAFETY GOGGLES.
3. Assemble the washers and nuts on the anchors then
tap into each hole with a hammer until the washer rests
against the tube. Be sure that if shimming is required,
enough threads are left exposed. (See Fig. 4.4)
4. If shimming is required, insert the shims as necessary
around each Anchor Bolts.
5. Remove the nut from the anchor on the left side of the
Rear Leg and place the Ground Plate over the Anchor Bolt.
(See Fig. 4.5)
Note: It is helpful to leave the Anchor Bolt Nut on the
Ground Plate loose until after routing of the Hydraulic
Hose and Safety Cable.
6. With the Anchor Bolts in place, tighten. DO NOT use an
impact wrench for this procedure. (See Fig. 4.6)
Fig. 4.3
Fig. 4.2
Fig. 4.1
Fig. 4.4
Fig. 4.5
Fig. 4.6