9
STEP 3
(Assembling The Lift Column)
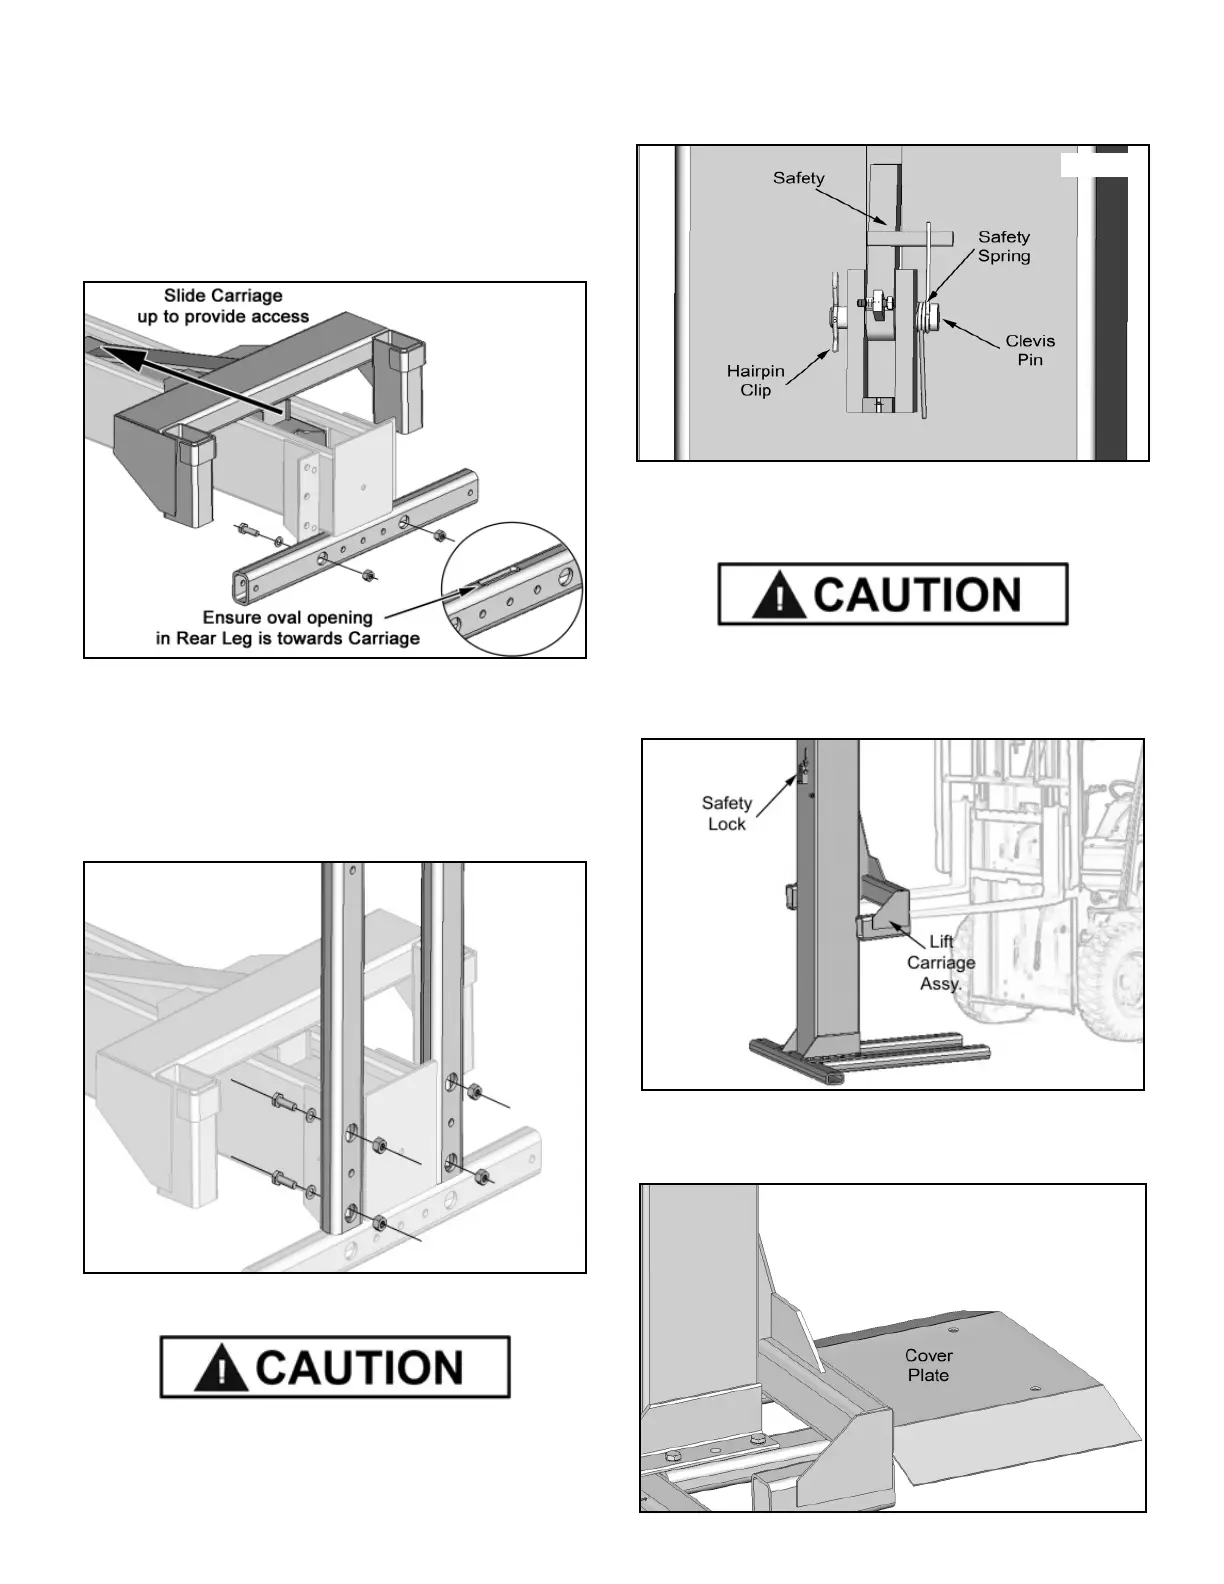
1. Lay the Main Column near the selected location, with
the open side of the Column facing up. Attach the Rear Leg
to the backside of the Lift Column using the 30 mm Bolts,
Washers and Nyloc Nut. Make sure the oval opening in the
Rear Leg is towards the Column. (See Fig. 3.1)
2. Before proceeding, make certain the lift is positioned with
clearances around and overhead.
3. Attach the Right and Left Front Legs to the side(s) of
the Lift Column using the Bolts, Washers and Nyloc Nut.
(See Fig. 3.2)
4. Lower the Carriage to the bottom of the Column
BEFORE you stand up the Column Carriage Assembly
using a forklift or other heavy lifting device.
5. Install the Column Safety Lock at the REAR of the Lift
Column. The Safety Lock MUST move freely. Lubricate
with light oil. (See Fig. 3.3)
6. Raise the Lift Carriage assembly with a forklift until the
Carriage reaches the first safety lock position.
(See Fig. 3.4)
MAKE A VISUAL INSPECTION OF THE SAFETY LOCK
AND MAKE SURE IT IS ENGAGED BEFORE WORKING
ON OR NEAR LIFT.
7. Place the Cover Pan on the Front Legs of the lift
Column. The Cover Pan will be bolted down after the
Anchors Bolts are installed in Section 4. (See Fig. 3.5)
Fig. 3.1
Fig. 3.4
Fig. 3.2
Fig. 3.3
Fig. 3.5