7
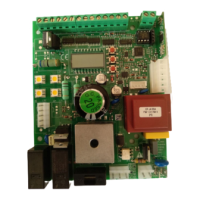
DIP-SWITCH FUNCTION
DIP 1 “CVAR” Operating mode of the radio receiver.
On: Only variable code transmitters are enabled (14 codes maximum).
Off: Both variable code and fixed code transmitters (14 codes maximum) are enabled.
Note: The receiver is also compatible with ARC (Advance Rolling Code) coding. To use these
transmitters see section “Configuration of incorporated receiver”.
DIP 2 See section “Stroke learning”
DIP 3 “PP/OPEN-CLOSE”- The operating mode of the Step-by-Step and STOP input is selected.
On: The OPEN function is performed by the Step-by-Step key, the CLOSE function is performed by
the STOP key, the STOP function is performed by pressing OPEN+CLOSE keys simultaneously.
Off: The Step-by-Step key carries out cyclically the OPEN>STOP>CLOSE>STOP> sequence, the
STOP key carries out the STOP function.
DIP 4 “AUX” It selects the operating mode of the AUX output.
On: The output carries out the “courtesy light” function.
The contact closes for 2 minutes at the beginning of each operation.
Off: The output carries out the “Radio channel II” function. “See section Configuration of
incorporated radio receiver”
DIP 5 “PHOT” It selects the operating mode of the PHOT input.
On: The input is activated in the closing phase only.
Off: The input is activated in both opening and closing phases.
DIP 6 “TCA” Automatic closure function. To be used to memorise the TCA time, as indicated in the
STROKE SELF-LEARNING section. If, after the TCA time learning, the system is switched OFF,
the closure function will be disabled in any case.
STROKE LEARNING
The stoke learning (operating time) and the automatic closure time (TCA) learning is carried out as follows:
1 - Move the DIP2 to ON, LED DL1 starts flashing rapidly.
If the automatic closure (TCA) is required, move DIP6 to ON.
If the automatic closure is not required, move DIP6 to OFF.
2 - Send a Step-by-Step (PP) control signal (with push-button or transmitter) and wait for the complete
opening.
3 - With open door, send a PP control signal:
a) If the DIP6 is ON, the TCA time counting starts. Wait for the desired TCA time, then wait for a new PP
control signal, the door starts closing.
b) If the DIP6 is OFF, a new PP control signal can be immediately sent. The door starts closing.
4 - The operating time counting starts. Wait that the door is closed and the motor stopped; wait for some
other seconds than send another PP control signal to store the operating time into memory.
5 - Move the DIP2 to OFF, LED DL1 starts flashing regularly.
SERVICE MAN OPERATION
If all DIP-Switches are moved to ON, the control unit operates in “Service Man” mode. The pressure on the
OPEN/CLOSE buttons should be kept for the entire duration of the stroke. For this reason, the PP and STOP
inputs perform the OPEN and CLOSE function, respectively.
Moreover, the stroke learning is not possible.
The controls must be positioned so as to be able to visually check the entire movement of the door, in
compliance with regulations in force.
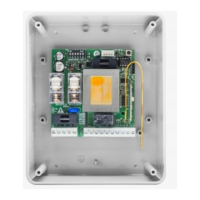
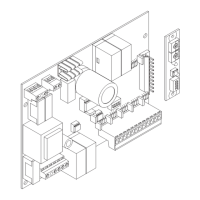
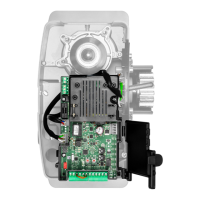
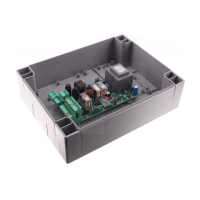
CONFIGURATION OF THE BUILT-IN RECEIVER
The control unit is equipped with an built-in radio module for the reception of variable code controls, with
ARC (Advanced Rolling-Code) or fixed code, 433.92 MHz frequency.
The control unit is normally supplied to operate with variable or fixed code. The fixed code (or dip-switch)
transmitter can be disabled by moving Dip-Switch 1 to ON.
If the ARC transmitters are to be used, they should be totally erased from the receiver memory by pressing
the PGM key for 15 seconds, as described in section “How to erase all transmitter codes from memory”.
Then proceed with the storage in memory as indicated hereunder.
 Loading...