18 Connection
Connection
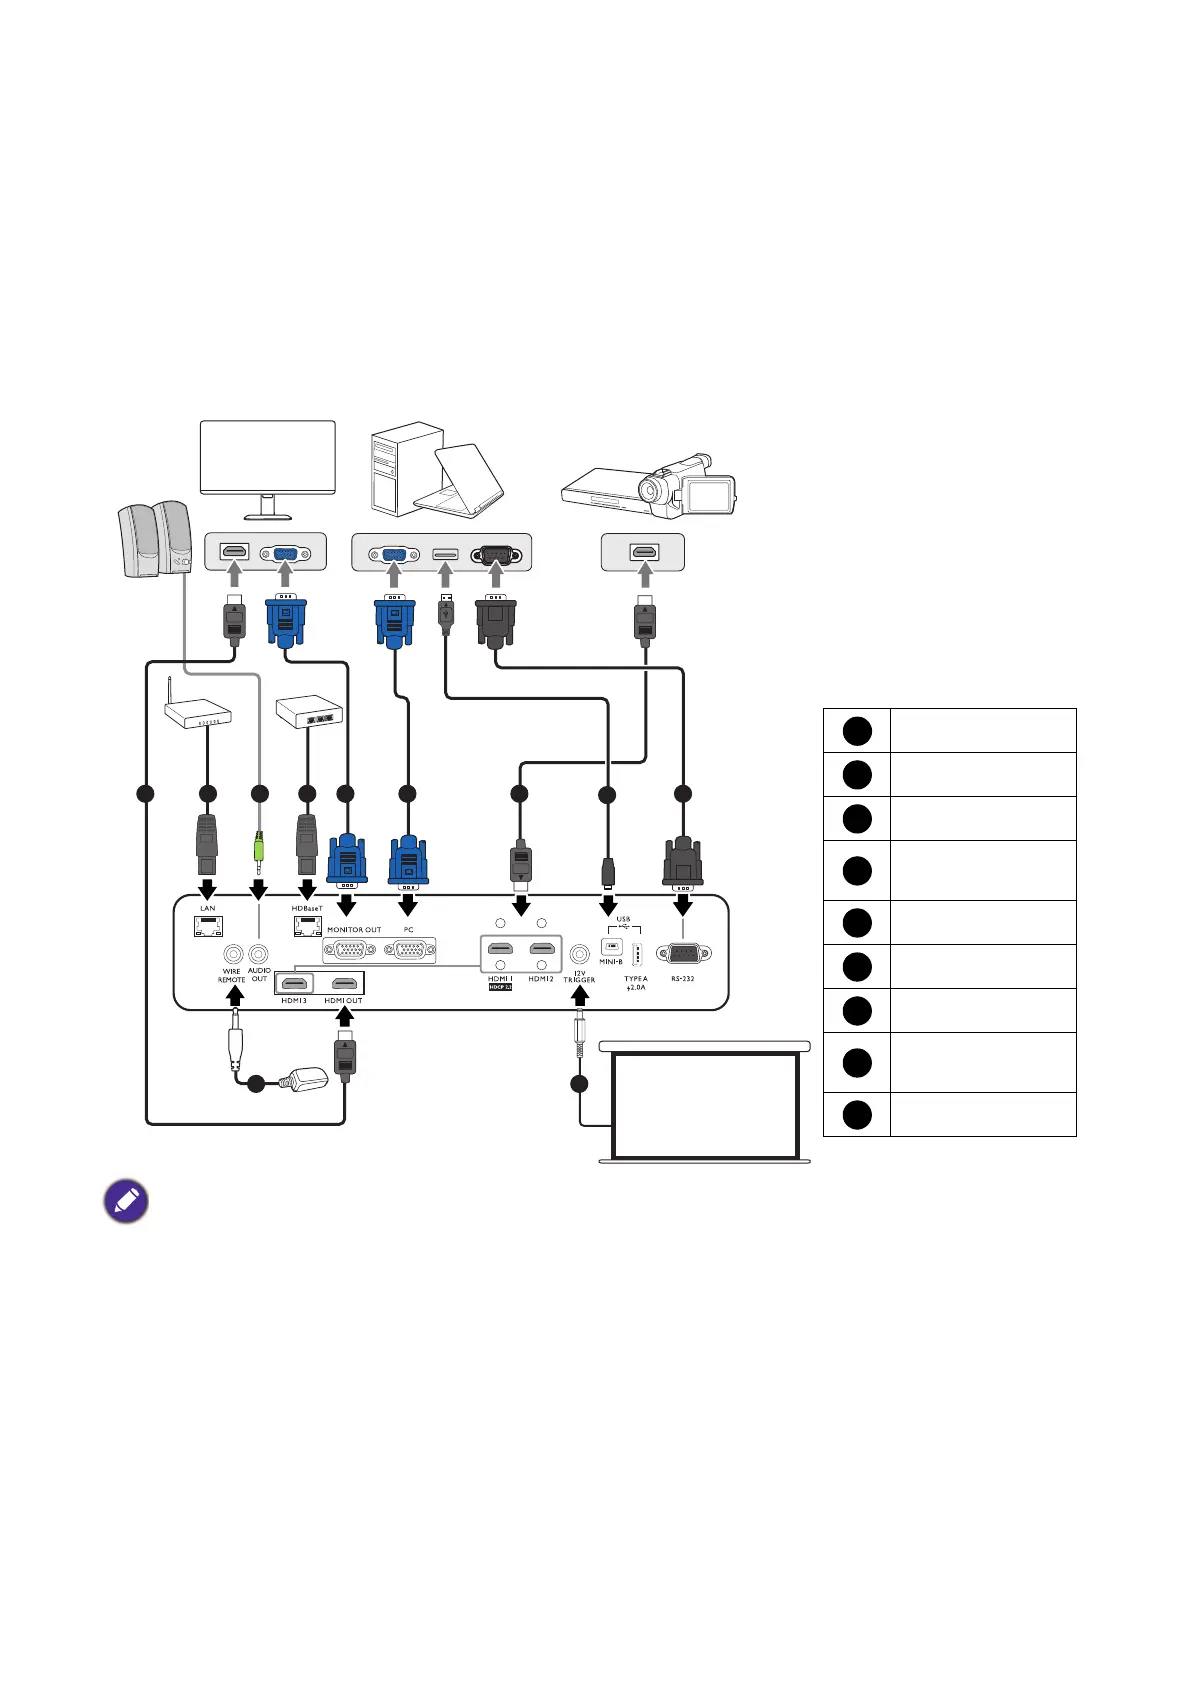
Before connecting, carefully read the operating instructions for connecting the external device. When
connecting a signal source to the projector, be sure to:
1. Turn all equipment off before making any connections.
2. Use the correct signal cables for each source.
3. Ensure the cables are firmly inserted.
• In the connections above, some cables may not be included with the projector (see Shipping contents on page 6).
They are commercially available from electronics stores.
• The connection illustrations are for reference only.
• Before connecting a cable to the projector or to a device that is connected to the projector, touch any nearby
metallic objects to remove any static electricity from your body.
• Do not use unnecessarily long cables to connect the projector or a device to the projector. Using a longer cable
that is wound makes it act like an antenna, making it more susceptible to noise.
• When connecting cables, connect GND first and then insert the connecting terminal of the connecting device.
• Many notebooks do not turn on their external video ports when connected to a projector. Usually a key combo
like FN + function key with a monitor symbol turns the external display on/off. Press FN and the labeled function
key simultaneously. Refer to your notebook's documentation to find your notebook's key combination.
• If the selected video image is not displayed after the projector is turned on and the correct video source has been
selected, check that the video source device is turned on and operating correctly. Also check that the signal cables
have been connected correctly.
Notebook or desktop
computer
A/V device
HDMI cable
RJ-45 cable
Audio cable
HDBaseT matrix
switcher
VGA cable
USB cable
RS232 cable
Electric screen,
etc.
IR extender


 To Next Page