EasyManua.ls Logo

BenQ W2710 - User Manual

BenQ W2710
23 pages
Print Icon
To Next Page IconTo Next Page
Loading...
W2710/W2710i
HT3560/HT3560i
Projector RS232 Command Control
Installation Guide
Question and Answer IconNeed help?

Do you have a question about the BenQ W2710 and is the answer not in the manual?

Summary

Introduction

Wire arrangement

Details the wire connections for projector control.

RS232 pin assignment

Outlines the pin assignments for the RS232 serial port.

Connections and communication settings

RS232 serial port with crossover cable

Explains how to connect using an RS232 serial port and a crossover cable.

Settings for serial port connection

Details COM port identification, selection, and serial port setup parameters.

RS232 via LAN

LAN connection settings

Explains how to find the projector's IP address and configure network settings for RS232 control.

RS232 via HDBaseT

HDBaseT connection settings

Details how to set up RS232 communication over an HDBaseT connection.

Command table

FAQ Video

Overview

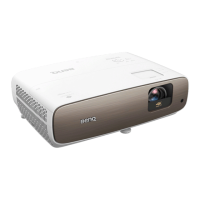
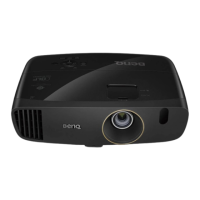
This document serves as an installation guide for controlling BenQ W2710/W2710i and HT3560/HT3560i projectors via RS232 commands. It outlines the necessary steps for establishing connections and configuring communication settings, followed by a comprehensive table of RS232 commands. The guide is designed to assist users in integrating their BenQ projectors into a controlled environment, allowing for remote operation and management from a computer.

Function Description

The primary function of this guide is to enable users to control their BenQ projectors remotely using RS232 commands. This capability allows for a wide range of operational controls, from basic power management to intricate picture and audio adjustments, as well as system settings. The RS232 interface provides a robust and reliable method for integrating the projector into a larger control system, such as a home automation setup or a professional AV installation.

The projector can be controlled through various connection methods:

  • RS232 Serial Port with a Crossover Cable: This is a direct serial connection between a computer (PC or laptop) and the projector using a D-Sub 9 pin crossover cable. This method is ideal for local control where the computer is in close proximity to the projector.
  • RS232 via LAN: For network-based control, the projector can be connected to a LAN via an RJ45 port. This allows for remote control over a network, making it suitable for installations where the projector is located away from the control computer.
  • RS232 via HDBaseT: In setups utilizing HDBaseT compatible devices, the RS232 control signals can be transmitted alongside video and audio over a single LAN cable. This simplifies cabling in complex installations and extends the reach of RS232 control.

The command set covers a broad spectrum of projector functions, including:

  • Power Control: Commands to turn the projector on and off, and to check its power status.
  • Source Selection: Ability to switch between various input sources such as COMPUTER/YPbPr, DVI-D, HDMI, Composite, S-Video, Network, USB Display, USB Reader, HDBaseT, DisplayPort, 3G-SDI, and Smart System.
  • Audio Control: Commands for adjusting volume, muting/unmuting audio, and selecting audio sources (e.g., Audio-Computer1, Audio-Video/S-Video, Audio-Component, Audio-HDMI).
  • Picture Mode Selection: Access to various predefined picture modes like Dynamic, Presentation, sRGB, Bright, Living Room, Game, Cinema (Rec.709), Standard/Vivid, Football, Football Bright, DICOM, THX, Silence mode, DCI-P3 mode (D. Cinema), Vivid, Infographic, User1, User2, User3, ISF Day, ISF Night, 3D, Sport, HDR10, HLG, and Spreadsheet.
  • Picture Setting Adjustments: Fine-tuning of picture parameters such as Contrast, Brightness, Color, Sharpness, Flesh Tone, Color Temperature (Warmer, Warm, Normal, Cool, Cooler, Native), Aspect Ratio (4:3, 16:6, 16:9, 16:10, 2.35:1, Auto, Real, Letterbox, Wide, Anamorphic, Anamorphic 2.35, Anamorphic 16:9), Keystone correction (Vertical, Horizontal, Rotate), Overscan adjustment, and 4 Corners adjustment.
  • Operation Settings: Control over quick cooling, quick auto search, menu position, direct power on/off, signal power on/off, standby settings (network, microphone, monitor out), digital zoom, brilliant color, HDR mode (Auto, SDR, HDR10, HLG), and resetting picture settings.
  • Lamp Control: Management of lamp modes (Normal, Eco, SmartEco, SmartEco mode 2, SmartEco mode 3, Dimming, Custom, Light level for custom mode), and checking lamp hours.
  • Miscellaneous Controls: Functions such as blanking the screen, freezing the image, menu navigation (Up, Down, Right, Left, Enter, Back), 3D settings (3D Sync Off/Auto/Top/Frame Sequential/Frame Packing/Side by Side/Inverter Disable/Inverter/2D to 3D/nVIDIA), remote receiver settings, instant on/off, lamp saver mode, projection log in code, broadcasting, and AMX device discovery.
  • Installation Settings: Commands for loading and saving lens memories, and resetting lens to center.
  • Color Calibration (Service Only): Advanced color calibration parameters including Tint, Gain (Red, Green, Blue), Offset (Red, Green, Blue), Primary Color, Hue, Saturation, and Color Gamut (Auto, BT.709, BT.2020, DCI-P3). Dynamic Iris control (ON/OFF) and Color Calibration Save/Pattern Display are also available.

Usage Features

The guide emphasizes a structured approach to setting up RS232 control:

  1. Connection: Users must first choose the appropriate connection method (serial port, LAN, or HDBaseT) and ensure the physical connection is correctly established. This includes using a crossover cable for direct serial connections and ensuring network connectivity for LAN/HDBaseT.
  2. Communication Settings: After physical connection, the guide details how to configure communication parameters on the computer. For serial connections, this involves identifying the COM Port in Device Manager and setting up the serial port with specific baud rate, data length, parity check, stop bit, and flow control. The default baud rate is highlighted as a critical setting. For LAN connections, users need to find the projector's IP address from its OSD menu and input the correct TCP port number (8000).
  3. Command Execution: Once the connection and settings are verified, users can send RS232 commands to the projector. The command table provides the exact ASCII strings for each function, including the required <CR> (carriage return) at the end of each command. Commands are typically in the format <CR>*command#<CR> or <CR>*command=value#<CR>.
  4. Read Commands: Many commands have a corresponding "Read" operation, allowing users to query the current status or value of a particular setting (e.g., <CR>*power=?#<CR> to check power status). This is crucial for feedback and verification in automated systems.
  5. Value-Based Commands: Several commands allow for setting specific values (e.g., brightness, contrast, color temperature). These commands typically use "value" as a placeholder, which should be replaced with the desired numerical or descriptive setting.
  6. Increment/Decrement Commands: For settings like brightness, contrast, and color, there are also commands to increment or decrement the value (e.g., +#<CR> or -#<CR>), providing granular control without needing to know the exact current value.
  7. Model-Specific Functions: The guide explicitly states that available functions and commands may vary by model. Users are advised to consult the specifications and user manual of their specific projector for accurate product functions. This ensures that users do not attempt to use commands that are not supported by their device.
  8. On-Screen Image Reference: The document notes that on-screen images are for reference only and may vary based on the operating system, I/O ports, and connected projector specifications. This manages user expectations regarding visual consistency.

Maintenance Features

While the guide primarily focuses on control, some commands can be considered maintenance-related:

  • Reset Picture Settings: Commands like rstcurpicsetting#<CR> (reset current picture settings) and rstallpicsetting#<CR> (reset all picture settings) allow users to revert picture adjustments to default values, which can be useful for troubleshooting or preparing the projector for a new setup.
  • Lamp Hour Monitoring: The Itim=?#<CR> command allows users to read the lamp hours, which is a critical maintenance indicator for projectors. This helps in planning lamp replacements and ensuring optimal performance.
  • Quick Cooling: The qcool=on<CR> and qcool=off<CR> commands, along with qcool=?<CR> for status, relate to the projector's cooling system. Proper cooling is essential for the longevity and stable operation of the projector lamp and internal components.
  • High Altitude Mode: Commands for Highaltitude=on#<CR> and Highaltitude=off#<CR> are important for projectors operating in high-altitude environments, where different cooling profiles are required to prevent overheating.
  • Projection Log In Code: The prjlogincode=on#<CR> and prjlogincode=off#<CR> commands, along with prjlogincode=?#<CR> for status, suggest the presence of logging features that could be used for diagnostic purposes or tracking projector usage.
  • AMX Device Discovery: Commands for amxdd=on#<CR> and amxdd=off#<CR>, and amxdd=?#<CR> for status, indicate support for AMX device discovery, which is a feature for integrating the projector into AMX control systems, simplifying setup and management in professional environments.
  • Color Calibration (Service Only): The extensive list of color calibration commands, while marked "Only for service," provides a deep level of control over the projector's color output. These commands are crucial for professional calibration and maintaining color accuracy over the projector's lifespan, ensuring consistent image quality.
  • Dynamic Iris Control: Commands for diris=on#<CR>, diris=off#<CR>, and diris=?#<CR> allow control over the dynamic iris, which helps in optimizing contrast and black levels. Proper management of this feature can contribute to better image quality and potentially extend the life of the lamp by adjusting light output as needed.

The guide also includes a section for "FAQ Video" with links to YouTube tutorials covering common setup and control scenarios, offering an additional resource for troubleshooting and understanding practical applications of RS232 control. This demonstrates a commitment to supporting users in maintaining and effectively utilizing their BenQ projectors.

BenQ W2710 Specifications

General IconGeneral
Number of colors1.07 billion colors
Native aspect ratio16:9
Vertical scan range23 - 120 Hz
Horizontal scan range15 - 135 kHz
Projection technologyDLP
Contrast ratio (typical)50000:1
Screen size compatibility- \
Projector native resolution2160p (3840x2160)
Keystone correction, horizontal-30 - 30 °
Light source typeLamp
Service life of light source4000 h
Service life of light source (economic mode)10000 h
Offset100 %
Throw ratio1.13~1.47
Focal length range12 - 15.6 mm
Aperture range (F-F)1.9 - 2.47
Vertical lens shift range0 - 10 %
Noise level30 dB
Preset modes3D, Bright, Cinema, ISF Day
Noise level (economic mode)28 dB
High Dynamic Range (HDR) supportedYes
High Dynamic Range (HDR) technologyFilmmaker Mode, High Dynamic Range 10 (HDR10), Hybrid Log-Gamma (HLG)
DVI portNo
HDMI ports quantity3
Serial interface typeRS-232
USB 2.0 ports quantity1
Audio decodersDolby Atmos
RMS rated power10 W
Number of built-in speakers2
Operating temperature (T-T)0 - 40 °C
Power sourceAC
AC input voltage100 - 240 V
AC input frequency50 - 60 Hz
Power consumption (standby)0.5 W
Power consumption (typical)330 W
Product colorWhite, Grey
Market positioningHome cinema
Video color modesBright cinema
Supported video modes1080p, 2160p
Supported graphics resolutions640 x 480 (VGA), 3840 x 2160
Security updates end date31/12/2026
Weight and Dimensions IconWeight and Dimensions
Depth263 mm
Width380 mm
Height127 mm
Weight4200 g

Related product manuals