BERNINA International AG · Seestrasse 161 · CH-8266 Steckborn · Switzerland 21
4.5 Replacing the PCBA-X-Carriage Front resp. X-Carriage Rear.
Removing_the_PCBA_X-Carriage_Front_resp._Rear
Replacing_the_PCBA_X-Carriage_Front_resp._Rear
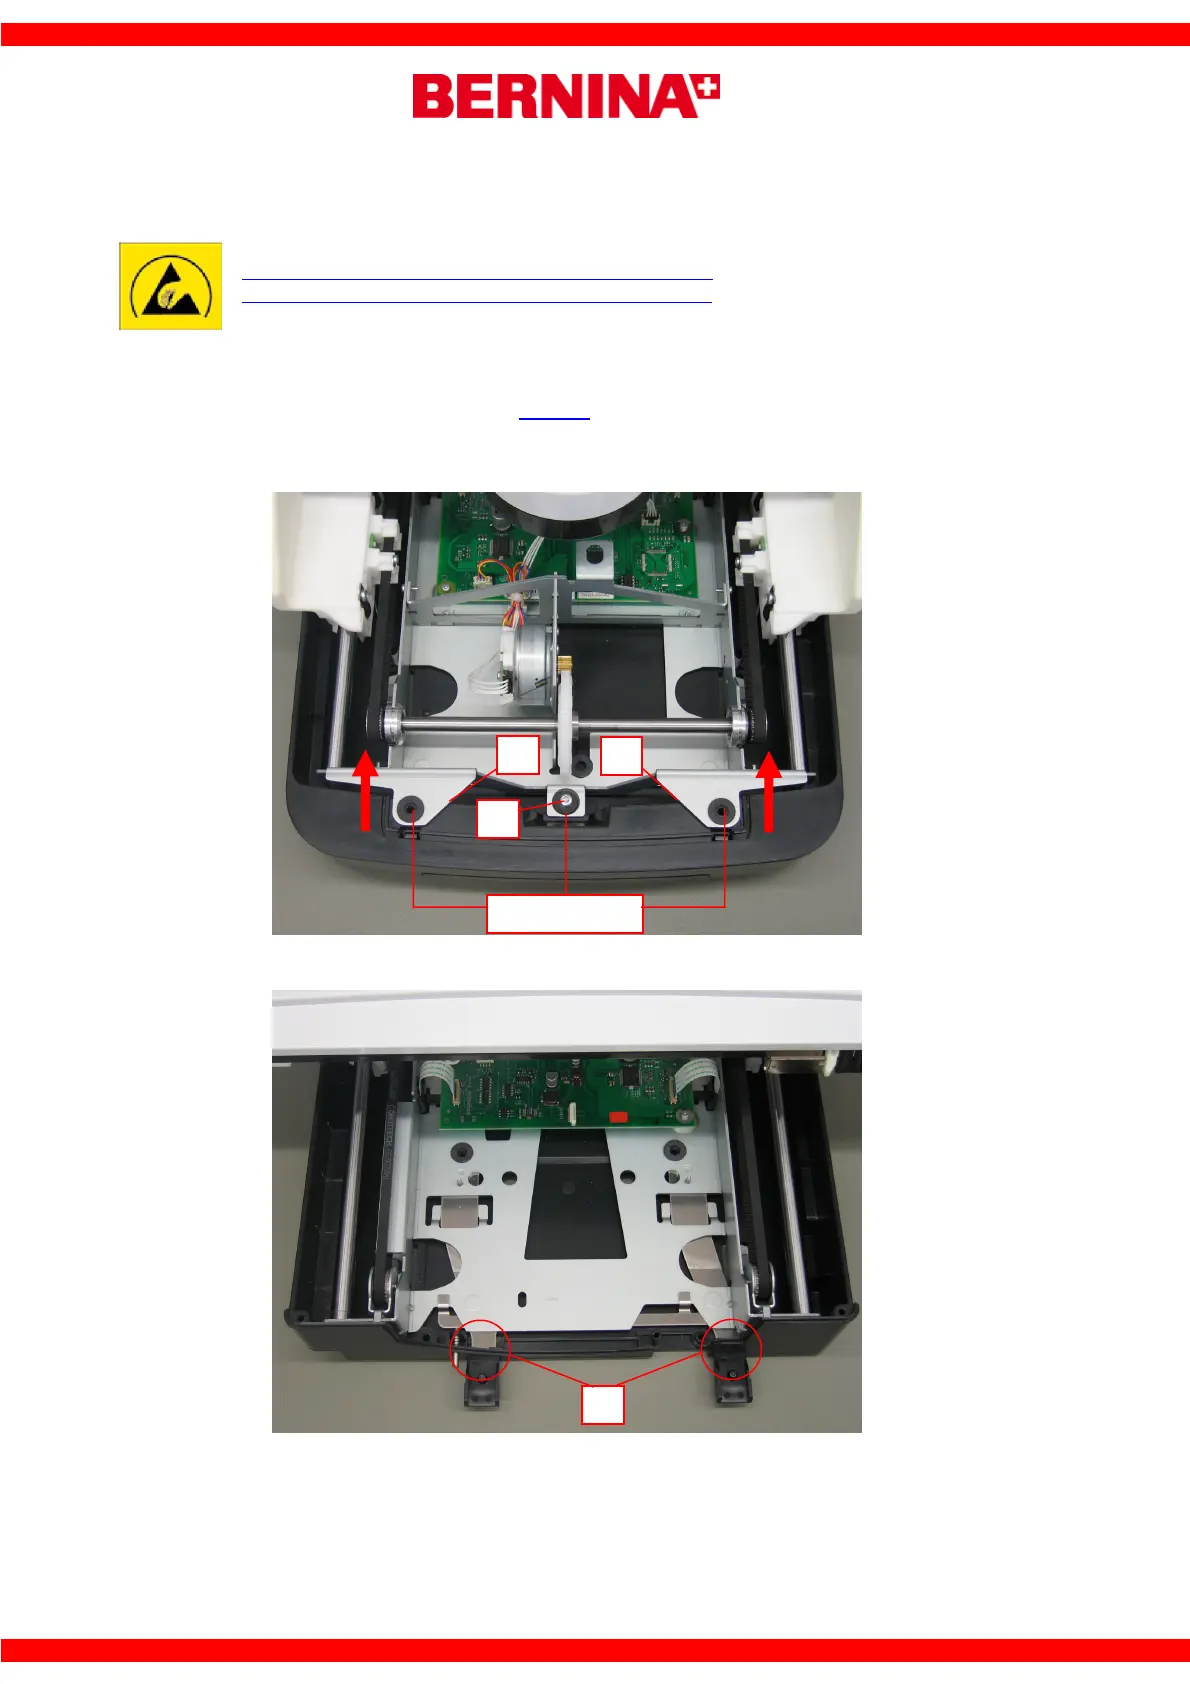
Removing the X-carriage (as a complete part):
See picture 1
• Remove the upper X-Carriage cover (
item 4.1).
• Remove screw a (T20 M4x16) and washer.
• Lift the X-Carriage upwards ca. 45° at points b.
Picture 1
• Slide the X-Carriage out through the openings in the base cover c and remove (see picture 2).
Picture 2
c
a
b
b
Rubber
ads
 Loading...