6 © 2013 Finishing Brands UK Ltd.
E
OPERATION
1. Mix, prepare and strain the material to be sprayed according to the paint manufacturers
instructions. Use a lint free mesh to strain the material.
2. Adjust the spray gun controls and atomizing pressure before turning on the air and coating material
supplies.
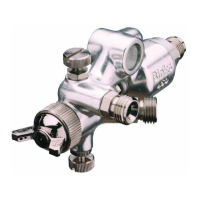
2.1. Fan pattern valve 184963 at the bottom of gun body (head side). Turn adjusting screw to fully open
position, by turning counter-clockwise.
2.2. Atomizing control valve 184963 at the top of the gun body. Turn adjusting screw to fully open
position, by turning counter-clockwise.
2.3. Needle adjustment. Fully close needle adjusting screw184581, release locknut 183981, turn
clockwise until resistance is felt, then turn to the fully open position by turning counter-clockwise
ten turns and secure with locknut 183981.
3. Regulate the air supply pressure to 4,5 bar (67 lbf/in²) and coating material pressure to 1 bar (15
lbf/in2)
4. Turn on air and coating material supplies and test spray by operating control valve. The
recommended spray distance is 150 mm (6"). If the finish is too wet, reduce the coating material
supply pressure, or turn the needle adjusting screw 184581 fully clockwise then gradually open
until the desired pattern is achieved. If the atomization is too coarse increase the air pressure. The
spray width can be reduced from fan to round by turning fan adjusting valve 184963 at the bottom
clockwise.
NOTE: If both ‘FAN’ and ‘ATOM’ valves 184963 are closed the air supply operates the cylinder
only and will allow coating material to be jetted from the nozzle.
5. To prevent accidental discharge of coating material, always turn off and release pressure when the
gun is not in use.
PREVENTIVE MAINTENANCE
FLUSHING THE SYSTEM.
1. Turn off coating material supply and relieve pressure.
2. Close both air valves 184963 ‘FAN’ and ‘ATOM’.
3. Replace coating material with a suitable solvent, reduce pressure and turn on supply.
4. Turn Remove air cap, trigger the gun by operating the control valve. Flush system until clean.
Clean air cap by immersing in solvent, brush or wipe clean. If any holes in the air cap are blocked use a
toothpick or broom straw to remove the obstruction. Never use a steel wire or hard implement which
will damage the air cap and result in a distorted pattern.
Lubrication: Daily lubricate with light mineral oil the valve stems 184578 and needle seal 180295
through holes in seal retainer 180296.
Occasionally coat the gun body cylinder section and springs (160170 & 160171) with mineral based
grease.