32
2. In the “Devices” frame, click on the “+” button to add the instrument of interest to the
list. Only one session of EC-Lab
®
is needed to control several instruments.
Fig. 34: “Devices”
frame for connection.
Note: This step is only required the first time. The instruments configured previously
are saved and will be displayed in the list of device each time EC-Lab
®
is opened. In
that case, go directly to step 6.
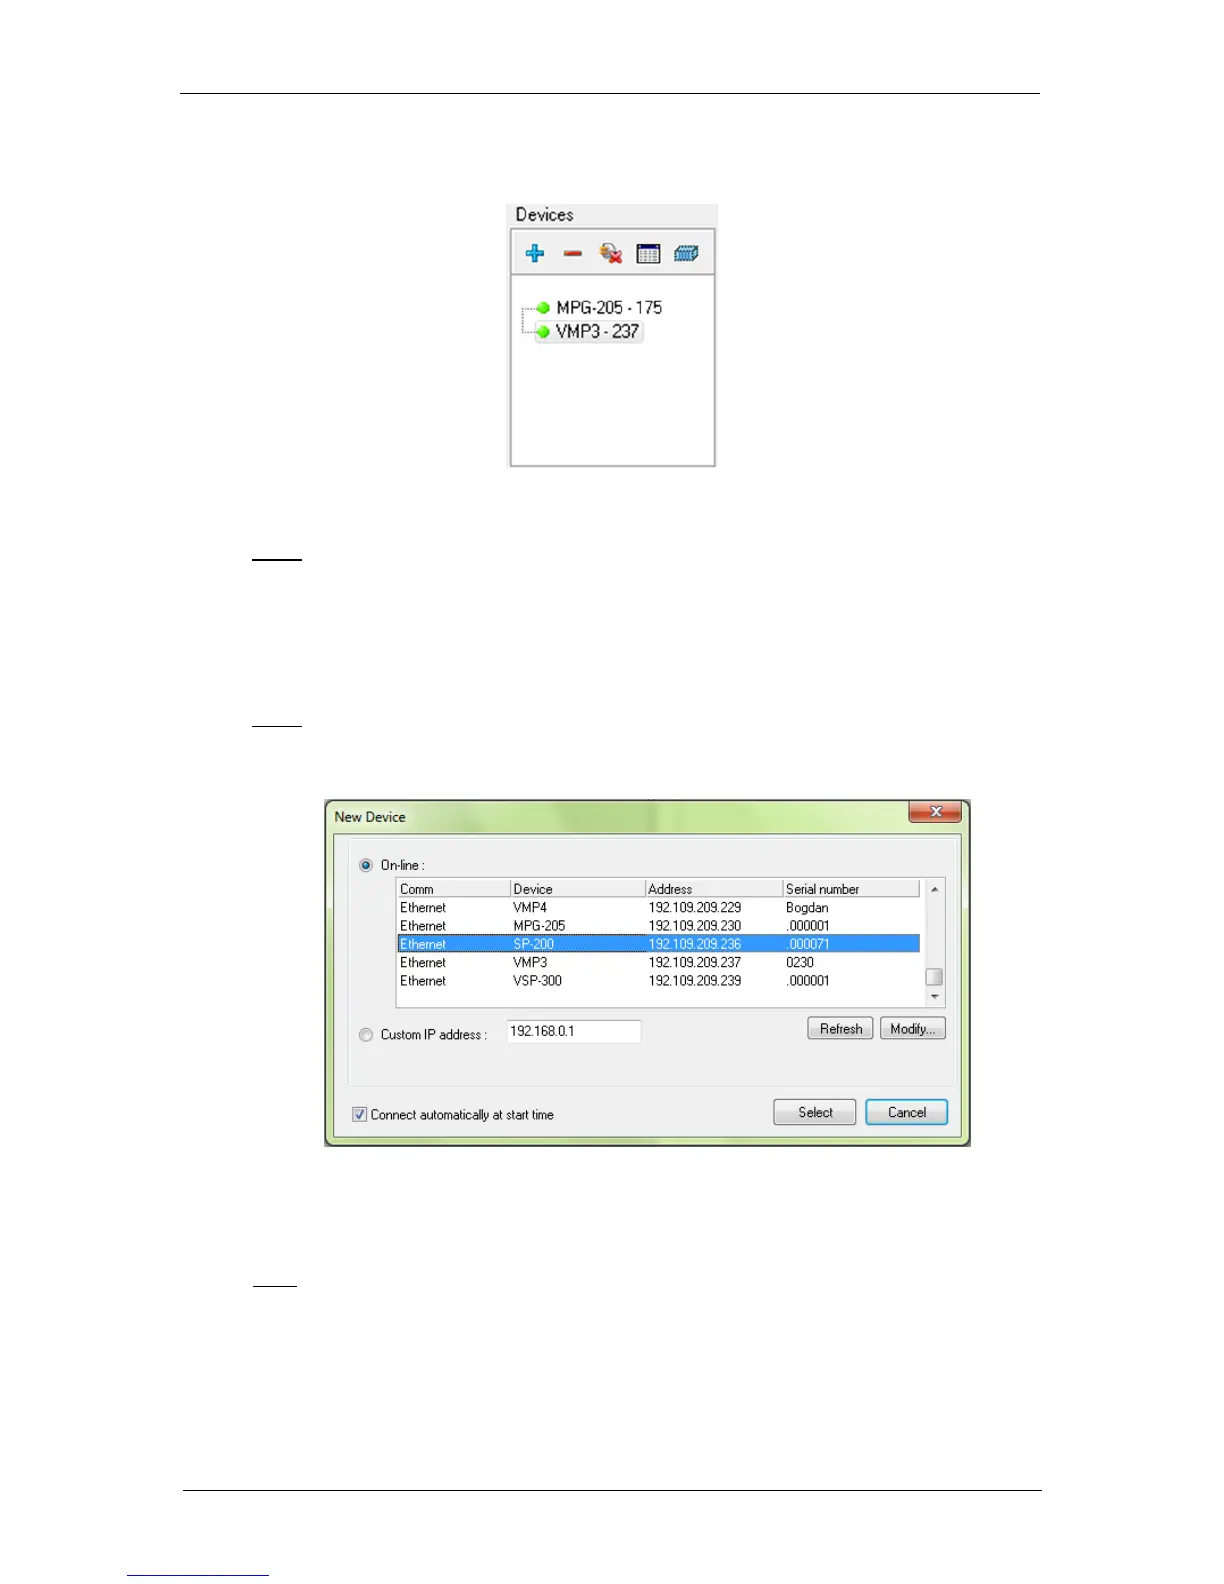
3. The window shown in Fig. 35 appears. Click on “Refresh” to see the instruments
present on your network.
Note: The automatic search frame shows the name of the instruments detected with
their serial numbers (#). A MAC address is given to each instrument at the factory. The
MAC address is used to detect the instrument in a LAN even if its IP Address is not
valid in the network. It is also used for the detection of instruments connected by USB.
Fig. 35: “New Device” window to select and add an instrument
to the current devices.
4. Select the instrument and click on the “Select” button.
Note: If the IP address of the instrument is not valid, it has to be changed (see next
section).
5. The instrument selected appears in the list displayed in the “Device” frame. Then, the
connection is established automatically and the circle to the left of the device name will
turn green.