11
BLOWER INSTALLATION
ALWAYS HAVE ALL UTILITY LINES AND EQUIPMENT MARKED BY A LOCATING SERVICE PROVIDER PRIOR TO
PERFORMING ANY WORK.
ALL ELECTRICAL WORK MUST BE PROPERLY PERFORMED BY A QUALIFIED ELECTRICIAN PER ALL APPLICABLE CODES.
FAILURE TO DO SO MAY RESULT IN SEVERE BODILY INJURY OR DEATH.
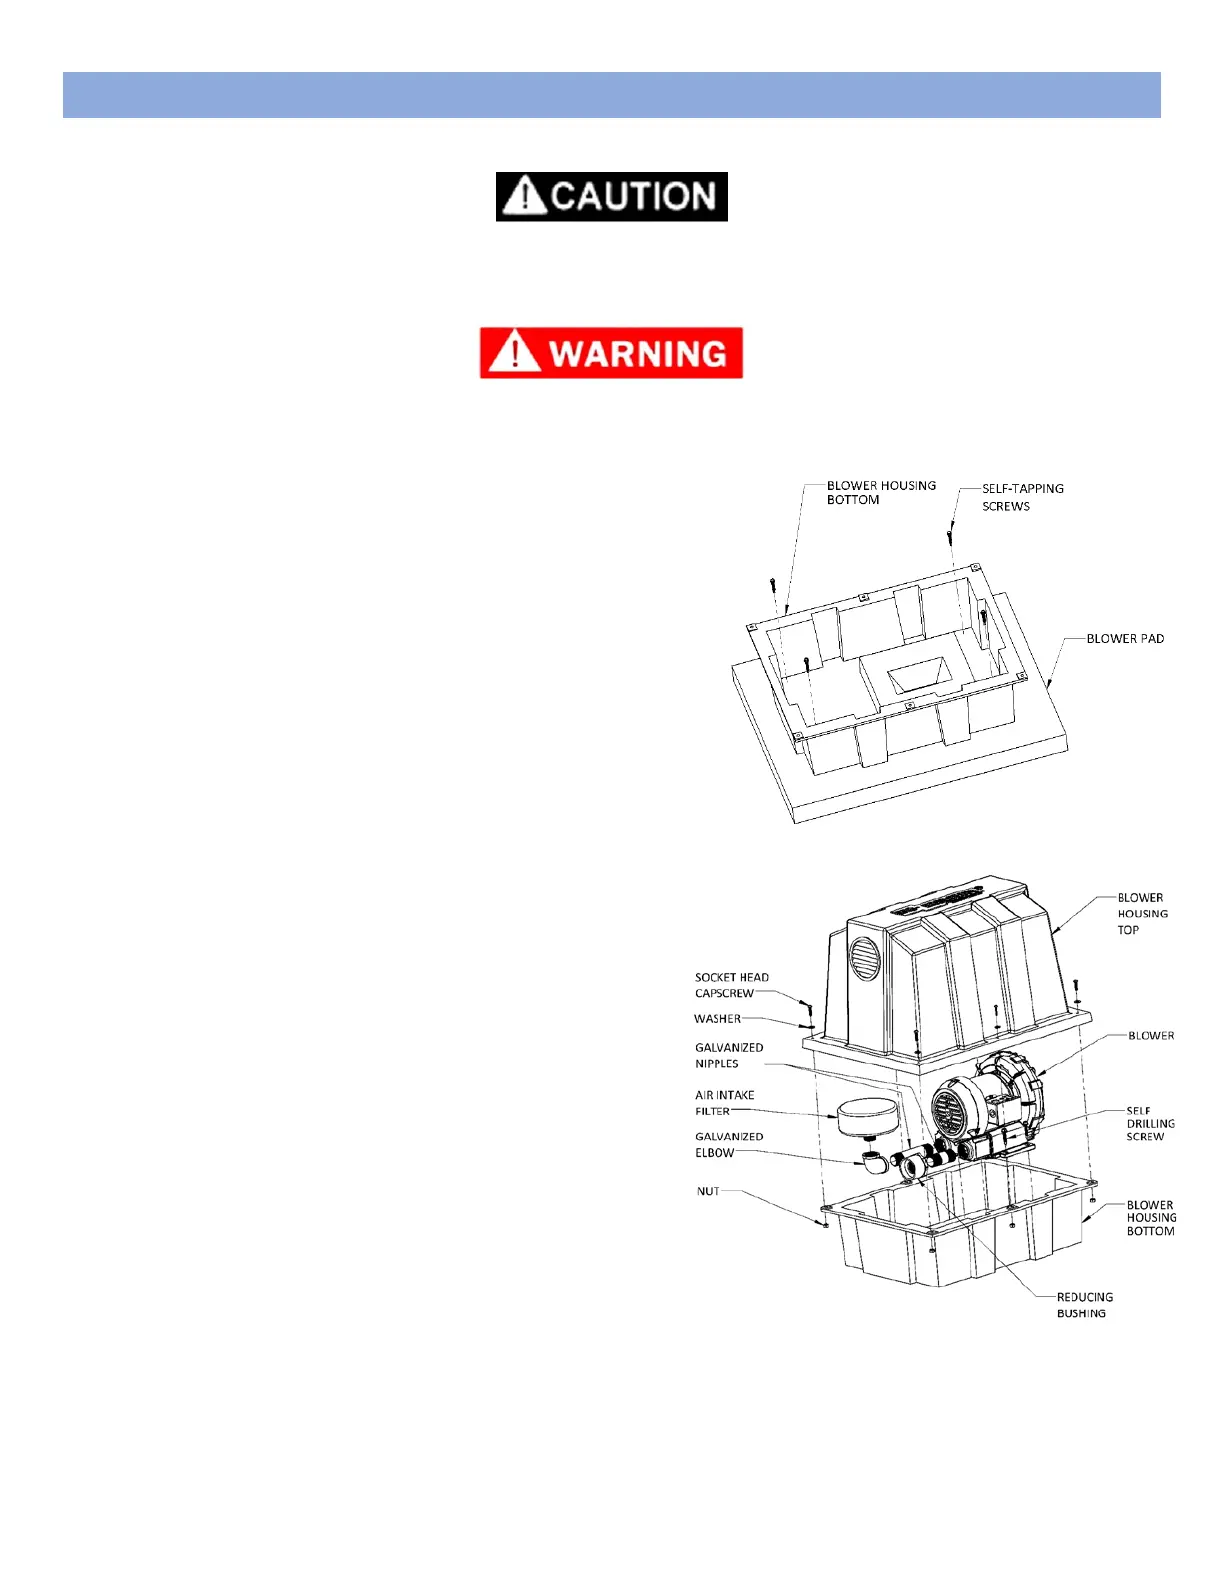
1. The blower and blower housing must be mounted on a
pad to avoid settling. All conduit/piping should pass
through the pad from below. Blower must be located
above flood levels.
2. Secure lower blower housing to pad using 4 supplied
#14 x 1½” self-tapping screws. Drill screws directly into
blower pad.
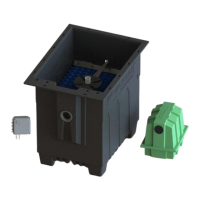
3. Connect initial blower fittings (right).
4. Connect airline from FAST® unit to blower outlet
using required piping (not included). We
recommend a union be installed inside the housing
on the blower outlet piping for easy removal of
blower. Keep all debris out of airline. All
connections must be air-/watertight.
5. Connect incoming power to the blower at the
blower junction box. Be sure to follow the supplied
wiring diagram for the voltage at your specific
location. All blowers are dual voltage and must be
connected according to the proper diagram. Blower
diagrams can be found on the blower’s shipping
box and at the end of this manual.