14
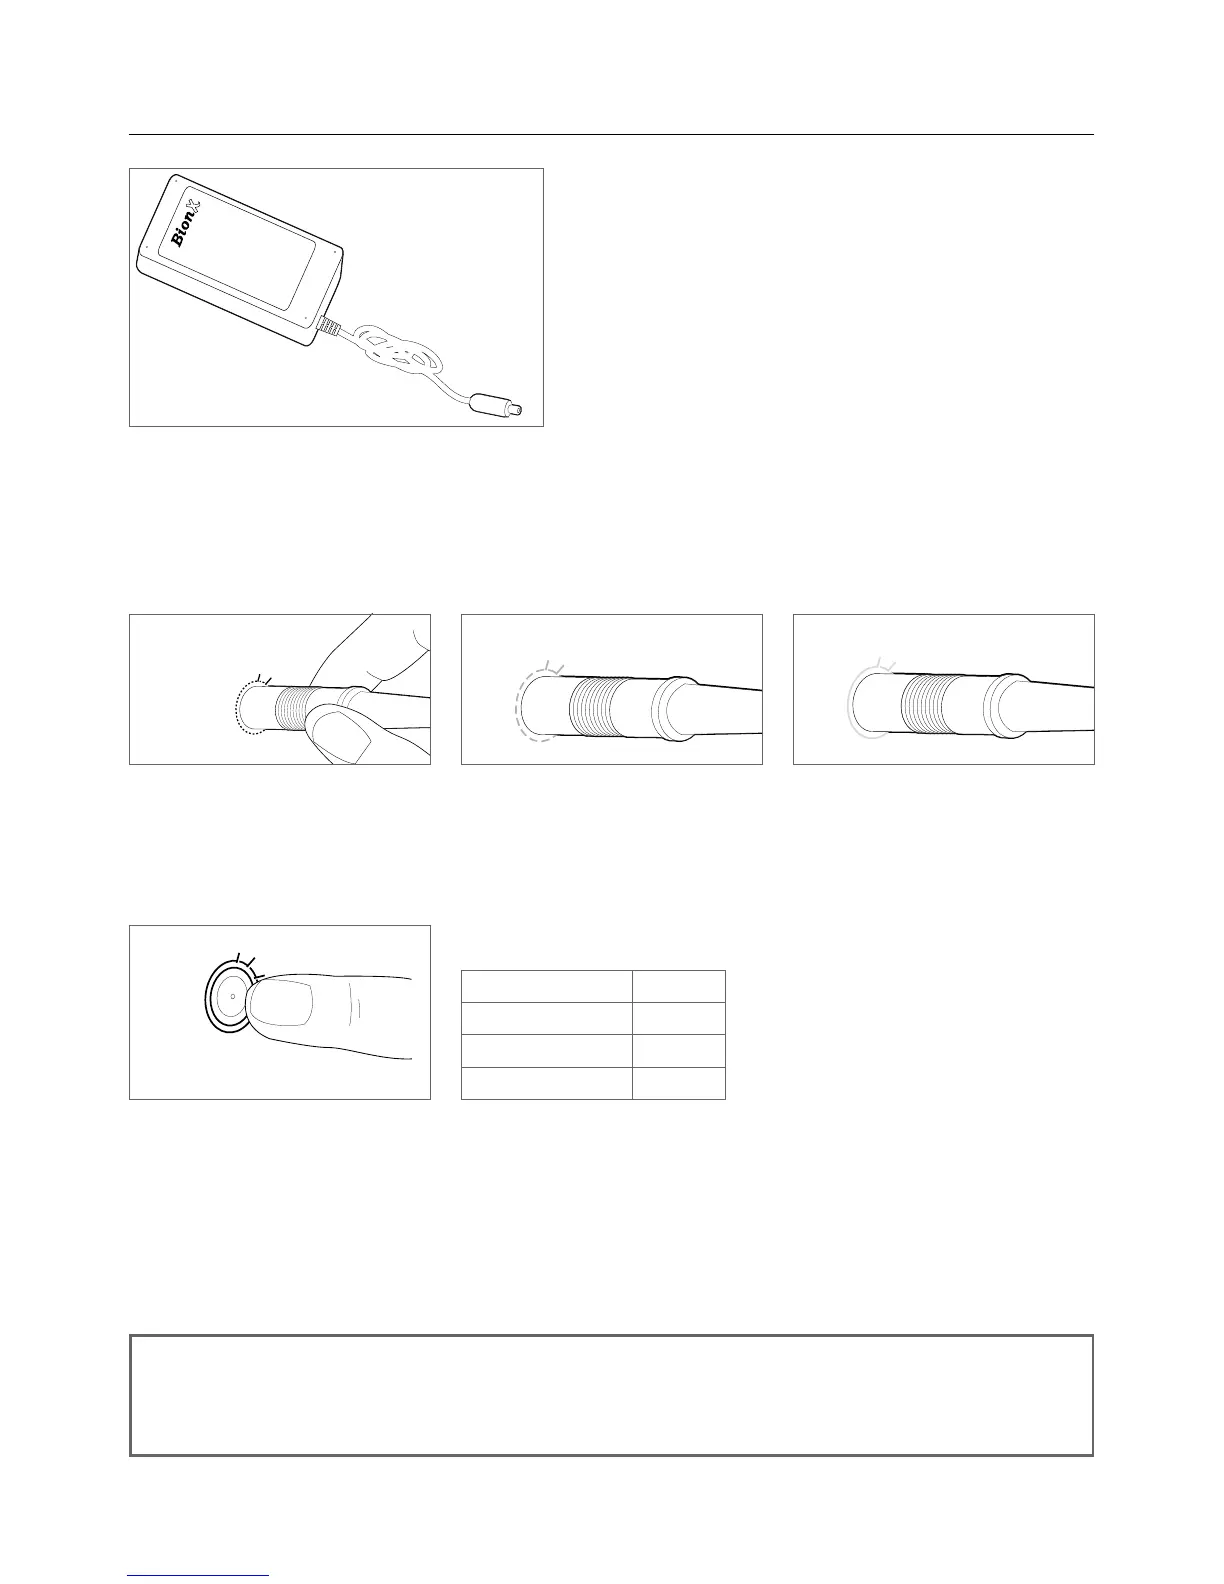
Power supply
SL system charging procedure (power supply)
• Connect power supply and battery by inserting the
charge connector into the touch port – the system
can be turned on or off
• Connect the plug of the power supply with the
power outlet
• Thebatterytouchport(LEDringaroundthecharging
connector) lights up red upon inserting and then
turns to amber during the charging process
• When fully charged, the colour of the LED ring
changes to green. The battery charging process is then complete
• Following this procedure the charging connector should be disconnected from the battery
• During the charging process you can check the battery state of charge through the console if the
batteryisconnectedtothesystem-a48Vsystemcanbeswitchedonwhileitischarging
Battery state Colour
100-85 % Green
85-25 % Amber
< 25 % Red
Checking the 48V Battery State of Charge
• Swipe your finger slowly over the touch port
• Battery state of charge LED will illuminate
• Allowten(10)secondsbeforecheckingstateofchargeagain
NOTE
The delivered power supply is suitable for the voltage ranges 110-115V or 220-230V.
There is no need to manually set the voltage range for international use.
The battery is fully charged after about 4 to 5 hours. Make sure that a completely charged battery is no
longer connected to the charger after the charging procedure is completed.
Touch port green = fully chargedTouch port amber = chargingTouch port red =
upon inserting