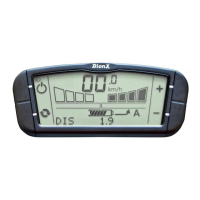
22
Installing the rear wheel
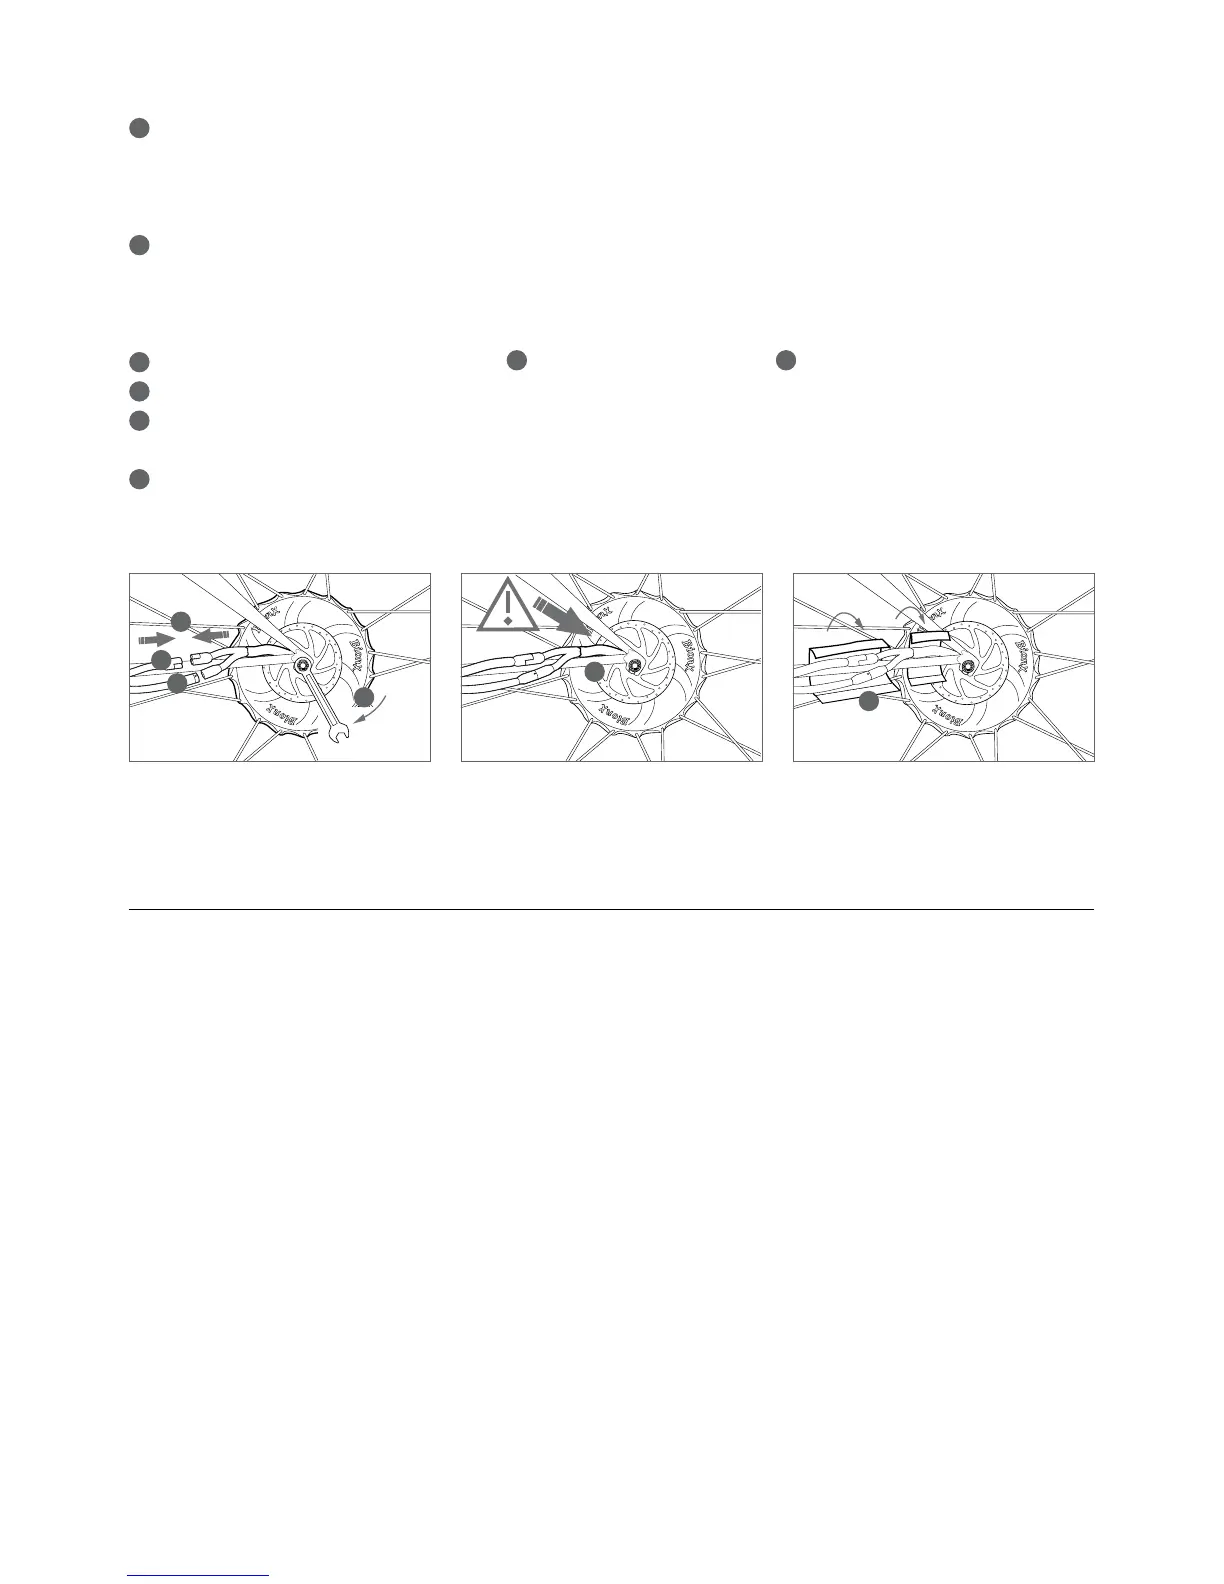
1
Guidetherearwheelaxleintothedropoutsandmakesurethatthebrakedisc(onmodelswithdisc
brakes) is inserted between the brake pads. Also make sure that the flat area at the left of the rear axle
(torquereactioncollar)isalignedsothatittsintotheleftdropout(noillustration).Makesuretheaxle
is inserted all the way in the dropouts
2
Tightentheaxlenutsontherearwheelwith40Nm/30lb-ft(=VERYTIGHT!).Thistorqueisessential
for the correct function of the propulsion system. If you do not have a torque wrench, use a normal
ringwrench.Haveyourdealercheckthetorqueoftheaxlenutsasquicklyaspossible.Useonlythe
original axle nuts; otherwise you run the risk of damaging the axle threads
3
Pluginthecableconnections(POWER
A
beforeCOMMUNICATION
B
)
4
Keepthemotorcablesclearofthebrakedisc(onmodelswithdiscbrakes)andthemotorcasing
5
Nowreplacethecablepull.Re-installthecableguideoftherearwheelbrake(rimbrakesonly),and
correctlyadjusttherearwheelbrake(noillustration)
6
Place the larger neoprene cover over the plug-in connections, and the smaller neoprene cover closer to
thedisc/motortopreventthecablesfromwear
Maintenance and Care
We recommend to have the spoke tension of the rear wheel and the torque of all screws checked by your
qualieddealeraftertherst200km(125miles).
In order to ensure extended use of the propulsion system, all plug-in contacts of the system should be
checked every two to three months and cleaned with a soft and dry brush, if necessary. It must be ensured
that no dirt or humidity penetrates the battery docking station when the battery is removed. The electric
motor is a brushless DC-motor that does not have to be serviced.
15mm