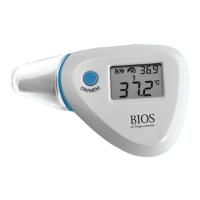
3. INSERTING THE BATTERY
1. Open the battery cover located on the lower inner side of the
thermometer.
2. Insert the battery (included) under the metal hook on the left side and
press the battery down until you hear a click.
3. Replace the battery cover.
4. REAL TIME CLOCK SETTING
1. Power on: Press the ‘ON/MEM’ button. The thermometer is ready for
use after hearing two beeping sounds.
2. Press and hold the ‘ON/MEM’ button for 5 seconds until the <<SET>>
icon starts to flash in the upper right hand corner of the screen. This
indicates that you are in the setting mode screen. (see Figure 2 below)
3. Press the ‘SCAN’ button to make the ‘24’ icon
flash. This indicates that you are in the 12/24 hour
setting screen. Press the ‘SCAN’ button again to
change/set the time format from ‘24’ (24 hour) to
‘12’ (12 hour).
4. Press the ‘ON/MEM’ button to move through the setting sequence
shown below. Use the ‘SCAN’ button to change the hour, minutes, year,
month, and day settings while flashing.
FIGURE 2
5