EasyManuals Logo

Biostar H410MH S2 2.0 User Manual

Biostar H410MH S2 2.0
125 pages
To Next Page IconTo Next Page
To Previous Page IconTo Previous Page
Page #8 background imageLoading...
Page #8 background image
8 | Chapter 2: Hardware installaon
Chapter 2: Hardware installaon
2.1 Install Central Processing Unit (CPU)
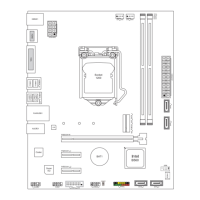
Step 1: Locate the CPU socket on the motherboard
Note
» 
»
Remove pin cap before installaon, and make good preservaon for future use. When the CPU is 
removed, cover the pin cap on the empty socket to ensure pin legs won’t be damaged.
» 
»
The motherboard might equip with two dierent types of pin cap. Please refer below instrucon to 
remove the pin cap.
Step 2: Pull the socket locking lever out from the socket and then raise the lever up.
Step 3: Remove the Pin Cap.

Table of Contents

Questions and Answers:

Question and Answer IconNeed help?

Do you have a question about the Biostar H410MH S2 2.0 and is the answer not in the manual?

Biostar H410MH S2 2.0 Specifications

General IconGeneral
Form FactorMicro ATX
ChipsetIntel H410
CPU SocketLGA 1200
Memory TypeDDR4
Memory Slots2
Maximum Memory64GB
Memory StandardDDR4 2933/2666/2400/2133
PCIe x16 Slots1
PCIe x1 Slots2
SATA III Ports4
LANRealtek RTL8111H
Video OutputsHDMI, VGA
M.2 Slot1 x M.2 Key M Socket, supports M.2 Type 2280 SATA3 6.0Gb/s SSD
AudioRealtek ALC887
USB 3.2 Gen14 (2 rear, 2 via headers)
USB 2.06 (2 rear, 4 via headers)

Related product manuals