EasyManua.ls Logo

Biostar H61MLC - User Manual

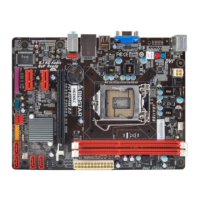
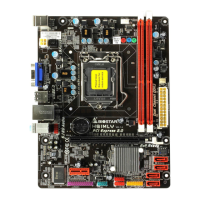
Biostar H61MLC
45 pages
Go to English
Print Icon
To Next Page IconTo Next Page
Loading...
H61MGC / H61MLC Setup Manual
FCC Information and Copyright
This equipment has been tested and found to comply with the limits of a Class
B digital device, pursuant to Part 15 of the FCC Rules. These limits are designed
to provide reasonable protection against harmful interference in a residential
installation. This equipment generates, uses, and can radiate radio frequency
energy and, if not installed and used in accordance with the instructions, may
cause harmful interference to radio communications. There is no guarantee
that interference will not occur in a particular installation.
The vendor makes no representations or warranties with respect to the
contents here and specially disclaims any implied warranties of merchantability
or fitness for any purpose. Further the vendor reserves the right to revise this
publication and to make changes to the contents here without obligation to
notify any party beforehand.
Duplication of this publication, in part or in whole, is not allowed without first
obtaining the vendor’s approval in writing.
The content of this user’s manual is subject to be changed without notice and
we will not be responsible for any mistakes found in this user’s manual. All the
brand and product names are trademarks of their respective companies.
Dichiarazione di conformità
sintetica
Ai sensi dell’art. 2 comma 3 del D.M.
275 del 30/10/2002
Si dichiara che questo prodotto è
conforme alle normative vigenti e
soddisfa i requisiti essenziali richiesti
dalle direttive
2004/108/CE, 2006/95/CE e
1999/05/CE
quando ad esso applicabili
Short Declaration of conf ormity
We declare this product is complying
with the laws in force and meeting all
the essential requirements as specified
by the directives
2004/108/CE, 2006/95/CE and
1999/05/CE
whenever these laws may be applied

Questions and Answers

  • S
    Stephen CurtisJul 30, 2025
    What to do if my Biostar Motherboard does not boot from hard disk drive?
    • T
      tamara09Jul 31, 2025
      If your Biostar Motherboard system isn't booting from the hard disk drive but works fine with the optical drive, first check the cable that connects the disk to the disk controller board. Ensure both ends are securely plugged in. Also, verify the drive type in the standard CMOS setup. It's also important to remember to back up your hard drive, as hard disks can fail at any time.
  • D
    dixonjenniferAug 5, 2025
    How to troubleshoot a Biostar Motherboard with no power?
    • F
      Felicia NicholsAug 5, 2025
      If your Biostar Motherboard system has no power, and the power LED isn't lit while the power supply fan isn't working, ensure the power cable is securely plugged in. If it still doesn't work, try replacing the cable. If problems persist, contact technical support.
  • T
    Teresa MckenzieAug 12, 2025
    Why does my Biostar H61MLC Motherboard show 'Invalid Configuration'?
    • C
      Christina CarpenterAug 12, 2025
      If you see an “Invalid Configuration” or “CMOS Failure” message on your Biostar Motherboard, review your system’s equipment and ensure the correct information is in the setup.
  • F
    Frances WilsonAug 17, 2025
    What to do if Biostar Motherboard is inoperative but lights are on?
    • O
      odrakeAug 17, 2025
      If your Biostar Motherboard system is inoperative but the keyboard lights are on, the power indicator lights are lit, and the hard drives are running, apply even pressure on both ends of the DIMM until the module snaps into place.
  • L
    Laura SwansonAug 23, 2025
    Why won't my Biostar H61MLC Motherboard boot after installing a second hard drive?
    • L
      lphillipsAug 23, 2025
      If your Biostar Motherboard system cannot boot after installing a second hard drive, set the master/slave jumpers correctly. Then, run the SETUP program and select the correct drive types. For compatibility issues, contact the drive manufacturers.

Summary

FCC Information and Copyright

CHAPTER 1: INTRODUCTION

BEFORE YOU START

Essential safety precautions and preparation steps before installing the motherboard.

PACKAGE CHECKLIST

List of accessories and components included in the motherboard package.

MOTHERBOARD FEATURES

REAR PANEL CONNECTORS

MOTHERBOARD LAYOUT

CHAPTER 2: HARDWARE INSTALLATION

INSTALLING CENTRAL PROCESSING UNIT (CPU)

Step-by-step guide for correctly installing the CPU into the motherboard socket.

FAN HEADERS

INSTALLING SYSTEM MEMORY

CONNECTORS AND SLOTS

CHAPTER 3: HEADERS & JUMPERS SETUP

HOW TO SETUP JUMPERS

Explanation of how to correctly set up jumpers by placing or removing the jumper cap.

DETAIL SETTINGS

Detailed pinout and function descriptions for front panel and other internal headers.

CHAPTER 4: USEFUL HELP

DRIVER INSTALLATION NOTE

Instructions for installing motherboard drivers and software from the provided CD.

SOFTWARE

BIOS Update

EXTRA INFORMATION

AMI BIOS BEEP CODE

TROUBLESHOOTING

Biostar H61MLC Specifications

General IconGeneral
Memory channelsDual-channel
Number of memory slots2
Supported memory typesDDR3-SDRAM
Maximum internal memory16 GB
Processor socketLGA 1155 (Socket H2)
Processor manufacturerIntel
Compatible processor seriesIntel Core i3, Intel Core i5, Intel Core i7
Power fan connectorYes
Number of SATA II connectors4
Number of Parallel ATA connectors0
USB 2.0 ports quantityUSB 2.0 ports have a data transmission speed of 480 Mbps, and are backwards compatible with USB 1.1 ports. You can connect all kinds of peripheral devices to them.
Ethernet LAN (RJ-45) ports1
Audio chipVIA VT1708B
Component forPC
Power source typeATX
Motherboard chipsetIntel® H61
Audio output channels5.1 channels
Motherboard form factormicro ATX
Compatible operating systemsWindows XP, Vista, 7
Supported storage drive interfacesSATA II
Cables includedSATA
Parallel processing technology supportNot supported
PCI Express slots version2.0
LAN controllerRealtek RTL8105E
Networking featuresFast Ethernet
BIOS type-
Weight and Dimensions IconWeight and Dimensions
Depth175 mm
Width226 mm

Related product manuals