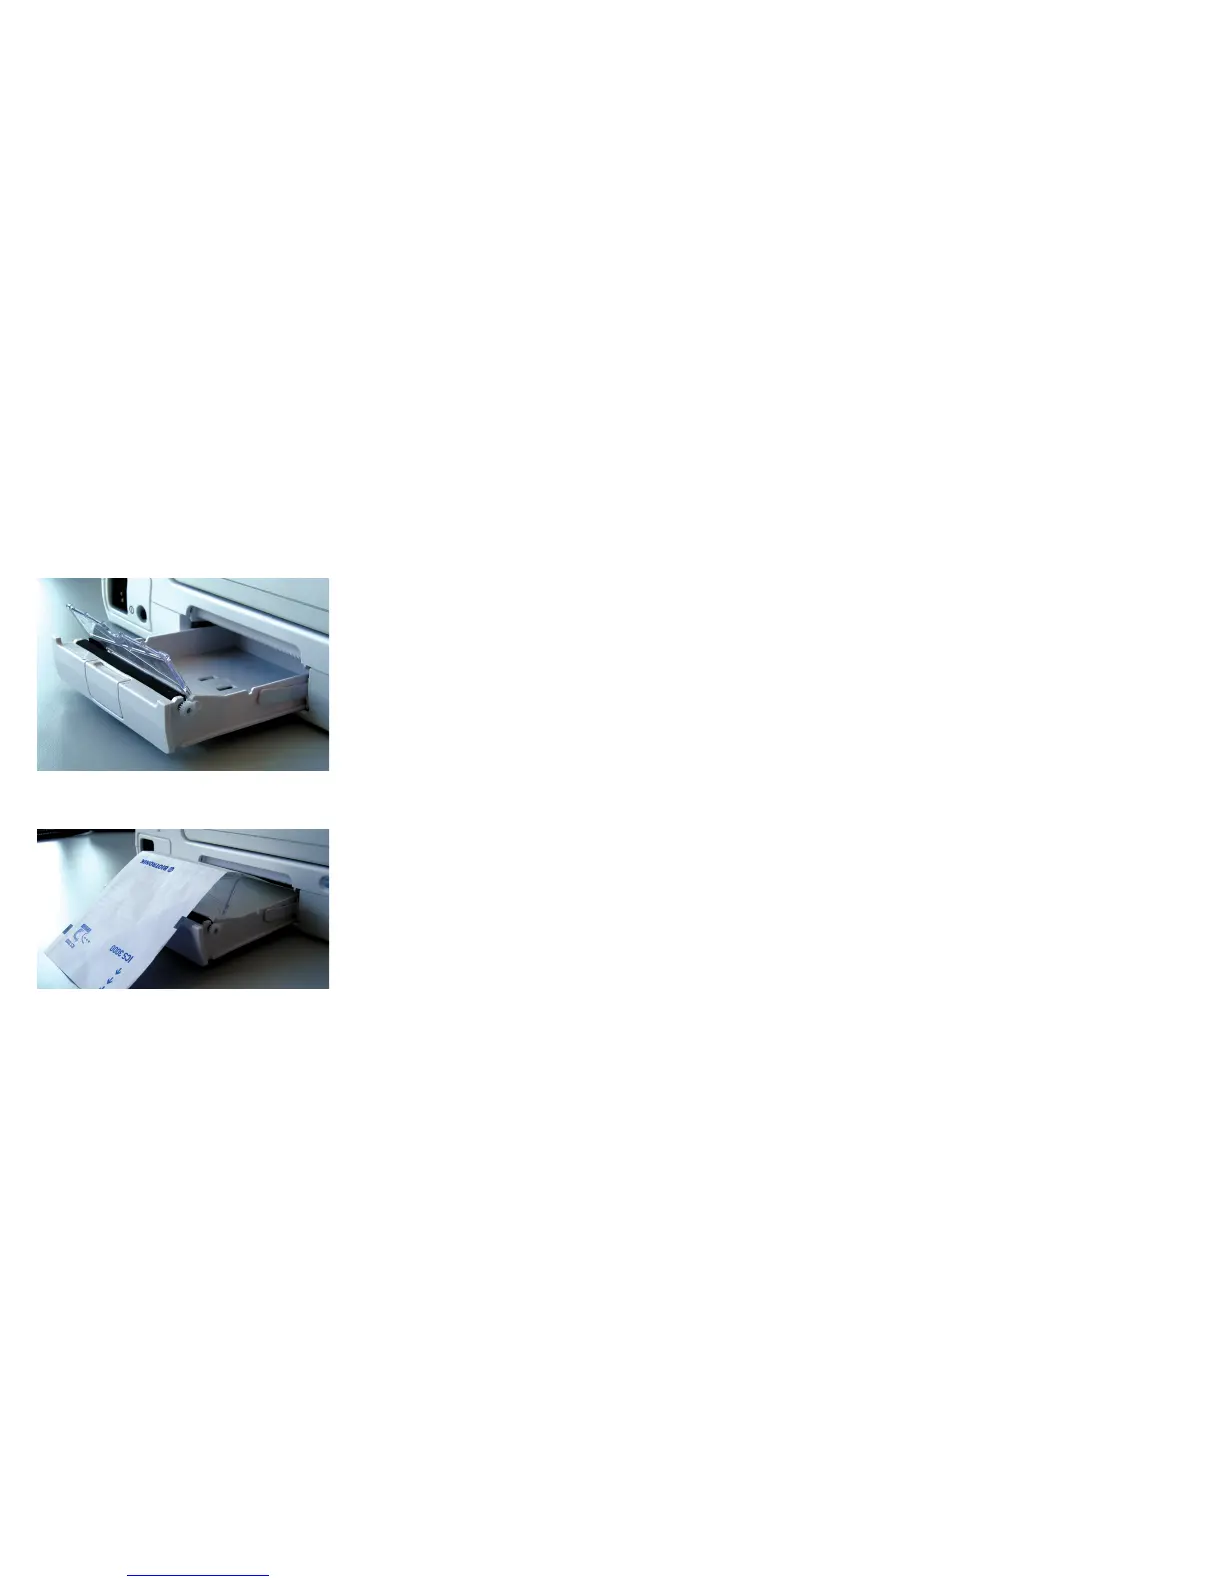
Placing paper in the printer tray
• Open the printer tray by applying slight pressure from above.
• Do not pull the tray all the way out.
• Removing the paper tray:
Printers without release key:
• Pull the tray all the way out.
Printers with a release key:
• Press down the key on the right side and pull the tray all the way out.
• Push back the separator flap.
• Pull back the top sheet of the ream of paper.
• Insert the ream of paper into the tray from the top so that the wide marking
on the ream of paper is on the left side.
• Place the separator flap under the top sheet of paper.
• Guide the top sheet over the separator flap and the rubber roller.
• Push the tray into the device until it stops.
If too much paper is in the tray and it is difficult to push into the device,
remove some paper and repeat the steps.
• The closure will lock automatically.
Push back the separator flap
Place the separator flap under top sheet