3 Align the connector on the rear of the Smart Panel with the adjoining connector on
the face of your Teranex Mini converter and gently push the Smart Panel towards your
converter until the connectors are firmly seated. The Smart Panel should make a firm
connection and fit neatly inside the face of your Teranex Mini converter.
4 Re-insert the M3 screws from the original panel.
If your Teranex Mini is installed in a Teranex Mini Rack Shelf, you will need to remove the mini
converter from the rack shelf to access the front panel screws.
See the ‘Teranex Mini Rack Shelf’ section for more information.
The Teranex Mini’s USB port is still accessible with the Smart Panel attached. To access the
port, simply open the rubber USB dust cover. With the Smart Panel installed, the front panel
small switches are covered up and no longer used and this is because all the switch settings
and more are now in the menu on the Teranex Smart Panel and can be set using the LCD. The
settings available will vary between Teranex Mini’s because the features are different between
models, but navigation layout on screen is the same, so it’s easy to move between models to
make changes to settings.
Refer to the ‘changing settings’ section for information on changing settings using an optional
Teranex Mini Smart Panel. The original basic panel is very strong, so if you need to mount your
Teranex Mini in the back of a rack system or in areas where there are lots of cables or activity,
you can always reinstall the original basic panel.
When installing the Teranex Mini Smart Panel to your Teranex Mini, holding the panel with your
fingers and thumb aligned with the panel’s rear connector will help guide it into place.
NOTE Some models of Teranex Mini have an integrated Smart Panel preinstalled
instead of a basic panel with a set of small switches. The integrated Smart Panel is not
detachable, though it functions just like an optional Teranex Mini Smart Panel.
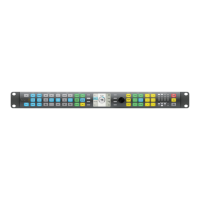
Smart Panel Features
LCD Display
The home screen is the first feature you’ll see on your Teranex Mini Smart Panel’s LCD display.
The home screen shows you important information, including:
7Installing Administration Software