10
ENGLISH
(Original instructions)
Bad Battery
Thechargercandetectaweakordamagedbattery.The
redLEDashesinthepatternindicatedonthelabel.Ifyou
seethisbadbatteryblinkpattern,donotcontinuetocharge
thebattery.Returnittoaservicecentreoracollectionsite
forrecycling
Hot/Cold Pack Delay
Whenthechargerdetectsabatterythatisexcessively
hotorexcessivelycold,itautomaticallystartsaHot/Cold
Packdelay,suspendingcharginguntilthebatteryhas
normalised.Afterthishappens,thechargerautomatically
switchestothePackChargingmode.Thisfeatureensures
maximumbatterylife.TheredLEDashesinthepattern
indicatedonthelabelwhentheHot/Coldpackdelayis
detected.
Leaving the battery in the charger
Thechargerandbatterypackcanbeleftconnectedwiththe
LEDglowingindenitely.Thechargerwillkeepthebattery
packfreshandfullycharged.
Important charging notes
u Longestlifeandbestperformancecanbeobtainedif
thebatterypackischargedwhentheairtemperatureis
between65°Fand75°F(18°-24°C).DONOTchargethe
batterypackinanairtemperaturebelow+40°F(+4.5°C),
orabove+105°F(+40.5°C).Thisisimportantandwill
preventseriousdamagetothebatterypack.
u Thechargerandbatterypackmaybecomewarmtotouch
whilecharging.Thisisanormalcondition,anddoesnot
indicateaproblem.Tofacilitatethecoolingofthebattery
packafteruse,avoidplacingthechargerorbatterypack
inawarmenvironmentsuchasinametalshed,oran
uninsulatedtrailer
u Ifthebatterypackdoesnotchargeproperly:
u Checkcurrentatreceptaclebyplugginginalampor
otherappliance
u Checktoseeifreceptacleisconnectedtoalightswitch
whichturnspoweroffwhenyouturnoutthelights.
u Movechargerandbatterypacktoalocationwherethe
surroundingairtemperatureisapproximately65°F
-75°F(18°-24°C).
u Ifchargingproblemspersist,taketheappliance,battery
packandchargertoyourlocalservicecenter.
u Thebatterypackshouldberechargedwhenitfailsto
producesufcientpoweronjobswhichwereeasilydone
previously.DONOTCONTINUEtouseunderthese
conditions.Followthechargingprocedure.Youmayalso
chargeapartiallyusedpackwheneveryoudesirewithno
adverseaffectonthebatterypack.
u Foreignmaterialsofaconductivenaturesuchas,but
notlimitedto,steelwool,aluminiumfoil,oranybuildup
ofmetallicparticlesshouldbekeptawayfromcharger
cavities.Alwaysunplugthechargerfromthepowersupply
whenthereisnobatterypackinthecavity.Unplugcharger
beforeattemptingtoclean.
u Donotfreezeorimmersechargerinwateroranyother
liquid.
Warning!Shockhazard.Donotallowanyliquidtogetinside
charger.Neverattempttoopenthebatterypackforany
reason.
Iftheplastichousingofthebatterypackbreaksorcracks,
returntoaservicecenterforrecycling.
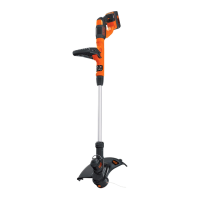
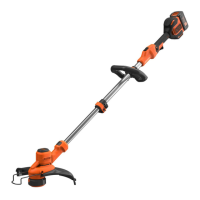
Installing and removing the battery pack from the
appliance
Warning!Makecertainthelock-offbuttonisnotengagedto
preventswitchactuationbeforeremovingorinstallingbattery.
To install battery pack
Insertbattery(12)intoapplianceuntilanaudibleclickis
heard(FigureB).Ensurebatterypackisfullyseatedandfully
latchedintoposition.
To remove battery pack
Depressthebatteryreleasebutton(13)asshowninFigureC
andpullbatterypackoutofappliance.
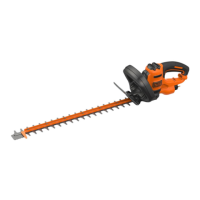
Assembly
Warning!Beforeassembly,makesurethatthetoolis
switchedoffandthebatteryhasbeenremoved.
Assembly tools required (not supplied):
PhillipsScrewdriver.
Fitting the guard
Warning!Removethebatteryfromtheappliancebefore
attemptingtoattachtheguard,edgeguideorhandle.Never
operateappliancewithoutguardrmlyinplace.Theguard
mustalwaysbeontheappliancetoprotecttheuser.
u Removethescrewfromtheguard.
u Turnthetrimmerupsidedownsothatyouarelooking
downatthespoolcap(14).
u Turntheguard(10)upsidedownandslideitfullyontothe
motorhousing(15).Makesurethetabs(16)ontheguard
engagetheribs(17)onthemotorhousingasshown.
u Continuetoslidetheguardonuntilyouhearit“snap”into
place.Thelockingtab(18)shouldsnapintothehousing
slot(19).
u Usingaphillipsscrewdriver,inserttheguardscrewand
tightensecurelyasshowninFigureEtocompletethe
guardassembly.
u Oncetheguardisinstalled,removethecoveringfromthe
linecut-offblade,locatedontheedgeoftheguard.
Warning!Neverusethetoolunlesstheguardisproperly
tted.
Attaching the auxiliary handle
u Toattachthehandle,pressinonthebuttons(20)onboth
sidesoftheupperhousingasshowninFigureF.