Page 8
Pixellicious™ User Manual Rev. A © 2015 Blizzard Lighting, LLC
Mounting & Rigging
This xture may be mounted in any SAFE position provided there is
enough room for ventilation.
It is important never to obstruct the vents pathway. Mount the xture
using a suitable “C” or “O” type clamp. The clamp should be rated to
hold at least 10x the xture’s weight to ensure structural stability. Do
not mount to surfaces with unknown strength, and ensure properly
“rated” rigging is used when mounting xtures overhead.
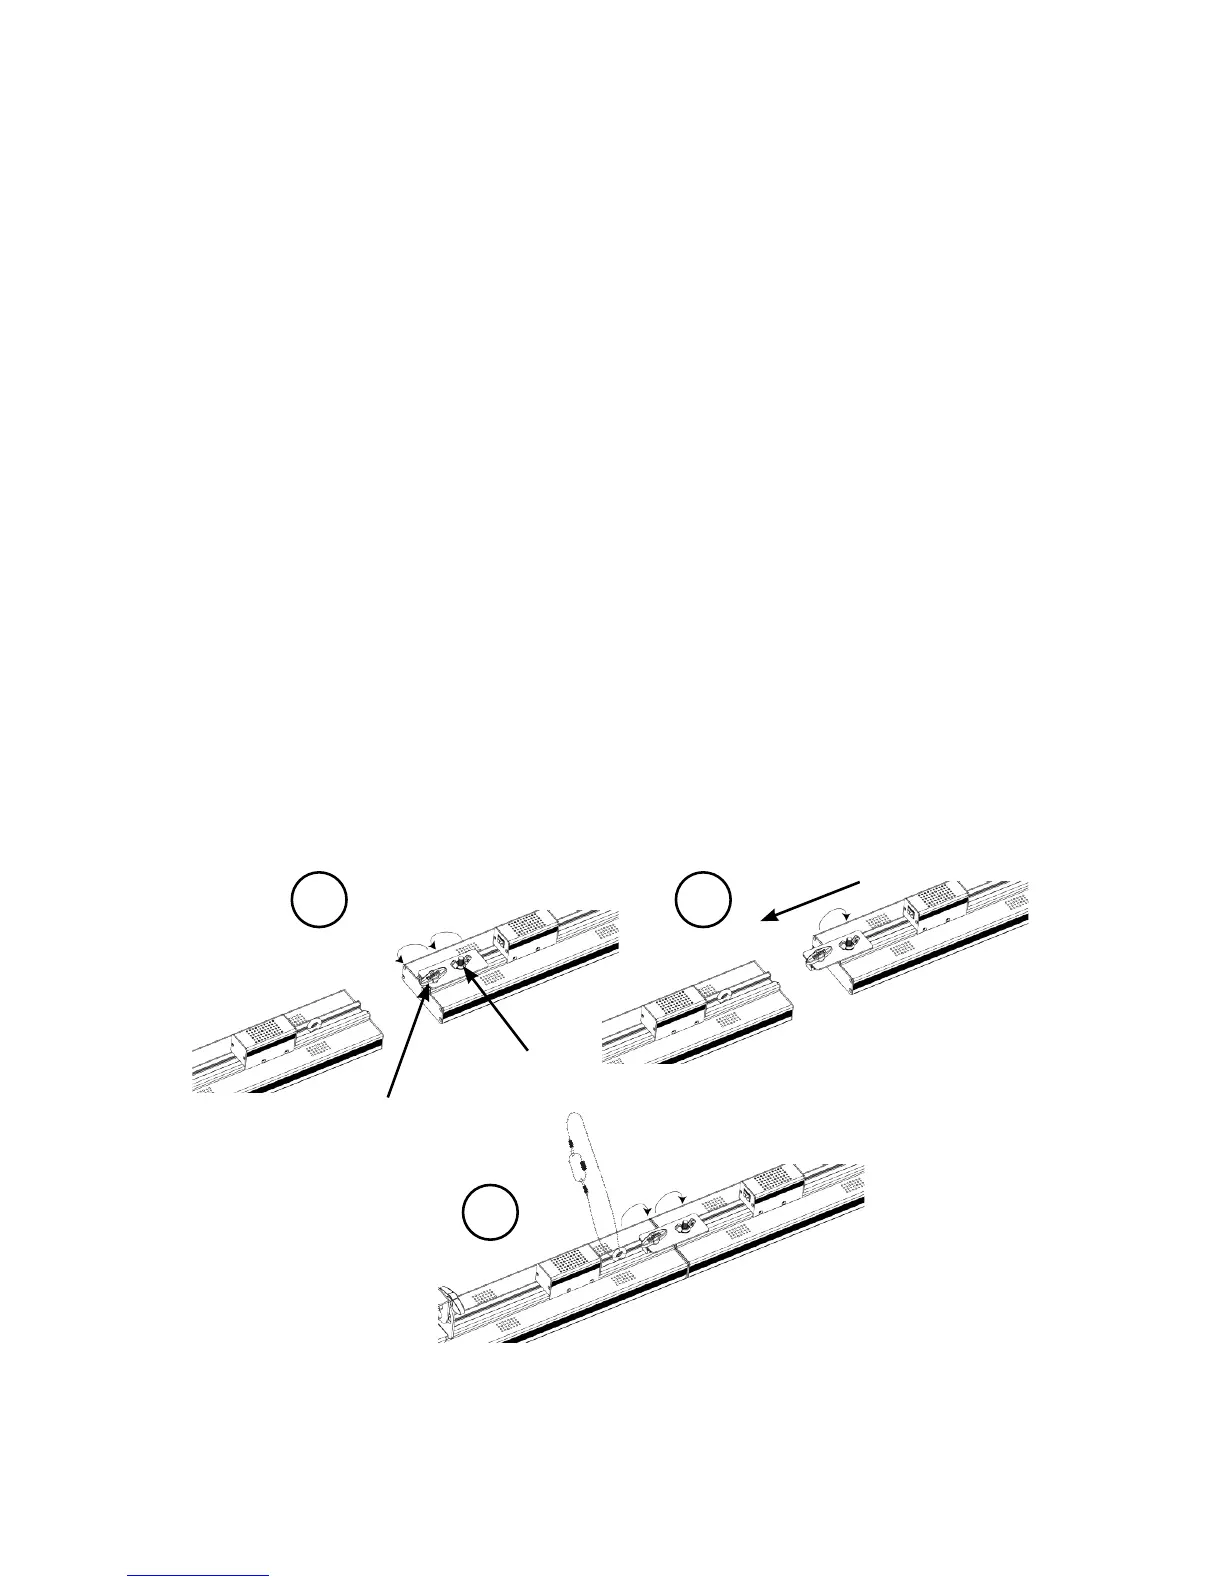
Series Attachment
Pixellicious™ xtures can be attached in an end-to-end formation to
create a strip up to 2 meters long from just one rigging point. Do not
connect any more than a total of 2 in a row when hanging vertically.
1. Loosen the fastening knob and wing nut.
2. Slide the connecting bracket out till it stops and tighten the wing
nut.
3. Slide the Pixellicious™ into the connecting bracket and tighten the
fastening knob, then attach the safety cable.
Fastening Knob
Wing Nut
1 2
3
 Loading...