1
2
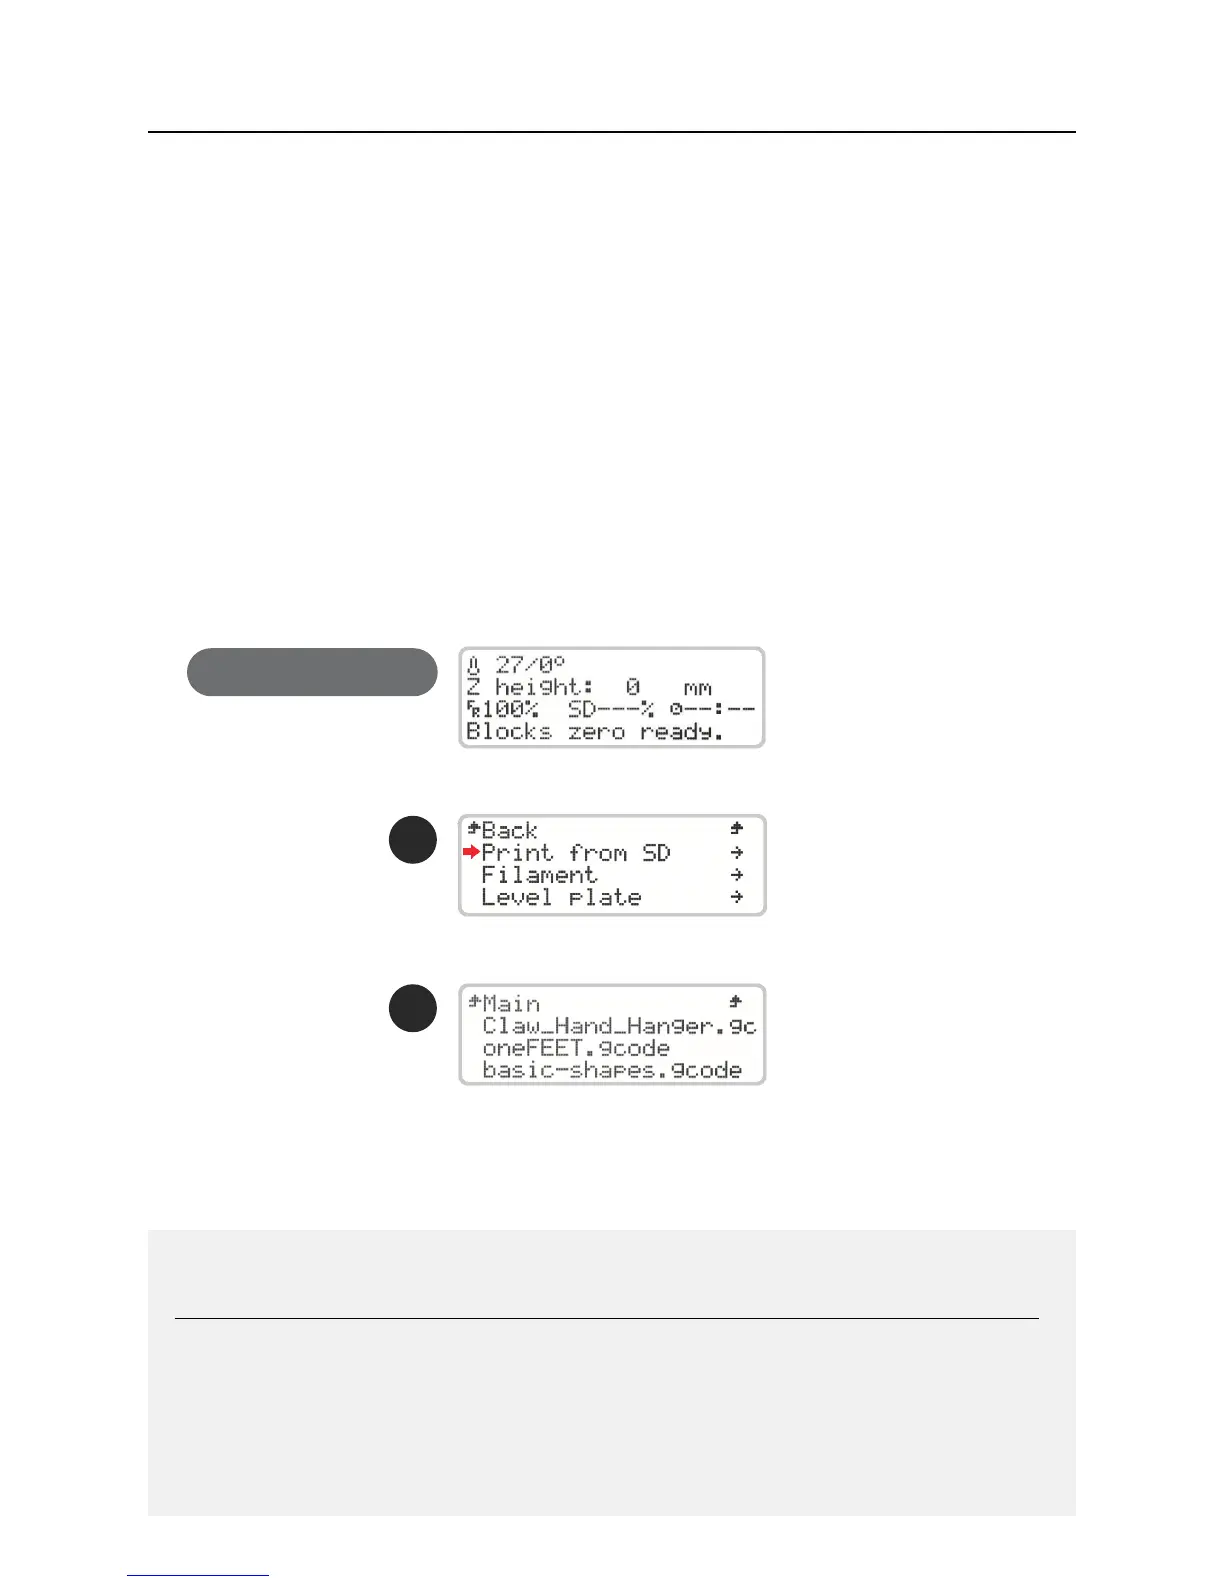
Main Screen
04.3 Doing a print
Open the software for preparing the 3D printing les and load the modeled object le.
Make sure that the print characteristics are correct for the material to be used and the print
quality you want. Also check that the machine that is selected is the Blocks Zero.
1. Save the gcode le to an SD card and insert it into the side slot next to the screen.
2. Press the on-screen button once, rotate until you select Print from SD and press it again.
3. Select the le you want to print with the thumb wheel and click the button.
Note: Print quality is directly related to the height difference between layers. The smaller the height
difference, the higher the nal quality, but also the print time.
Note 2: Wait while the Hot End reaches the chosen temperature for the material to be printed and
always observe the start of the printing to see if the adhesion of the rst layer of material to the plate is
acceptable. To ensure a good adhesion make sure the plate is properly leveled. The rst layer must not
show any visible spaces between the lines (it means a excessive distance between nozzle and plate) nor
should there be excess material that causes irregularities on the surface of the layer (means a insuf-
cient distance between nozzle and plate).
Operation04