5.0 Cleaning Probes and Meter Maintenance
Cleaning the Bluelab Combo Meter probes periodically ensures accurate readings.
Cleaning includes using 'Jif', a trade name for a liquid scourer cream used in home
bathrooms and kitchens. Similar products are called 'Liquid Vim' and 'Soft Scrub'.
Scented varieties are never used as they affect the probe functions. Perform the
following tasks to clean pH and nutrient/temperature probes.
1
2
Clean Glassware
Gently scrub glassware using a clean soft toothbrush, then rinse thoroughly under
running water to remove all traces of 'Jif' / cleaner.
CAUTION: Do not touch probe glassware with fingers, this will contaminate the probe.
5.1 Clean pH Probe
Rinse Probe
Rinse off the pH probe tip and place 1-2 drops of 'Jif' onto the glassware of the probe.
Do not use scented 'Jif' varieties.
1
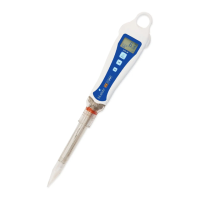
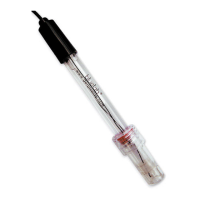
Remove Shroud
Dismantle by holding the body and pulling away the
shroud. Figure 5 shows the shroud removed.
1
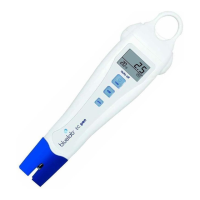
Batteries are replaced in the unit when the message 'LO BAT' appears in top left-hand
corner of LCD display. Section 2.2 in this document explains battery replacement.
NOTE: Batteries are checked at least once every six months for signs of deterioration,
rusting or swelling. If signs of deterioration are found, battery holder contacts are cleaned
and batteries replaced.
5.2 Clean Nutrient/Temperature Probe
3
Rinse Probe
Place probe under running water. Using the same finger or other side of Bluelab Chamois,
completely remove all traces of cleaner.
Copyright, all rights reserved 6 Version 1 : 011107
Bluelab Combo Meter Bluelab Corporation Limited
2
Clean Probe Face
Using unscented liquid scourer such as 'Jif' or 'Soft
Scrub', place one or two drops onto probe face and
using a finger or Bluelab Chamois, rub firmly and
vigorously to clean the probe face.
4
Check Probe Cleanliness
Check that water forms a film on the probe face, without beads of water. If beading is
present, repeat the cleaning process until the face retains a water film without beading.
5
Replace Shroud
Refit the shroud firmly onto the probe face.
5.3 Replacing Batteries
Figure 5. Shroud Removed
Hold
Pull