12
EN
Post-Flight Inspections and Maintenance
Ball Links
Makesuretheplasticballlinkholdsthecontrolball,butisnottight(binding)ontheball.Whenalinkistoolooseontheball,itcanseparatefromtheball
duringightandcauseacrash.Replacewornballlinksbeforetheyfail.
Cleaning Makesurethebatteryisnotconnectedbeforecleaning.Removedustanddebriswithasoftbrushoradrylintfreecloth.
Bearings Replacebearingswhentheybecomenotchy(stickyinplaceswhenturning)ordraggy.
Wiring Makesurewiringisawayfromthehelicopterframeedgesandanymovingparts.Replacedamagedwiringandlooseconnections.
Fasteners
Makesuretherearenoloosescrews,otherfastenersorconnectors.Donotovertightenmetalscrewsinplasticparts.Tightenscrewsopartsaremated
together, then turn screw only 1/8th of a turn more.
Rotors
Makesurethereisnodamagetorotorbladesandotherpartswhichmoveathighspeed.Damagetothesepartsincludescracks,burrs,chipsorscratches.
Replacedamagedpartsbeforeying.
Flight Guidelines and Warnings
• Alwayskeepaircraftinsightandundercontrol.
• Alwayskeeppeopleandpetsatleast40feet(13meters)awaywhenthe
battery is connected.
• Alwaysturnonthrottlehold[THHLD]ifthebladesstrikeanything.
• Always use fullly charged batteries.
• Alwayskeeptransmitterpoweredonwhenthebatteryisconnected.
• Alwayskeepmovingpartsclean.
• Alwaysavoidyingininclementweathersuchasrain.
• Always let parts cool after use before touching.
• Always remove batteries after use and before disassembly.
• Alwayshavearstaidkitandappropriatereextinguisherwithyou.
• Never operate aircraft with damaged wiring.
• Never touch moving parts.
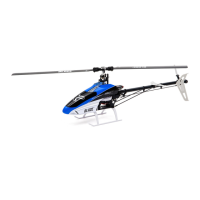
WARNING: Always use Horizon approved carbon fiber Main Rotor Blades with the Blade 500 3D to avoid injury and/or property damage.
After every flight
❏ Checkallscrewstomakesurethattheyarestilltight.
❏ Checktomakesurenowireconnectionshavebeguntoloosen.
After every 5 flights
❏ Checkallscrewstomakesurethattheyarestilltightusingthe
proper tools.
❏ Checktomakesurenowiresarechafng.
After every 20 flights
❏ Checkbearingstomakesuretheyarestillsmooth.
❏ CheckgyrotapeandESCtapetomakesuretheyarestillgood.
❏ Checkdampersandensuretheyarenottoosoft,replaceifnecessary.
❏ Checkbelttension,adjustifnecessary.
After every 50 flights
❏ Checklinksandensurethattheydonotpopofftheballstooeasy,replace
if necessary.
❏ Inspect belt and ensure it is not fraying and that no teeth are missing.
Maintenance check list
Adjusting the Drive Belt Tension
Belt tension that is too tight results in loss of power and causes the belt to
wearmorequickly.Tensionthatistooloosecancausebeltdamageandlossof
tailrotorcontrolinight.
To check for proper belt tension:
1. View the tail rotor drive belt through the opening at the top of the tail case.
2. Use a hex wrench or standard screwdriver to compress the belt through the
opening.
3. Apply light pressure on the belt, compressing the belt toward the bottom of
the tail boom.
4. The belt tension is correct if the compressed side of the belt reaches
approximately halfway to the opposite side of the belt.
a. If the compressed side of the belt reaches farther than halfway to
the other side of the belt, the tension is too loose.
b. If the compressed side of the belt does not reach halfway to the
other side of the belt, the tension is too tight.
To adjust the belt tension:
1. Loosen the two horizontal stabilizer screws.
2. Loosenthesixscrewsatthebackofthemainframe.
3. Slide the boom forward or aft to adjust the belt tension.
4. When the belt tension is properly adjusted, tighten the six screws at the
backoftheframe.
5. Tighten the horizontal stabilizer screws.
Low Voltage Cuto (LVC)
Lowvoltagecutoff(LVC)protectstheLi-Pobatteryfromoverdischargeinight
and activates when the battery reaches 3V per cell under load.
Set your transmitter timer for 4 minutes and land when the timer expires.
RepeatedlyactivatingLVCdamagestheightbatteryandyouwillneedto
replace the battery.
Crash damage and battery damage are not covered under warranty.


 To Next Page