9
EN
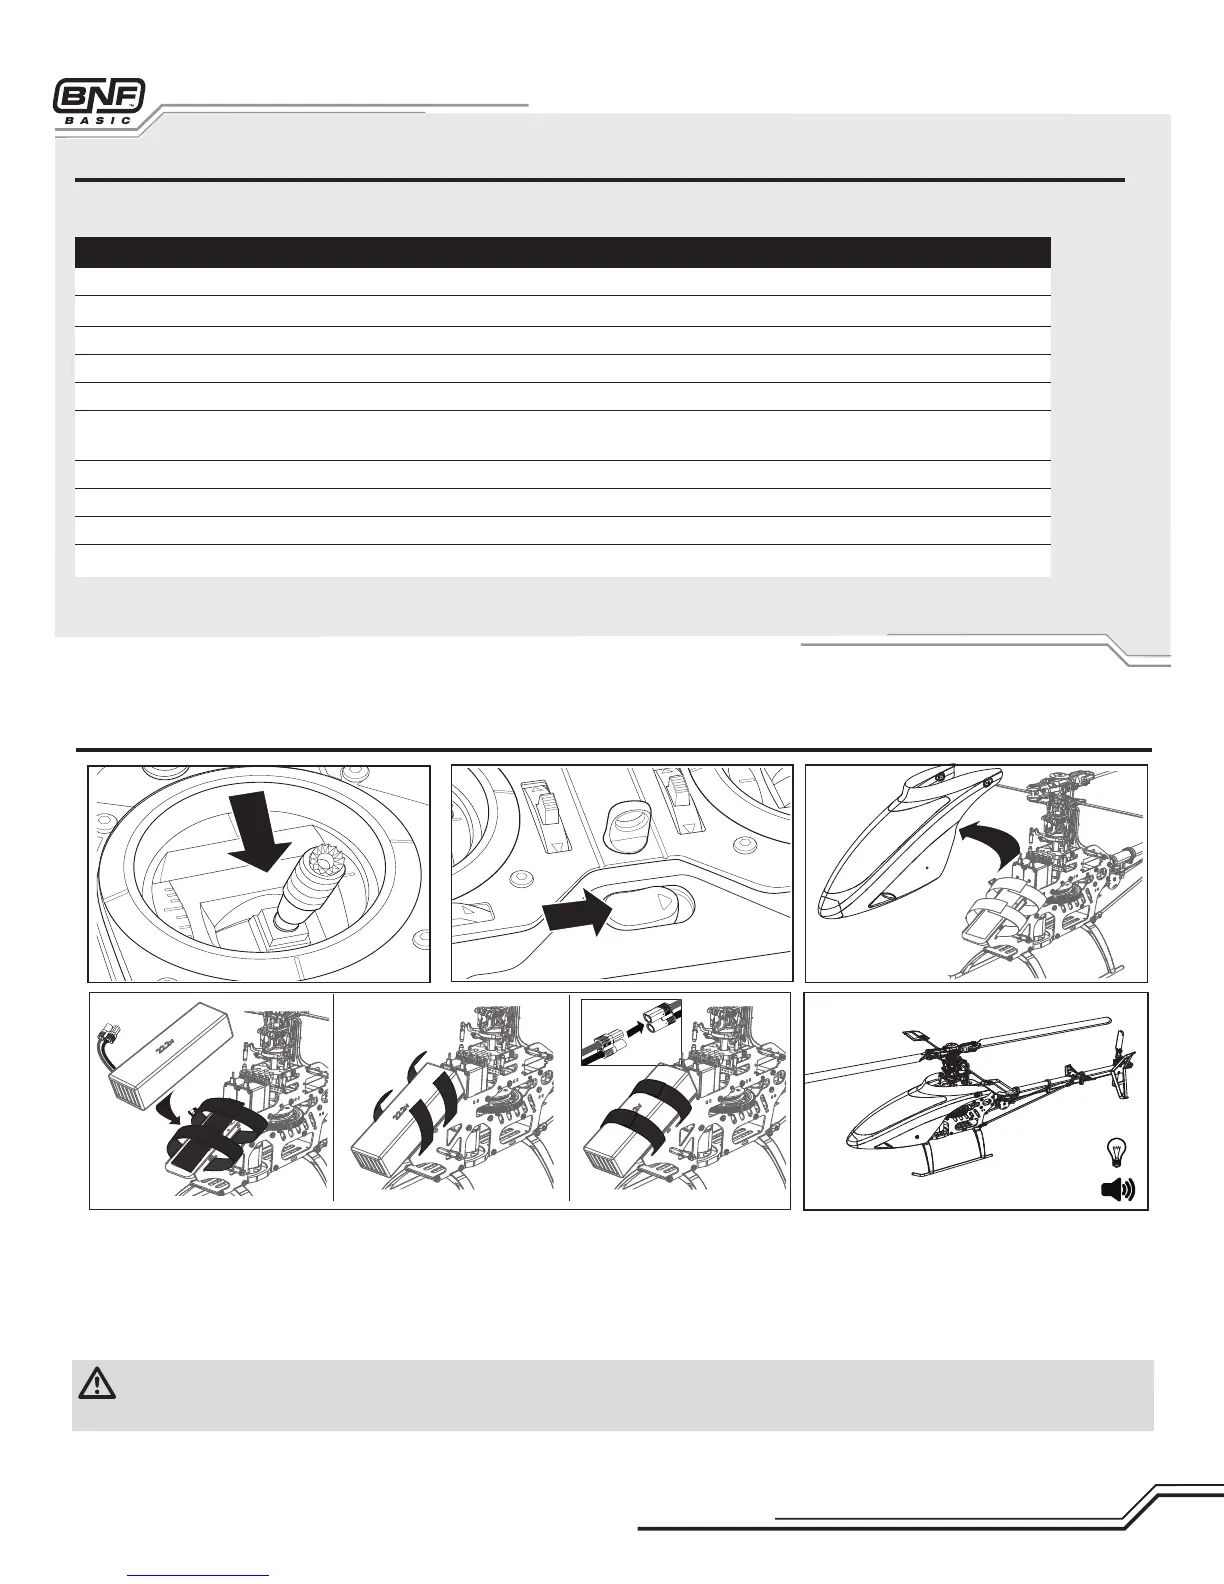
Binding Procedure
1. Read transmitter instructions for binding to a receiver (location of transmitter’s Bind control).
2. Makesurethetransmitterispoweredoff.
3. Install a bind plug in the receiver battery/bind port.
4. ConnecttheightbatterytotheESC.ThereceiverLEDwillbegintoashrapidly.
5. Movethethrottlesticktolowthrottle.MakesuretheightmodeswitchisinthenormalpositionandthrottleholdisOFF.
6. Power on the transmitter while holding the transmitter bind button or switch. Refer to your transmitter’s manual for binding button or
switch instructions.
7. When the receiver binds to the transmitter, the receiver lights will turn solid.
8. DisconnecttheightbatteryfromtheESC.Removethebindplugfromthereceiver.
9. Safely store the bind plug (some owners attach the bind plug to their transmitter using two-part loops and clips).
10. Thereceiverwillkeepthebindingtothetransmitteruntilanotherbindingisdone.
If you encounter problems, obey binding instructions and refer to transmitter troubleshooting guide for other instructions. If needed, contact the appropriate
Horizon Product Support office.
Binding is the process of programming the receiver to recognize the GUID (Globally Unique Identifier) code of a single specific transmitter. The Blade 500 3D RTF
transmitter and receiver are bound at the factory. Should you need to re-bind the transmitter and receiver, follow the steps below.
Transmitter and Receiver Binding
Installing the Flight Battery
CAUTION: Always disconnect the Li-Po battery from the aircraft receiver when not in use to avoid over-discharging the battery. Batteries discharged to a
voltage below the lowest manufacturer’s approved voltage may become damaged, resulting in loss of performance and potential fire when batteries are
charged.
1.Attachthehookmaterialtothehelicopterframeandtheloopmaterialto
theightbattery.
2.Installtheightbatteryonthehelicopterframe.Securetheightbattery
withthehookandloopstrap.
3. Move the F Mode and TH HOLD switches to the (0) position.
4. Lower the throttle.
5. Power on the transmitter and center the throttle trim.
6. Move the TH HOLD switch to the (1) position.
7.ConnecttheblueEC3™batteryconnectortotheESC.
8. Wait 5 seconds while the gyro initializes.
9. The helicopter ESC will emit a series of tones and emit a solid red LED on
the gyro once it is ready.