12
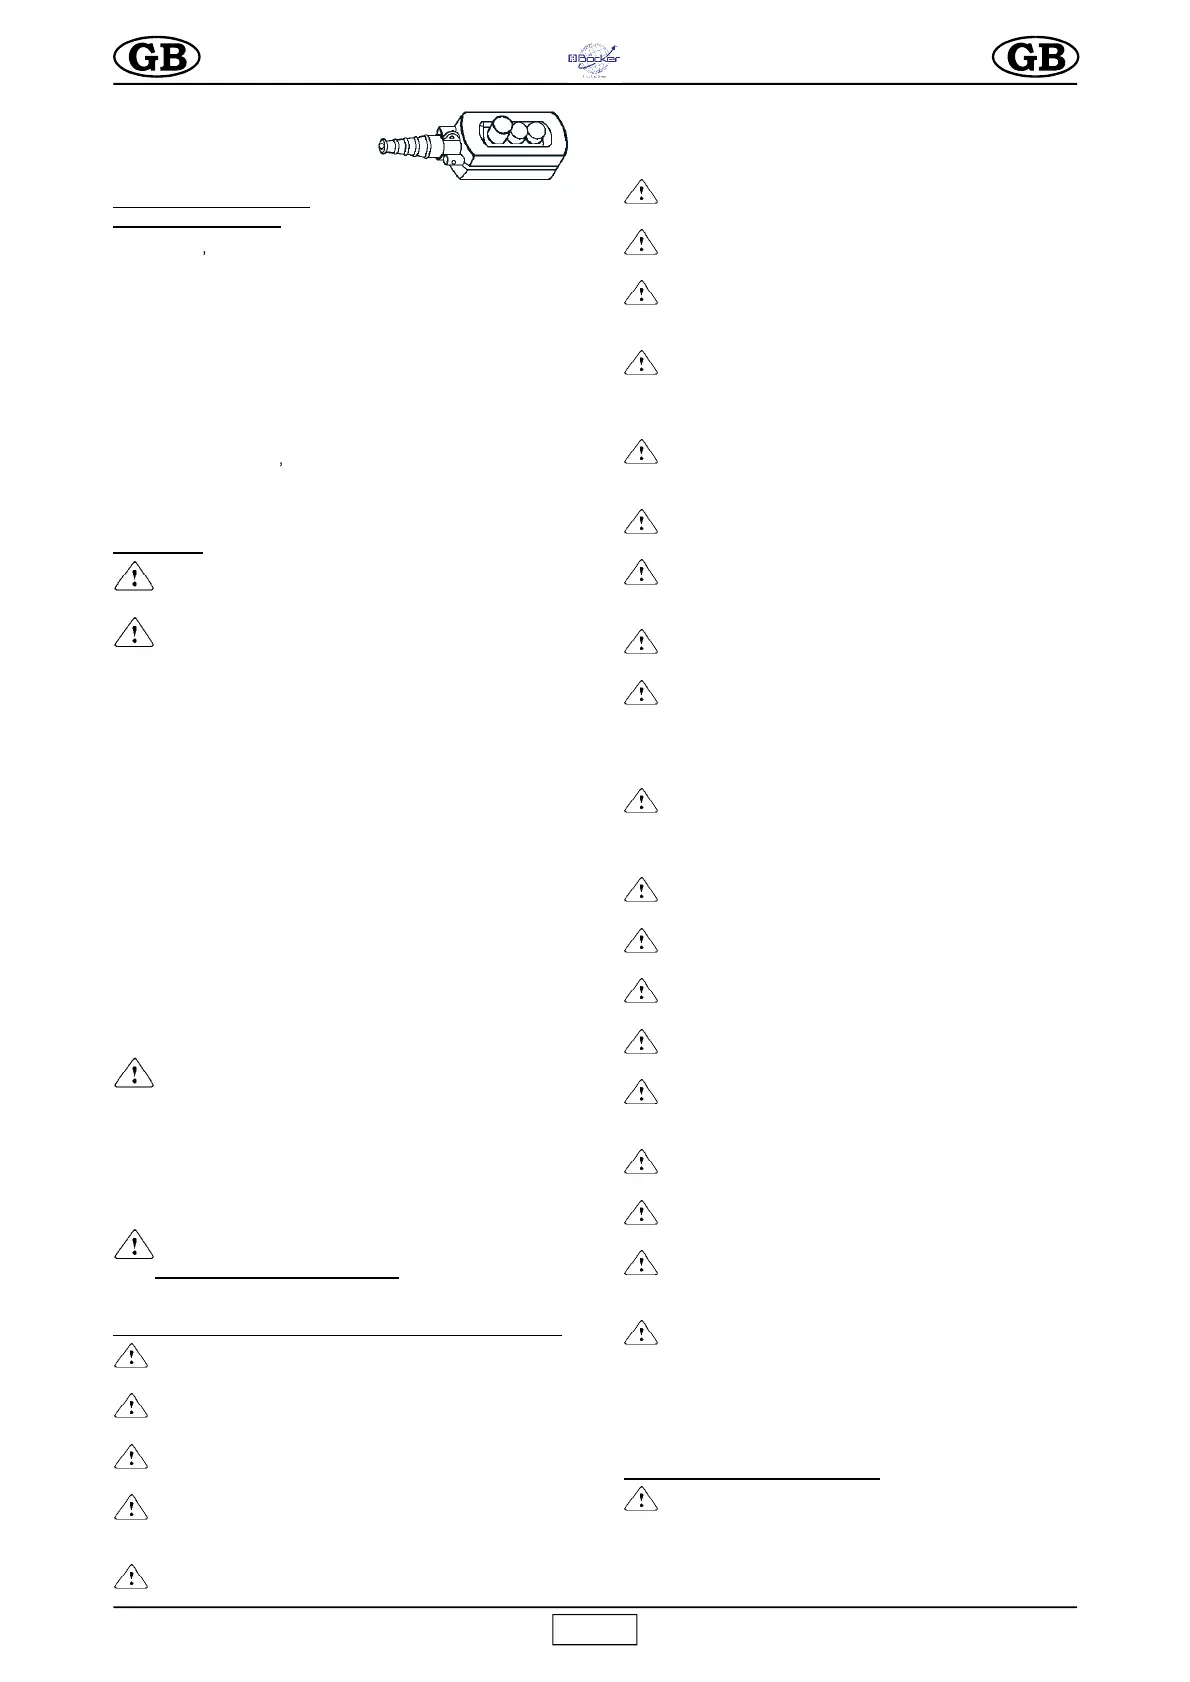
Boy
black: down
white: up
red: emergency stop.
6) Release the hook.
4. CONNECTION TO THE
ELECTRICITY MAINS
- Make sure that the mains voltage corresponds to the rating on
the machine
s rating plate.
- Also ensure that the mains voltage is within the range 210 V
to 235 V with the hoist operating at full load.
-
The electrical supply line must be fitted with both overcurrent and
differential type protection devices and the earth wire must have
the same cross-section as the live wire. The wires must be sized
taking into account the operating currents and the length of the line
to avoid excessive voltage drops (see Table 1).
Do not use extension leads wound onto drums.
- The power supply cable must be suitable for frequent handling
and must have an abrasion-resistant sleeve (e.g. H07RN-F).
- Connect the machine
s plug to a 16 Amp EEC socket with an
IP67 protection factor and tighten up the securing collar.
- The hoist is now ready for testing.
5. TESTING
- Warning!! Testing must be carried out by qualified
personnel only. Take all necessary safety precautions.
- Warning: the hoist must be tested before use.
Before testing the hoist make sure that it has been correctly
installed.
1) Lower the unloaded rope to the lower loading position by
pressing the down button, and check that at the end of its travel
three turns of rope remain on the drum.
2)
No-load test. Apply a small load (20 kg) and check that the
machine works correctly by running a complete up/down cycle.
Test the up, down and emergency stop buttons and check that
the up limit switch and the electric motor brake work correctly
and that the cable winds correctly onto the drum.
3)
Load test. Load the hoist with the maximum allowable load.
Run a complete up/down cycle to test the stability of the supports
and the motor brake.
After the test, check the support structure for failure and
slippage and recheck the horizontal alignment of the drum (using
a level as shown in fig. 1).
4) The hoist is fitted with a safety which stops travel at the UP (9) and
fully unwound positions (17) to avoid the rope winding on in the wrong
direction.
Do not depend on this safety to stop the winch; release the control
button to stop the winch instead.
-
IMPORTANT! Limit switch activation can occur either
due to incorrect working height or due to other problems
which may prejudice correct hoist functioning. After the limit
switch has been activated, the hoist installation and
components must be checked (rope, drum, shaft etc.)
When testing is completed, fill in the test report with the date,
installation check and signature (Table 2) along with any other
comments.
- The test procedure described above, complete
with no-load (2) and load (3) tests
, must be performed
every time the machine is installed.
6. SAFETY WARNINGS AND OPERATING PRECAUTIONS
-
1) Never lift loads exceeding the capacity of the
elevator.
-
2) Never allow persons to remain below suspended
loads.
-
3) Never try to lift loads anchored to the ground
(e.g. embedded posts, plinths, etch.).
-
4) Ensure that the load is securely connected to the
elevator hook and also close the safety catch (ref.6 fig.
4.1).
-
5) If the load requires accessories to be attached to
be hooked up, these must be certified and approved
(harnesses, ropes, slings, etc.). The weight of these
accessories must be subtracted from the maximum
capacity.
-
6) Ensure that no part of the load protrudes during
the lifting phases.
-
7) Before releasing the load, ensure that it is in a
stable position.
-
8) A suspended load must never be detached to
cause sudden release or by cutting the slings, causing a
backlash movement of the entire structure.
-
9) Never move hands or parts of the body near the
drum during operation, as this constitutes a risk of
entrapment in the ropes unwinding, with the risk of
serious accidents.
-
10) Never move hands or parts of the body near the
counterweight during the ascent phase, as this constitutes a
risk of crushing on contact with the limit switch lever.
-
11) Avoid use in adverse weather conditions
(strong winds or storms) as the load is not guided.
-
12) The control position and lighting conditions
must ensure perfect visibility of the load throughout
travel.
-
13) Ensure that all guards and safety devices are
fitted.
-
14) During use, check that the rope unwinds
correctly, turn on turn, without slackening or twisting,
which can cause damage to the rope. If this occurs,
unwind the rope and rewind correctly keeping the rope
tensioned at all times.
-
15) Ensure that the travel and work area is free of
obstacles throughout the height and take necessary
precautions to prevent persons from leaning out of
intermediate floors.
-
16) Delimit the lower load area to prevent persons
from being present during lifting.
-
17) Keep children at a safe distance from the
elevator.
-
18) When the elevator is not in use, do not allow
unauthorised personnel access or operation.
-
19) Use of the elevator for oblique tractions is
strictly prohibited (over 5° with respect to vertical angle).
-
20) Never rotate the elevator on the pins by pulling
the pendant control; it must always be rotated manually
from the frame.
-
21) Do not leave a suspended load unattended.
Raise or lower it and unload it.
-
22) During lifting or lowering, never allow the
load to turn as this may cause the rope to break.
-
23) Before leaving the elevator unattended, remove
the load, wind the rope completely onto the drum, and
detach the power plug from the mains.
-
24) When a load is to be raised or lowered, this
must be done in such a way as to minimise dangerous
sideways and vertical movements.
When operation is resumed after an extended period of disuse
(e.g. overnight) the entire machine must be tested under no-load
conditions before starting (as described in section 5, point 2).
7. CHECKS AND MAINTENANCE
-
Warning! All maintenance work must be carried
out with the machine switched off, unloaded and
disconnected from the mains.
- Repairs must be made by qualified personnel or by the
STEINWEG
technical service.
Fig. 3
 Loading...