EN
27
Installation
www.bora.com
Adapting the 90° bend:
2
3
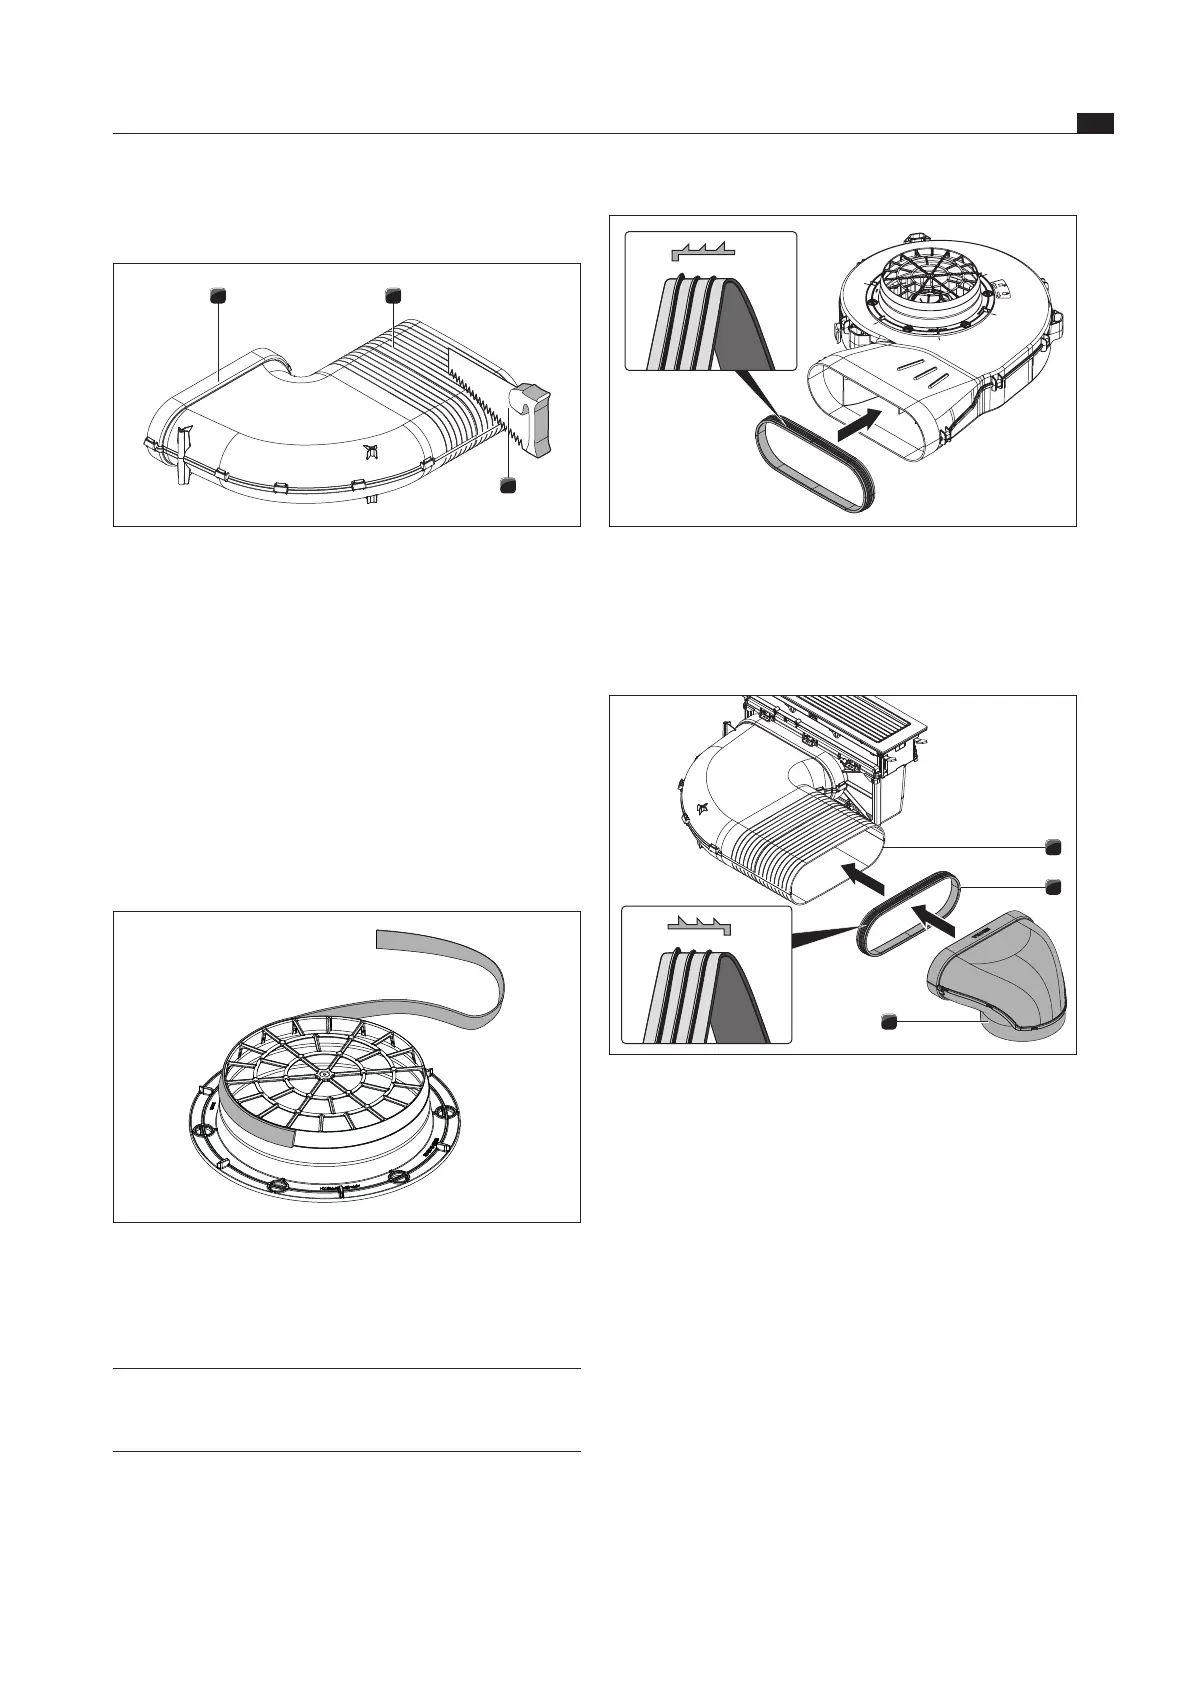
Fig. 4.24 Shortening the 90° bend
[1] 90° bend
[2] Cut marks
[3] Fine saw
Adapt the 90° bend [1] to the depth of the worktop
if necessary by shortening it accordingly at the cut
marks [2] using a fine saw [3].
Preparing the plinth fan:
Prepare the plinth fan by attaching the sealing tape
depending on the installation situation.
Secure the sealing tape to the inlet nozzle.
Fig. 4.25 Sealing tape position for installation with a round duct
Depending on the required connection cross-section,
you can vary the height at which the sealing tape is
attached to the plinth fan inlet nozzle.
INFO If another Universal fan module is to be used, this
must also be prepared as described here with
sealing tape on the inlet nozzle.
Fig. 4.26 Attach the seal to the plinth fan outlet nozzle.
Push the seal onto the plinth fan outlet nozzle. The seal
will need to be stretched slightly.
Connecting the duct system
2
2
3
1
Fig. 4.27 Duct system connection
[1] Output nozzles
[2] Seal
[3] Duct part
Pull the seal [2] onto the outlet nozzle [1] on the
appliance. The seal [2] will need to be stretched
slightly.
Push the duct part to be connected [3] with the
coupling onto the outlet nozzle [1] with the seal [2].
Ensure that the seal [2] is not displaced.