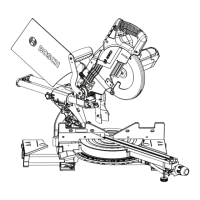
EasyManua.ls Logo

Bosch CM12 - Miter and Bevel Settings for Standard Crown Molding Cuts

Bosch CM12
112 pages
To Next Page IconTo Next Page
To Previous Page IconTo Previous Page
Loading...
-29-
!6A2?.;12C29&2AA6;4@3<?&A.;1.?1?<D;!<916;4BA@
*52;?<D;!<916;46@ F6;49.A<;'./92
@@B:=A6<;@Molding is milled consistently. Corner is exactly 90º.
!<916;4&=?6;4;4926@124?22@
!6A2?2C29
'./92'69A
&2AA6;4 &2AA6;4
;@612<?;2?
Left end (A) (31.6) Right (33.9) Left
Use the left end
of the cut
Right end (B) (31.6) Left (33.9) Right
Use the right end
of the cut
#BA@612<?;2?
Left end (C) (31.6) Left (33.9) Right
Use the left end
of the cut
Right end (D) (31.6) Right (33.9) Left
Use the right end
of the cut
!<916;4&=?6;4;4926@124?22@
!6A2? 2C29
'./92'69A
&2AA6;4 &2AA6;4
;@612<?;2?
Left end (A) (35.3) Right (30.0) Left
Use the left end
of the cut
Right end (B) (35.3) Left (30.0) Right
Use the right end
of the cut
#BA@612<?;2?
Left end (C) (35.3) Left (30.0) Right
Use the left end
of the cut
Right end (D) (35.3) Right (30.0) Left
Use the right end
of the cut
Ceiling
45° Spring Angle
38° Spring Angle
52° 45°
38°
45°
Wall
Ceiling
Wall
45/45° Crown Molding
38/52° Crown Molding
Inside
Corner
Outside
Corner
Fence
Table
Top of Molding
Against Fence
BM 2610021316 10-11 E:BM 2610021316 10-11 E.qxp 10/17/11 11:02 AM Page 29

Table of Contents

Related product manuals