English | 11
Bosch Power Tools 1 609 92A 3XH | (7.6.17)
Operation
Products sold in AUS and NZ only: Use a residual current de-
vice (RCD) with a rated residual current of 30 mA or less.
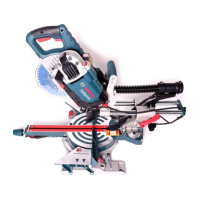
Transport Safety (see figure C)
The transport safety-lock 17 enables easier handling of the
machine when transporting to various working locations.
Releasing the Machine (Working Position)
– Push the tool arm by the handle 3 down a little in order to
relieve the transport safety-lock 17.
– Pull the transport safety-lock 17 completely outward.
– Guide the tool arm slowly upward.
Note: When working, pay attention that the transport safety-
lock is not pushed inwards. Otherwise, the tool arm cannot be
lowered to the requested depth.
Securing the Machine (Transport Position)
– Guide the tool arm downward until the transport safety-
lock 17 can be pushed completely inward.
For additional information on transport, see page 12.
Adjusting the Cutting Angle (see figure D)
The mitre angle can be set in a range from 0° to 45°.
Frequently used mitre angles are identified on the angle stop
7 with appropriate markings. The 0° and 45° position are set
at the respective end stop.
– Loosen the locking screws 16 for the angle stop using the
hex key provided 12 (8 mm).
– Adjust the desired angle and firmly tighten both locking
screws 16 again.
Displacing the Angle Stop (see figure D and E)
When cutting workpieces wider than 140 mm, the angle stop
7 can be displaced to the rear.
– Completely unscrew the locking screws 16 using the hex
key provided 12 (8 mm).
– Move the angle stop 7 toward the rear by one or two holes
to the desired clearance.
– Adjust the desired angle and firmly tighten both locking
screws 16 again.
Clamping the Workpiece
To ensure optimum working safety, the workpiece must al-
ways be firmly clamped.
Do not saw workpieces that are too small to clamp.
Clamping the Workpiece (see figure E)
– Place the workpiece against the angle stop 7.
– Slide the clamping spindle 8 against the workpiece and
firmly clamp the workpiece with the spindle handle 10.
Securing the Workpiece (cross section of max.
40 x 40 mm) on the Workpiece Support
(see figures F–H)
– Set the standard 0° mitre angle on the angle stop 7.
– Lift the workpiece support 15 slightly and slide it through
the slot in the angle stop.
– Hang the hook of the workpiece support in the opening of
the clamping jaw 14.
– Place the workpiece on the workpiece support 15.
– Slide the clamping spindle 8 against the workpiece and
firmly clamp the workpiece with the spindle handle 10.
Ensure that the workpiece support is securely connect-
ed to the clamping jaw and does not tip when you place
the workpiece on it.
Ensure that the height of the workpiece on the work-
piece support is max. 40 mm. Higher workpieces can-
not be securely clamped.
Ensure that the workpiece support is slid back com-
pletely into the angle stop after use. A protruding hook
prevents a workpiece from being securely clamped.
Loosening the Workpiece
– Loosen the spindle handle 10.
– Tilt up the quick release 9 and pull the clamping spindle 8
away from the workpiece.
Starting Operation
Dust from materials such as lead-containing coatings, miner-
als and metal can be harmful to one’s health. Contact with or
inhaling the dust can trigger allergic reactions to the operator
or bystanders and/or lead to respiratory infections.
Certain metal dust is considered hazardous, especially in con-
junction with alloys such as zinc, aluminium or chromium. Ma-
terials containing asbestos may only be worked by special-
ists.
– Provide for good ventilation of the working place.
– It is recommended to wear a P2 filter-class respirator.
Observe the relevant regulations in your country for the mate-
rials to be worked.
The blade can be blocked by dust, chips or workpiece frag-
ments in the slot of the base plate 13.
– Switch the machine off and pull the mains plug from the
socket outlet.
– Wait until the cutting disc has come to a complete stop.
– Tilt the machine toward the rear, so that small workpiece
fragments can fall out of the opening intended for this pur-
pose.
If required, use a suitable tool to remove all workpiece frag-
ments.
Switching On and Off (see figure I)
–To start the machine, firstly press the lock-off button 1.
Then press the On/Off switch 2 and keep it pressed.
Note: For safety reasons, the On/Off switch 2 cannot be
locked; it must remain pressed during the entire operation.
–To switch off the machine, release the On/Off switch 2.
Soft Starting
The electronic soft starting feature limits the torque upon
switching on and increases the working life of the motor.
Working Advice
General Cutting Instructions
Do not touch the cutting disc after working before it
has cooled. The cutting disc becomes very hot while work-
ing.
OBJ_BUCH-2521-004.book Page 11 Wednesday, June 7, 2017 2:44 PM
 Loading...