EasyManua.ls Logo

Bosch GCM12SD - User Manual

Bosch GCM12SD
184 pages
Print Icon
To Next Page IconTo Next Page
Loading...
1-877-BOSCH99 (1-877-267-2499) www.boschtools.com
GCM12SD
Operating/Safety Instructions
Consignes d’utilisation/de sécurité
Instrucciones de funcionamiento y seguridad
IMPORTANT
Read Before Using
IMPORTANT
Lire avant usage
IMPORTANTE
Leer antes de usar
For English Version
See page 2
Version française
Voir page 62
Versión en español
Ver la página 122
Call Toll Free for Consumer Information & Service Locations
Pour obtenir des informations et les adresses de nos centres de service après-vente, appelez ce numéro gratuit
Llame gratis para obtener información para el consumidor y ubicaciones de servicio
2610051827 GCM12SD 08-18.qxp_GCM12SD 9/19/18 2:51 PM Page 1

Table of Contents

Other manuals for Bosch GCM12SD

Questions and Answers

  • S
    Scott PorterAug 20, 2025
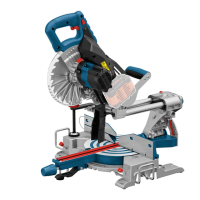
    Why can't I rotate the table on my Bosch GCM12SD Saw?
    • S
      smithkristenAug 20, 2025
      If you cannot rotate the table to change the miter angle on your Bosch Saw, check the following: 1. Ensure the miter lock knob is not tightened. Turn it counterclockwise to loosen. 2. Make sure the miter detent lever is disengaged from the detent slot by pulling up on the lever. 3. Clear any sawdust accumulation around the turntable using a vacuum or compressed air, wearing eye protection.
  • R
    Richard StanleyAug 22, 2025
    What to do if my Bosch GCM12SD motor does not start?
    • Y
      yedwardsAug 22, 2025
      If your Bosch Saw motor doesn't start, first ensure the unit is properly plugged into a functioning outlet. Check the power source fuse or time delay fuse, replacing it with a 15-Amp time delay fuse or circuit breaker if necessary. If the issue persists, the brushes may be worn, consider replacing them. For other potential issues, it's best to consult an authorized service center.
  • R
    Richard CervantesAug 25, 2025
    Why does the brake on my Bosch GCM12SD Saw not stop the blade quickly?
    • M
      Monica MillerAug 25, 2025
      If the brake on your Bosch Saw doesn't stop the blade within 5 seconds, several factors could be at play. Here's what to check: * **Brushes:** Inspect, clean, or replace the brushes if they are not seated properly, sticking, or worn. * **Overheating:** Ensure you're using a sharp, recommended blade and avoid rapid on/off cycling to prevent motor overheating. Allow the saw to cool down. * **Blade Bolt:** Tighten the blade bolt. If these steps don't resolve the issue, consult an authorized service center.
  • R
    Robert HutchinsonAug 26, 2025
    Why does my Bosch GCM12SD Saw blade brake not stop in 5 seconds?
    • R
      rodriguezsaraAug 26, 2025
      If the brake on your Bosch Saw blade isn't stopping within 5 seconds, it could be due to several reasons: 1. The brushes might not be seated properly, are sticking, or are worn. You may need to inspect, clean, or replace the brushes. 2. The motor may be overheated because of using a dull or heavy blade, an unrecommended accessory, or rapid on/off cycling. Using a sharp blade could resolve this. 3. A loose blade bolt can also cause this issue. Ensure the blade bolt is tightened.
  • E
    Eric ClarkAug 27, 2025
    What to do if Bosch GCM12SD blade binds, jams, burns wood?
    • S
      Steven SchmidtAug 28, 2025
      If the Bosch Saw blade binds, jams, burns wood, or produces rough cuts, here’s what you can do: * Ensure proper operation, referring to the Saw Operations section. * Replace or sharpen the blade if it's dull. * Use the correct 12" diameter blade designed for the material you're cutting. * Replace the blade if it's bent.
  • A
    Amy AdkinsAug 29, 2025
    Why Bosch Saw motor does not start?
    • B
      Brooke HoodAug 29, 2025
      If the motor of your Bosch Saw doesn't start, take these steps: 1. Ensure the unit is properly plugged into a functioning outlet. Try a different outlet to rule out power issues. 2. Check the power source fuse. It should be a 15-Amp time delay fuse or circuit breaker. 3. Inspect the motor brushes for wear, consulting the Motor Brush Replacement section in the Maintenance and Lubrication guide. 4. If none of these steps work, further assistance from an authorized service may be needed.
  • R
    Rhonda FordAug 31, 2025
    How to fix Bosch Saw brake that does not stop blade?
    • V
      Victor ReynoldsAug 31, 2025
      If the brake on your Bosch Saw does not stop the blade within about 5 seconds, consider the following: 1. **Brushes:** Inspect, clean, or replace the brushes, referring to the Maintenance and Lubrication section. 2. **Motor Overheating:** Use a sharp, recommended blade and avoid using too heavy of a blade or rapid on/off cycling. Allow the saw to cool down. 3. **Blade Bolt:** Ensure the blade bolt is tightened securely. 4. **Other Issues:** Seek assistance from an authorized service.
  • K
    Kimberly ThompsonSep 2, 2025
    What to do if Bosch GCM12SD Saw head assembly does not slide freely?
    • B
      Bethany ReynoldsSep 2, 2025
      If the head assembly of your Bosch Saw doesn't slide freely when attempting a slide cut, the mechanism lock lever might be engaged. Disengage it by pushing down on the mechanism lock lever.
  • A
    Aaron LewisSep 4, 2025
    Why does Bosch Saw head assembly slide when chop cutting?
    • S
      Stacey MurphySep 4, 2025
      If the head assembly of your Bosch Saw slides forward and back when making a chop cut, it's likely that the mechanism lock lever is disengaged. To fix this, pull up on the mechanism lock lever tab to engage it.
  • M
    Michael CollinsSep 6, 2025
    How to fix Bosch GCM12SD bevel angle not securely held?
    • J
      Julia SheaSep 6, 2025
      If the bevel angle on your Bosch Saw is not securely held when the bevel lock lever is pushed, the bevel lock lever likely needs a tension adjustment. Increase the bevel lock lever force by adjusting the tension nut.

Summary

General Power Tool Safety Warnings

Work Area Safety

Guidelines for maintaining a safe and organized workspace.

Electrical Safety

Precautions regarding electrical connections and usage.

Personal Safety

Measures to protect the operator during tool use.

Power Tool Use and Care

Best practices for operating and maintaining power tools.

Service

Instructions for professional servicing of power tools.

Safety Instructions for Miter Saws

Additional Safety Rules

Double Insulated Tools

Electrical Requirements

Electric Brake

Details on the automatic electric brake function of the saw.

Symbols

Getting To Know Your Miter Saw

Cutting Capacities

Unpacking And Checking Contents

Tools Needed For Assembly

Checking Combination Square

Procedure to verify the accuracy of the combination square.

Assembly

Attaching Loose Parts

Steps for attaching components like the miter lock knob.

Storing the 6;4 mm Hex Key

Instructions on how to store the hex key on the saw.

Removing and Installing Blades

Assembling Dust Collection System

Attaching and Adjusting the Dust Bag

Instructions for connecting and positioning the dust collection bag.

Using and Cleaning the Dust Bag

Guidance on how to use and maintain the dust bag.

Attaching a Vacuum Hose

Connecting vacuum cleaner hoses to the dust port.

Repositioning or Removing the Rubber Deflector

Adjusting or detaching the rubber deflector for dust collection.

Adjustments

Using the Head Assembly Lock Pin

How to engage and disengage the lock pin for transport and calibration.

Using the Glide Movement Controller

Adjusting the controller for smooth saw glide action.

Using the Mechanism Lock Lever

Engaging and disengaging the lever to lock head assembly position.

Depth of Cut Adjustment

Setting the blade depth for full-depth and non-through cuts.

Miter Detent System - Adjustment Procedure

Calibrating the miter detent system for accurate angle stops.

Miter Scale Pointer Adjustment

Aligning the miter scale pointer with the 0° line for accurate readings.

Kerf Insert Adjustment

Adjusting kerf inserts to minimize workpiece tear-out.

0° Bevel Stop - Adjustment Procedure

Checking and adjusting the 0° bevel stop for square cuts.

Adjusting 0° Bevel Stop (Blade 90° to Table)

Detailed steps for adjusting the 0° bevel stop alignment.

45° Bevel Stop - Adjustment Procedure

Checking the 45° bevel stop setting for accurate angled cuts.

Adjusting 45° Bevel Stop (Saw Blade 45° to Table)

Detailed steps for adjusting the 45° bevel stop alignment.

Adjusting Bevel Lock Tension

Adjusting the tension of the bevel lock lever for secure positioning.

Adjusting Front Stabilizing Bolt

Adjusting the front stabilizing bolt for added support during slide cuts.

Transporting and Mounting

Lifting Saw from Rear

Proper technique for lifting and transporting the miter saw.

Mounting Applications

Methods for securely attaching the miter saw to a workbench or stand.

Preparing for Saw Operations

Body and Hand Position

Guidelines for safe and effective positioning during cuts.

Dry Run

Simulating cuts with the saw OFF to understand blade path.

Workpiece Support

Clamps

Using workpiece clamps to secure material on the table.

Sliding Fences

Adjusting and using sliding fences for support.

Long Workpiece Support

Techniques for supporting long workpieces to prevent tipping.

Additional Workpiece Support

Using blocks or extensions for extra workpiece support.

Making an Auxiliary Fence

Saw Operations

Switch Activation

How to safely activate and use the power switch and lock-off mechanism.

Using Miter Detent System

Engaging and using the detent system for preset miter angles.

Miter Detent Override

Locking out detent action for precise miter angle adjustments.

Chop Cuts

Cross-cut made when saw is in rearmost position.

Slide Cuts

Cut made with head assembly unlocked, moving away from fence.

Miter Cuts

Cross-cut made with blade perpendicular to horizontal table.

Pitch angle information

Using the miter scale for roof rafter pitch angle calculations.

Crown molding information

Using miter settings for cutting crown molding.

Miter cutting 6-3;4 base boards

Technique for cutting tall base boards vertically against the fence.

Setting Saw to Make a Miter Cut

Steps to configure the saw for making miter cuts.

Bevel Cuts

Cross-cut made with blade perpendicular to fence, table at 0° miter.

BEVEL SCALE INFORMATION

Understanding the bevel scale for setting tilt angles.

Bevel Range Selector Knob

Explanation of the knob controlling bevel angle ranges.

Using the Bevel Range Selector Knob

Instructions for operating the bevel range selector.

Bevel Range 2 = 0-45° Right

Operating the saw for 0-45 degree right bevel cuts.

Bevel Range 3 = Max. Bevel Angle to 47° Left or Right

Using the range for maximum bevel cuts up to 47 degrees.

Bevel Angle Stops and Detents

Understanding the saw's preset bevel stops and detents.

Setting Saw to Make a Bevel Cut

Steps to set up the saw for making a bevel cut.

Compound Cuts

Definition of cuts combining miter and bevel angles.

Cutting Grooves

Using depth stop adjustment to cut grooves in workpieces.

Cutting Base Molding

Instructions and table for cutting base molding at 90° corners.

Cutting Crown Molding

Overview of cutting crown molding with specific miter/bevel detents.

Crown Molding Angled to Table and Fence

Method for cutting crown molding flat on the table against the fence.

Crown Molding Lying Flat on Table

Setting bevel and miter angles for crown molding cut flat on the table.

Miter and Bevel Settings for Standard Crown Molding Cuts

Table of settings for crown molding with 38° and 45° spring angles.

Crown Molding Auxiliary Fence

Instructions for constructing and attaching an auxiliary fence.

Auxiliary Fence

Details on building and attaching an auxiliary fence for crown molding.

Special Cuts

Techniques for specialized cuts like bowed or round materials.

Maintenance and Lubrication

Motor Brushes

Inspection and replacement procedure for motor brushes.

Drive Belt

Information on inspecting and replacing the drive belt.

Cleaning; Inspecting Drive Belt

Steps for cleaning and inspecting the drive belt.

Care of Blades

Proper cleaning and maintenance of saw blades.

Tool Lubrication

Information on lubricating moving parts and bearings.

Troubleshooting

Troubleshooting Guide - Electrical

Diagnosing and resolving electrical issues with the saw.

General Troubleshooting

Operation and Adjustment Issues

Resolving problems with head assembly, angles, blade, and mechanisms.

Attachments;Accessories

Bosch GCM12SD Specifications

General IconGeneral
TypeSliding Compound Miter Saw
Blade Diameter12 inches
Amperage15 A
No Load RPM3, 800 RPM
Voltage120V
Corded/CordlessCorded
Vertical Capacity (Baseboard)6-1/2 inches
Saw Blade Bore1 inch
Max Cutting Capacity at 0°14 inches
Max Cutting Capacity at 45° Miter10 inches
Weight65 lbs
Horizontal Capacity (Crown Molding)14 inches
Vertical Capacity (Crown Molding)6.5 in
Max Cutting Depth at 90°4 in
Max Cutting Width at 90°14 in
Max Cutting Width at 45°9.5 in
Power Input1, 800 W

Related product manuals