31
Transporting and Mounting
Mounting Applications
Be certain the miter saw
is mounted or placed on a
level, firm work surface before using. A level
and firm work surface reduces the risk of the
miter saw becoming unstable.
Workbench Permanent Attachment
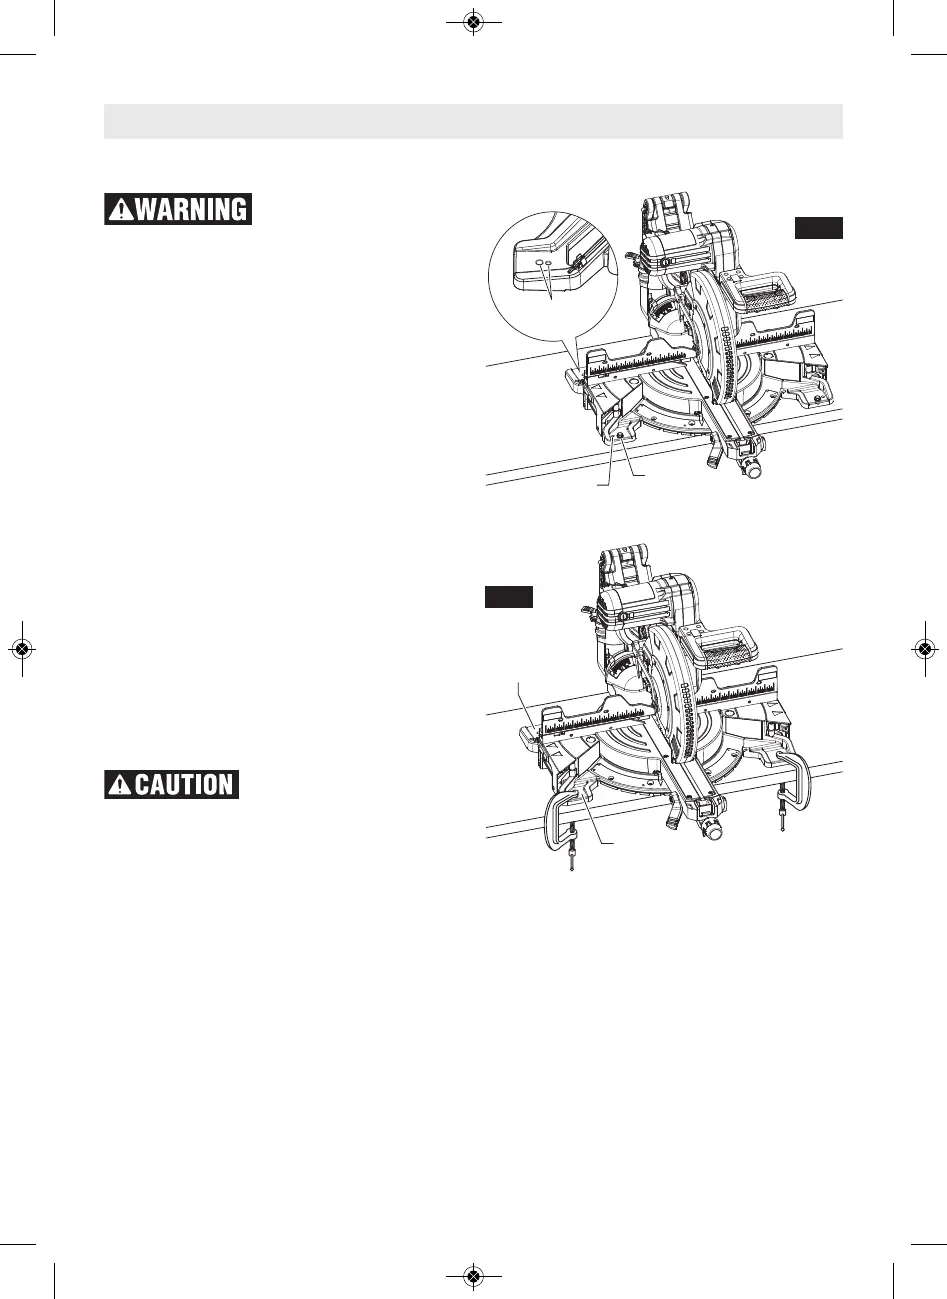
1. Each of the four mounting holes should be
bolted securely using 5/16" bolts, lock wash-
ers and hex nuts (not included), see Fig. 29.
2. Locate and mark where the saw is to be
mounted.
3. Drill four 5/16" diameter holes through work-
bench.
4. Place the miter saw on the workbench, align-
ing holes in base with holes drilled in work-
bench. Install bolts, lock washers and hex
nuts.
Alternate Attachment
The smaller mounting holes at each corner can
be used for nails or longer drywall screws.
The supporting surface where the saw is to be
mounted should be examined carefully after
mounting to ensure that no movement can
occur during use. If any tipping or walking is
noted, secure the workbench or stand before
operating the miter saw.
Be careful not to over-drive
nail or over-torque the bolt.
This could crack foot or damage base.
Temporary Mounting
Using Clamps
• If necessary, clamp the miter saw to a work-
bench or table top.
• Place two or more “C” clamps on the clamp-
ing areas and secure (see Fig. 30). There are
clamping areas at all four corners of the saw.
• Be careful not to place clamps over the base
extension clamping levers (see Fig. 30).
• Mounting with clamps may prevent access to
some wide miter angles.