EasyManua.ls Logo

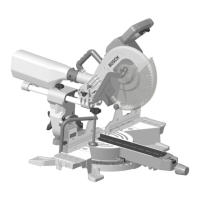
Bosch PROFACTOR GCM18V-10SDN14 User Manual

Bosch PROFACTOR GCM18V-10SDN14
168 pages
To Next Page IconTo Next Page
Page #1 background imageLoading...
Page #1 background image
For English Version
See page 2
Version française
Voir page 56
Versión en español
Ver la página 111
Operating / Safety Instructions
Consignes d’utilisation / de sécurité
Instrucciones de funcionamiento y seguridad
Call Toll Free for Consumer Information & Service Locations
Pour obtenir des informations et les adresses de nos centres de service après-vente, appelez ce numéro gratuit
Llame gratis para obtener información para el consumidor y ubicaciones de servicio
1-877-BOSCH99 (1-877-267-2499) www.boschtools.com
IMPORTANT
Read Before Using
IMPORTANT
Lire avant usage
IMPORTANTE
Leer antes de usar
GCM18V-10SD

Table of Contents

Questions and Answers:

Bosch PROFACTOR GCM18V-10SDN14 Specifications

General IconGeneral
Voltage18V
Blade Diameter10 in
Weight33.4 lb
Corded / CordlessCordless
CategorySaw
Max Cutting Depth at 45°50 mm
No-load Speed4500 rpm

Summary

Safety Symbols

General Power Tool Safety Warnings

Work area safety

Keep the work area clean, well lit, and free of hazards.

Electrical safety

Guidelines for safe use of electrical power and connections.

Personal safety

Importance of alertness, PPE, and proper tool handling.

Power tool use and care

Proper operation, maintenance, and storage of power tools.

Battery tool use and care

Guidelines for charging and using battery packs safely.

Service

Recommendations for qualified repair and maintenance.

Safety Instructions for Miter Saws

Additional Safety Rules

Symbols

Getting to Know Your Miter Saw

Main Controls and Handles

Key components for operating and adjusting the saw.

Workpiece Support Features

Parts that support and stabilize the workpiece.

Blade and Guarding System

Components involved in cutting and dust management.

Adjustment Mechanisms

Parts for setting precise cut angles.

Transport and Battery Features

Features related to moving and powering the saw.

Specifications

Intended Use

Cutting Masonry/Metal

Specific warnings and limitations for cutting these materials.

Cutting Capacities

Unpacking and Checking Contents

Unpacking the Miter Saw

Procedure for safely removing the tool from packaging.

Checking Contents in Package

Verifying all included loose parts are present.

Tools Needed For Assembly

Verifying Parts

Ensures the correct tools are available for assembly.

Checking Combination Square

Verifies the accuracy of a combination square.

Assembly

Storing the Torx Wrench

How to properly store the Torx wrench on the saw.

Attaching the Miter Lock Knob

Steps to install the knob for locking the miter table.

Attaching the Base Extensions

How to attach the extensions for increased workpiece support.

Inserting and Releasing Battery Pack

Procedure for installing and removing the battery.

Removing and Installing Blades

Step-by-step guide for safely changing the saw blade.

Installing 10" (254mm) Blade

Specific instructions and safety warnings for blade installation.

Assembling Dust Collection System

How to connect the dust collection components.

Attaching the Dust Bag

Procedure for connecting the dust bag.

Attaching a Vacuum Cleaner/Dust Extractor

Instructions for connecting a vacuum hose for dust removal.

Adjustments

Using the Head Assembly Lock Pin

How to engage and disengage the pin for securing the head assembly.

Miter Detent System – Adjustment Procedure

Calibrating the miter detent system for accurate cuts.

Miter Scale Pointer Adjustment

Aligning the miter scale pointer for precise angle indication.

0° Bevel Stop

Setting and checking the accurate 0° bevel position.

Adjusting 0° Bevel Stop (Blade 90° to Table)

45° Bevel Stop

Adjusting 45° Bevel Stop (Saw Blade 45° to Table)

Transporting and Mounting

Lifting the Saw

Proper techniques for lifting the saw to prevent injury.

Preparing To Lift The Saw

Steps to take before lifting the saw for transport.

Mounting Applications

Workbench Permanent Attachment

Instructions for bolting the saw to a work surface.

Temporary Mounting Using Clamps

Using clamps to temporarily secure the saw.

Preparing for Saw Operations

Switch Activation

How to safely activate the power switch to prevent accidental starts.

Built-in LED Light

Information about the integrated LED light for visibility.

Body and Hand Position

Crucial guidance on safe posture and hand placement during cuts.

No Hands Zone

Defines the hazardous area around the blade to avoid.

Use sliding fence outside No Hands Zone

How to use sliding fences to maintain safe hand positioning.

Dry Run

Performing a test cycle to understand blade path and safety zones.

Lower Guard

How the lower guard functions and what to do if it binds.

Workpiece Support

Methods for securely supporting workpieces during cutting.

Clamps

Using clamps to secure workpieces safely.

Sliding Fences

Long Workpiece Support

Additional Workpiece Support

Making an Auxiliary Fence

Saw Operations

Brake Operation

How the electric brake functions and its limitations.

Using the Miter Lock Knob

Securing the miter angle using the lock knob.

Using Miter Detent System

Utilizing the detent system for precise miter angles.

Miter Detent Override

Locking out detents for fine angle adjustments.

Chop Cuts

Making a Chop Cut

Step-by-step guide for executing a chop cut.

Slide Cuts

Making a Slide Cut

Step-by-step guide for executing a slide cut.

Miter Cuts

Reading the Miter Scale

Understanding the miter scale for setting angles.

Setting Saw to Make a Miter Cut

Bevel Cuts

Setting Saw to Make a Bevel Cut

Preparing the saw for bevel cuts.

Bevel scale information

Interpreting the bevel scale and stop indicators.

Compound Cuts

Making a Compound Cut

Step-by-step guide for executing a compound cut.

Cutting Base Molding

Cutting Crown Molding

Crown Molding Angled to Table and Fence

Crown Molding Lying Flat on Table

Miter and Bevel Settings for Standard Crown Molding Cuts (With Molding Flat on Table)

Crown Molding Auxiliary Fence

Making an Auxiliary Fence

Step-by-step guide to build an auxiliary fence.

First-Time Use of the Auxiliary Fence

Special Cuts

Cutting Bowed Material

How to cut warped workpieces safely and effectively.

Cutting Round or Irregularly Shaped Material

Maintenance and Lubrication

Service

Guidelines for professional repair and maintenance.

Batteries

Information on battery life and replacement.

Care of Blades

How to maintain and clean saw blades.

Tool Lubrication

Recommended lubrication points and types.

Bearings

Information on bearing lubrication (none required).

Cleaning

General cleaning procedures for the tool.

Troubleshooting Guide - Electrical

Troubleshooting Guide - General

Attachments and Accessories

Related product manuals