en
|
10
|
Installation and Operating Instructions
|
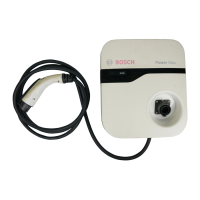
Power Max 2 Charging Station
579367 | REV A | 25.07.2016
7 Additional Information
7.1 Network Setting (EL-51866-4025P only)
For models equipped with WLAN functionality, it is critical
to congure WLAN parameters in accordance to local
settings. Consult network administrator to get WLAN SSID
and password. Use the supplied software tool to compose
the WLAN conguration le and save to a USB ash drive.
Insert the USB ash drive to the USB port during charger
installation. Refer to the instructions of the supplied soft-
ware tool for more details.
7.2 Log File Download and Firmware
Upgrade by USB
When a USB ash drive is inserted to the USB port of the
charger, system log le is downloaded automatically to the
ash drive. Submit system log le to technical support
when requested.
Latest update of system rmware is made available on a
designated website. Download and store the rmware
package on the USB ash drive and follow the instructions
to conduct rmware upgrade.
7.3 Auto Restart
When a charging session is interrupted due to a temporary
error condition, the Power Max 2 Charging Station will
automatically retry and restart charging when the cause of
the temporary error condition returns to normal. Status
indicator remains ashing in red until the error condition is
resolved.
Temporary error conditions include: Over Current, Over
Voltage, Under Voltage, Over Temperature.
For Over Current condition, there are two automatic retries
allowed for each charging session.
When a charging session is interrupted due to a CCID trip,
the Power Max 2 Charging Station will retry after 15 min-
utes, for up to 4 times.
7.4 Power Outage Recovery
When power resumes after an outage, the Power Max 2
Charging Station restarts automatically with delay ranging
from 5 to 100 seconds. The delay is designed to avoid
impacting the utility grid when multiple chargers in the
same area attempt to resume charging simultaneously.
There is no need to authenticate the user again.
7.5 Remote Control (EL-51866-4025P only)
For models equipped with WLAN functionality, charg-
ing capability of a Power Max 2 Charging Station can
be configured remotely by the back-end management
system.
8 Troubleshooting
Situation Action
Power
indicator
does not
illuminate
1. Make sure the AC power input is
connected correctly and the AC power
is within operating range of the unit
2. Power cycle the Power Max 2 Charg-
ing Station
3. If the problem persists, contact
Customer Support
Charging
indicator
does not
illuminate
1. Make sure the charging plug is
inserted rmly in the EV charging inlet
2. If the Power Max 2 Charging Station is
connected to a back-end management
system, check network connectivity
and make sure the Power Max 2
Charging Station is not under a remote
control scheme
3. If the Charging indicator does not
illuminate after 10 seconds, power
cycle the Power Max 2 Charging
Station and plug in the charging plug
4. If the situation persists, contact
Customer Support
Fault
indicator
ashes
red while
charging
1. There is a temporary error
2. Wait until the temporary error is
resolved and the Power Max 2
Charging Station returns to normal
condition. It usually takes less than
10 seconds.
3. If the Power Max 2 Charging Station is
connected to a back-end management
system, check network connectivity
4. If the status indicator doesn’t return to
green, power cycle the Power Max 2
Charging Station
5. If the situation persists, contact
Customer Support
Fault
indicator
is solid
red
1. There is a critical error (CCID trip or
Relay failure)
2. Unplug the charging connector
3. Power cycle the Power Max 2 Charg-
ing Station
4. If the situation persists, contact
Customer support
 Loading...
