67
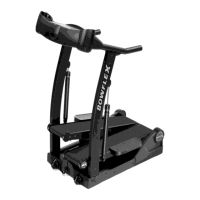
15. Using a 9/16” or 14mm socket and wrench, remove the nut from the
Left Crank Assembly.
16.AdjusttheCrankPulleruntiltheendoftheBoltisushwiththeNut
(as shown).
17. Carefully thread the Crank Puller into the Left Crank Arm. Be sure the
Crank Puller has at least three rounds of threads inserted.
18. Using a 16mm wrench, turn the inner portion (the Bolt) of the Crank
Puller clockwise. The Left Crank Arm will slide off as it is tightened.
Note: Be aware that the Left Crank Arm will be loose and will need to be
supported.
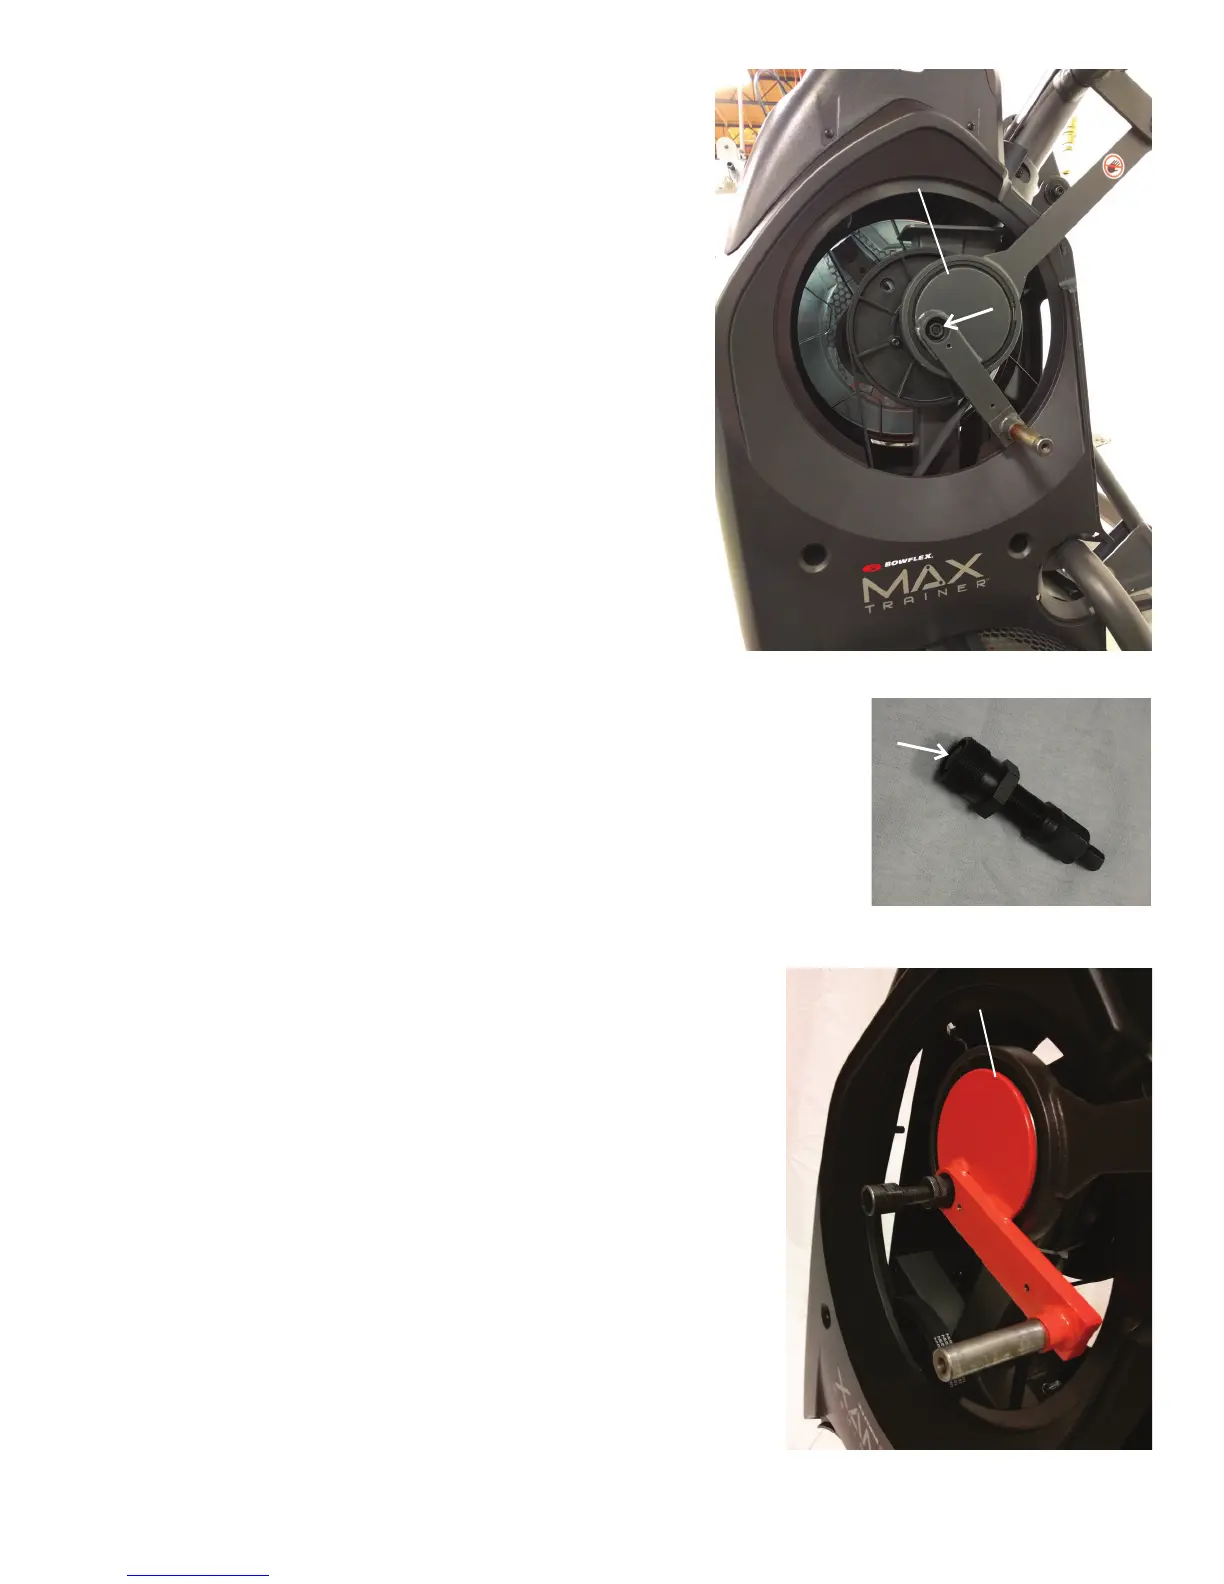
19. Remove the Crank Puller from the Left Crank Arm.
Left Crank Assembly
Left Crank Assembly