A-14
Assembling Your Bowflex
®
Ultimate
™
Leg Assembly
Figure R
62
54
57
63
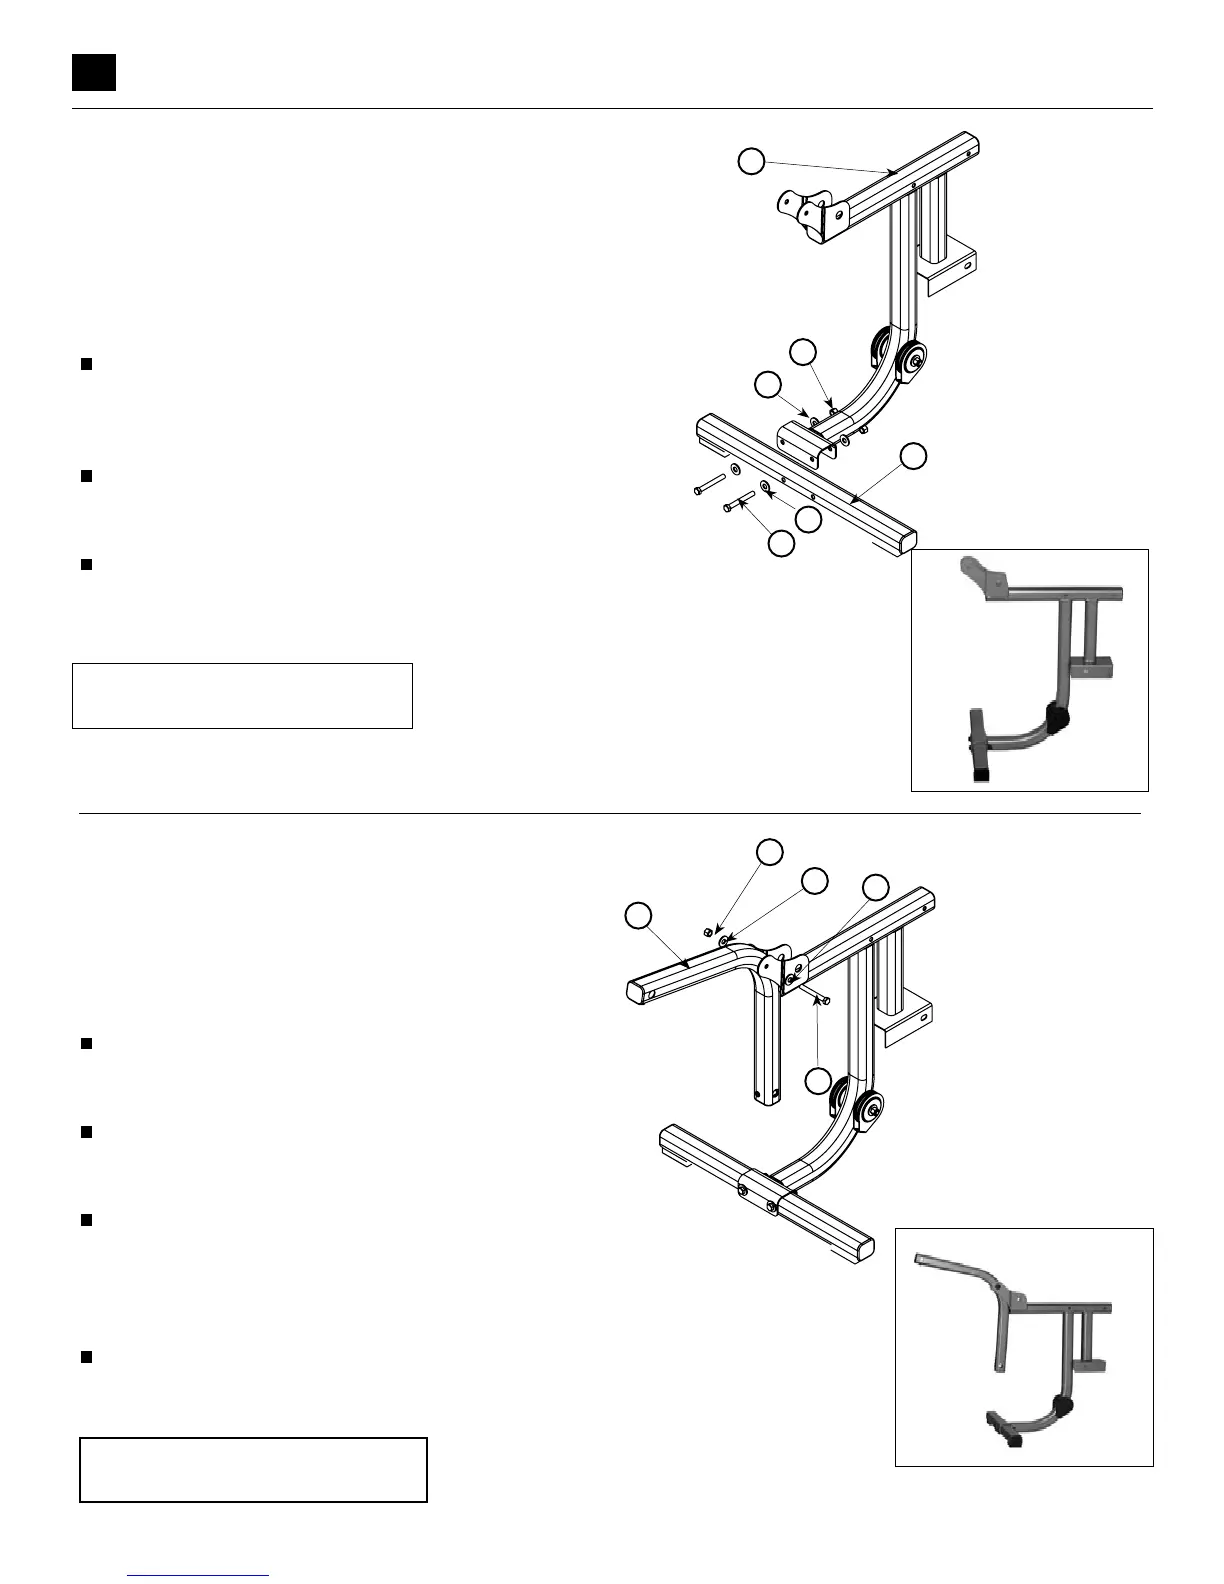
Step 1: LEG EXTENSION FOOT TUBE
INSTALLATION
Locate the following parts:
• Leg extension main frame (Item #62)
• Leg extension foot tube (Item #63)
• Two (2) 3/8”X3” bolt (Item #51)
• Two (2) 3/8” nylon lock nuts (Item #57)
• Four (4) 3/8” washers (Item #54)
Insert the leg extension foot tube (Item #63) into the
leg extension main frame (Item #62) saddle bracket,
aligning the holes in the bracket with the holes in the
foot tube, as shown in Figure R.
Insert two 3/8”X3” bolts (Item #51) with 3/8” washers
(Item #54) through the holes in both
tubes as shown in Figure R.
Install 3/8” washers (Item #54) and then 3/8”
nylon lock nuts (Item #57) onto the bolts and
securely tighten.
54
51
Unit appears like
this following this
assembly step
Components for this step are
in the Leg Extension Box
Step 2: LEG ASSEMBLY EXTENSION TUBE
Locate the following parts
• Leg extension main frame (Item #62)
• Leg extension pivot tube (Item #64)
• 3/8”X3” bolt (Item #51)
• 3/8” nylon lock nut (Item #57)
• Two (2) 3/8” washers (Item #54)
Untwist the twist-tie that is holding the
bushings in place in the leg extension pivot
tube (Item #64).
Place the leg extension tube (Item #64) as
shown in Figure S. The tube is symmetrical
so orientation does not matter.
Insert the 3/8”X3” bolt (Item #51) with a
3/8” washer (Item #54) on it through the
leg extension main frame (Item #62) and
through the leg extension tube (Item #64)
as shown in Figure S.
Install a 3/8” washer (Item #54) onto the bolt
and securely tighten the 3/8” nylon lock nut
(Item #57).
Figure S
54
51
57
64
54
Unit appears like
this following this
assembly step
Components for this step are
in the Leg Extension Box