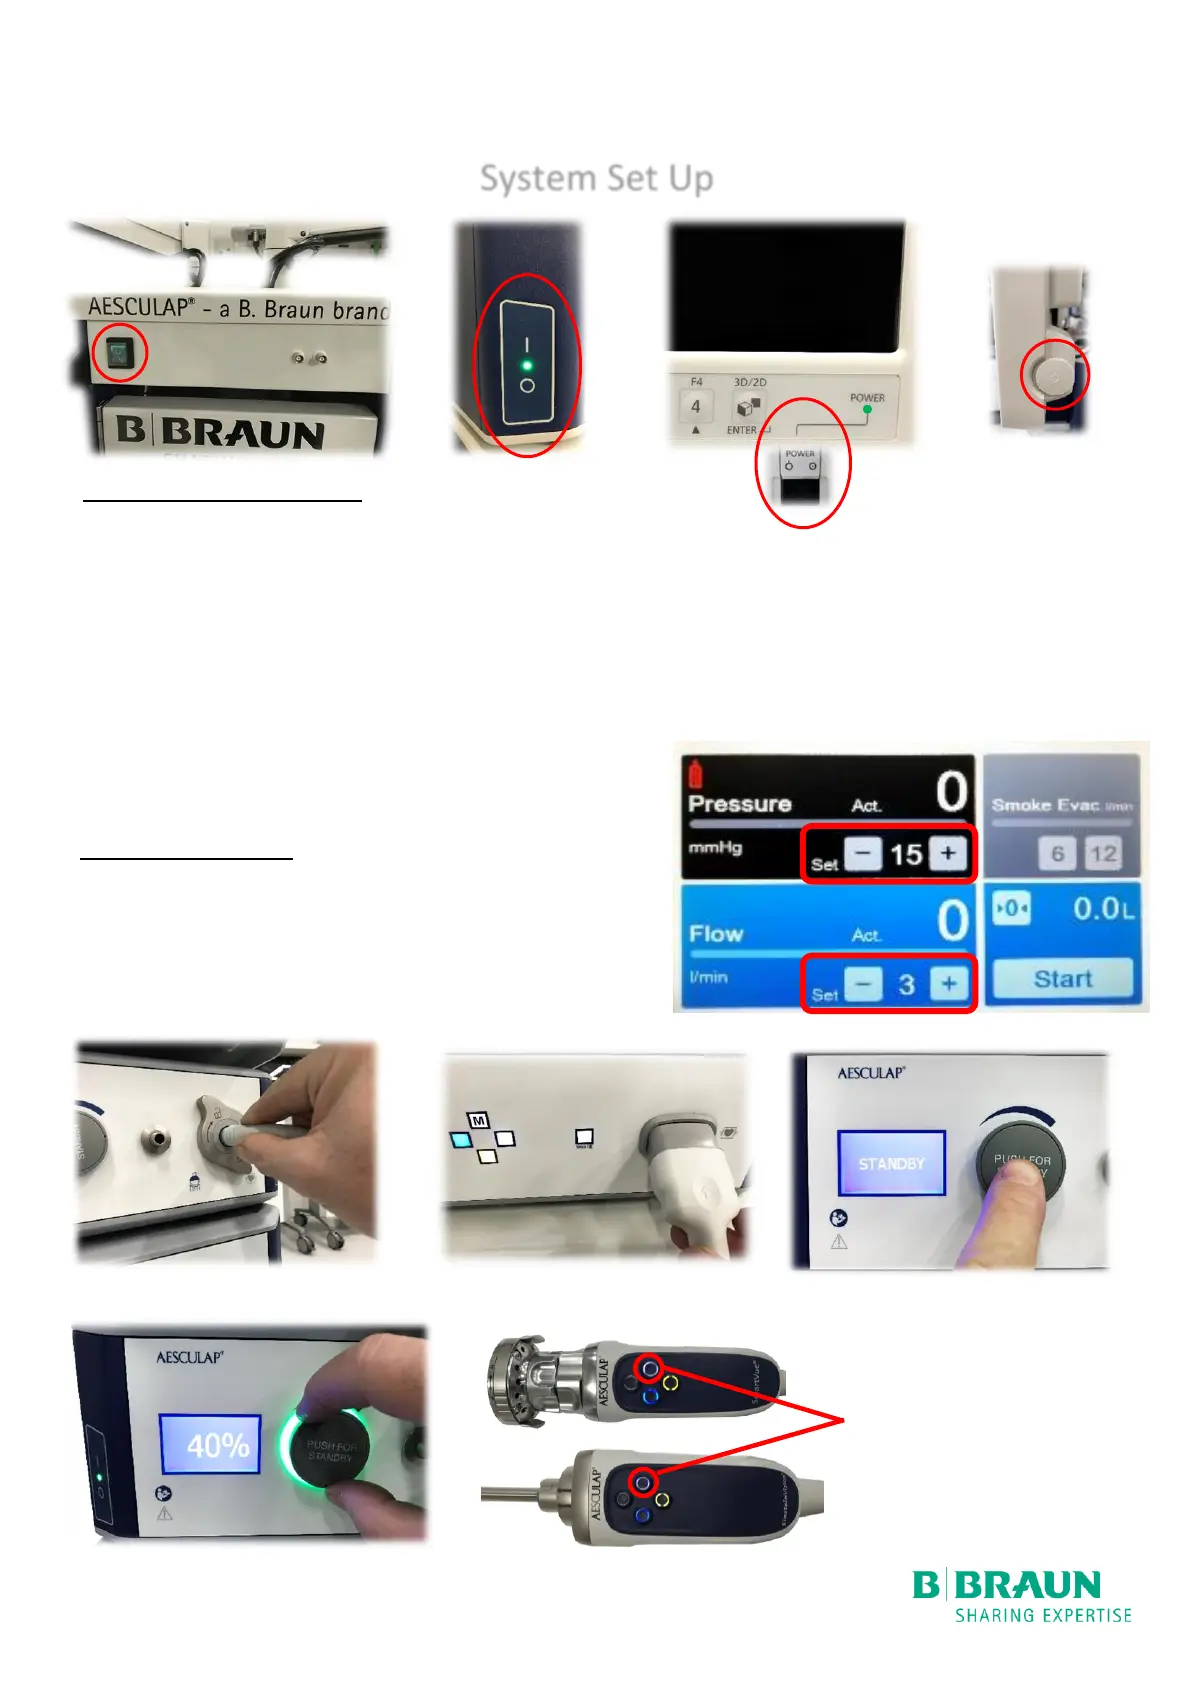
Pre Surgery Preparation
• Switch on central power supply, at back of the stack (1)
• Ensure individual component switches are on (bottom left corner of each unit) :
- Insufflator, Light Source, CCU, Digital Documentation (2)
(On status is indicated by green light and user interfaces will be illuminated, or display menu options)
• Ensure 32” 3D monitor is switched on (Right side of monitor, underneath) (3)
• Ensure 21” touch screen monitor is on
(Circular push/rotate switch on right side of 21” monitor. At the bottom of the monitor) (4)
• Plug in integrated 3D light lead (5) [if using 3D scope]
• Plug in 3D camera head (6) [if using 3D scope]
• Set Insufflator to desired pressure (7) and flow rate (8)
•
Start of procedure
• Apply sterile sleeve to 3D Endoscope
• Plug in light lead (5) [if using standard 2D scope]
• Plug in 2D camera (6) [if using standard 2D scope]
• Attach standard endoscope [if using standard 2D scope]
• Press light source control to activate (9)
* Attach scope with light lead, if
using standard camera head, prior
to White balance