- 3 -
bladder, then test the introduction into the
bladder.
n Perform a slight incision on the superficial
skin at the origin point of the local anaesthe-
sia if applicable.
n Connect the catheter on the urine drainage bag.
n Keep the protective cannula sheath in place
during the catheter preparation stage.
n Gently pull out the catheter inside the cannula
until the last mark.
n Remove the protective sheath.
n Puncture on the median line of the body above
the symphysis (2-3 cm) vertically to the abdo-
minal wall.
n After reaching the bladder urine appears in the
catheter tube.
n Push the catheter inside the bladder until the
double mark, then do not pull it out anymore.
n Withdraw the cannula out of the puncture track
until the tip of the cannula bevel.
n Split the cannula by bending the two wings.
n
Pull apart and remove the halves of the cannula.
n Fix the catheter on the skin to prevent its removal
during the application time.
n Fix the balloon catheter on the skin to prevent
the pulling strength on it.
Exchange of catheter
n Fill the bladder at approx. 50%.
n
Insert the guide-wire into the catheter – flexible
tip first.
n Remove the catheter.
n
Insert a new catheter by sliding on the guide wire
Exchange of catheter with dilator
n Procedure as above, but after removal of the
old catheter dilate the puncture track by
means of a dilator/sheath-unit.
n Remove dilator out of the sheath, insert the
catheter into the sheath.
n Withdraw sheath on catheter out of the
puncture track and remove it by splitting.
n Fix the catheter on the skin.
When using a balloon catheter
n Pull out the catheter with balloon until the
tip does not appear anymore in the cannula
bevel.
n Fill up the balloon with the specified volume
by using a sterile mixture of glycerine and
water in proportion 1 to 9. This prevents eva-
cuation of the balloon.
n Withdraw catheter up to the point where the
balloon makes contact with the bladder wall.
n If needed, in case of high pulling strengths, fix
the balloon catheter on the skin.
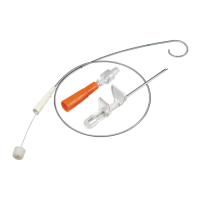
When using the Cystofix® Minipaed
n Remove the puncture needle and its splittable
cannula together from the protective sheath.
n The punction is done with the punction
needle together with a splittable cannula.
n Check that the urine comes out of the end
of the punction needle by opening the pro-
tective cap.
n Then remove the punction needle from the
splittable cannula in place.
n Push totally the soft mandril into the catheter
tube and lock the mandril-cap on the male
luer-lock connector.
n Now the catheter is straight and ready to be
inserted.
n Insert the catheter and its soft mandril toge-
ther into the splittable cannula in place until
the second red mark.
n Unscrew the soft mandril cap from the cathe-
ter connector and remove it from the cathe-
ter in such a way that the pigtail is reshaped
inside the bladder.
n Withdraw the splittable cannula out of the
puncture track and move it along the cathe-
ter until the cannula tip appears.
n Split the cannula in two parts then pull them
apart and remove the halves of the cannula.
n Fix the catheter on the skin appropriately to
prevent its removal during use.
Keep away from sunlight
Keep dry
 Loading...