11
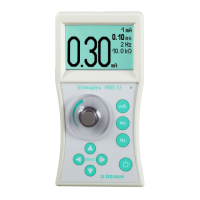
• Connect Stimuplex® Pen to electrode cable. Increase target stimulation current. The warning
“Patient current lower than your setting” appears in the display. Then close the circuit with the
test resistor. The warnings (display, LED, sound) must disappear. Enter results in equipment log-
book.
3.5 Checking stimulation signal
To prevent disturbances, perform all tests only when the 9-volt battery is installed.
Connect the electrode cable using the 10 kΩ +/- 1% test resistor – connect the oscillograph with
GND clip on the red clamp parallel to test resistor (see page 15 for tolerances).
Set stimulus duration = 0.10 ms – target stimulation current = 1.00 mA.
• Pulse form rectangular, negative.
• Measure stimulus duration – Enter results in equipment logbook.
Set stimulation frequency = 2 Hz – target stimulation current = 1.00 mA.
• Measure stimulation frequency – Enter results in equipment logbook.
Set stimulus duration = 0.10 ms – target stimulation current = 0.30 mA.
• Measure actual stimulation current – Enter results in equipment logbook.
Set stimulus duration = 0.10 ms – target stimulation current = 0.50 mA.
• Measure actual stimulation current – Enter results in equipment logbook.
Set stimulus duration = 0.10 ms – target stimulation current = 1.00 mA.
• Measure actual stimulation current – Enter results in equipment logbook.
Stimulus duration = 0.10 ms – current range = 5.00 mA. Using the control knob, set target stimu-
lation current = 5.00 mA.
• Measure actual stimulation current – Enter results in equipment logbook.
• Check impedance display with 10 kΩ test resistor. Enter results in equipment logbook.
If faults are detected, return the device – including accessories – to the manufacturer
or distributor for repair.
 Loading...


